Snowflake Data Cloud
Connecting Hawkeye to your Snowflake Data Cloud allows us to collect telemetry data related to your Snowflake environment, such as query history, session activity, user management, and data consumption metrics.
The data we collect depends on the permissions assigned to the Snowflake role used in this connection.
We follow Snowflake’s best practices by utilizing an integration with secure access through Snowflake’s Role-Based Access Control (RBAC).
Step 1: Create a Snowflake Role and User
Fig.1 - A walkthrough of how to create a Snowflake role and user
You need to create a role and user in Snowflake that will allow Hawkeye to access necessary telemetry data.
-
Sign in to Snowflake: Log in to your Snowflake account as a user with administrative privileges.
-
Create a new role: Navigate to the Admin section, select Roles, and click on Create Role.
-
Define role permissions: Assign the necessary privileges to the role.
-
Create a user for Hawkeye: In the Admin section, select Users > Create User. Provide a username, password, and assign the newly created role to this user.
Step 2: Add Snowflake Connection to Hawkeye
Now that you’ve set up the Snowflake role and user, configure the connection in Hawkeye.
-
Navigate to the connections tab: On the Hawkeye dashboard, go to the Connections section and select New Connection.

Fig.2 - Add Snowflake connection to Hawkeye
-
Select Snowflake: From the list of available connections, choose Snowflake Data Cloud.
-
Enter credentials: Fill in the necessary information:
-
Connection Name: Provide a name for this Snowflake connection.
-
Description: A brief explanation about the connection content. This field is optional.
-
Select Telemetry Sources: Choose which telemetry categories (e.g., logs) projects can use from this connection. Changes apply after saving. This field is required.
-
User Name: The username used to access your Snowflake account. This field is required.
-
Password: The password associated with the username above. This field is required.
-
Account: The unique name of your Snowflake account (account identifier). This field is required.
-
Warehouse: The processing warehouse in Snowflake that executes your queries. This field is required.
-
Database: The specific database in Snowflake you want to connect to. This field is required.
-
Schema: The schema within the selected database where your tables and data are stored. This field is required.
-
RSA Private Key: Paste your RSA private key here if you are using key-pair authentication instead of a password. This field is optional (only required if using key authentication).
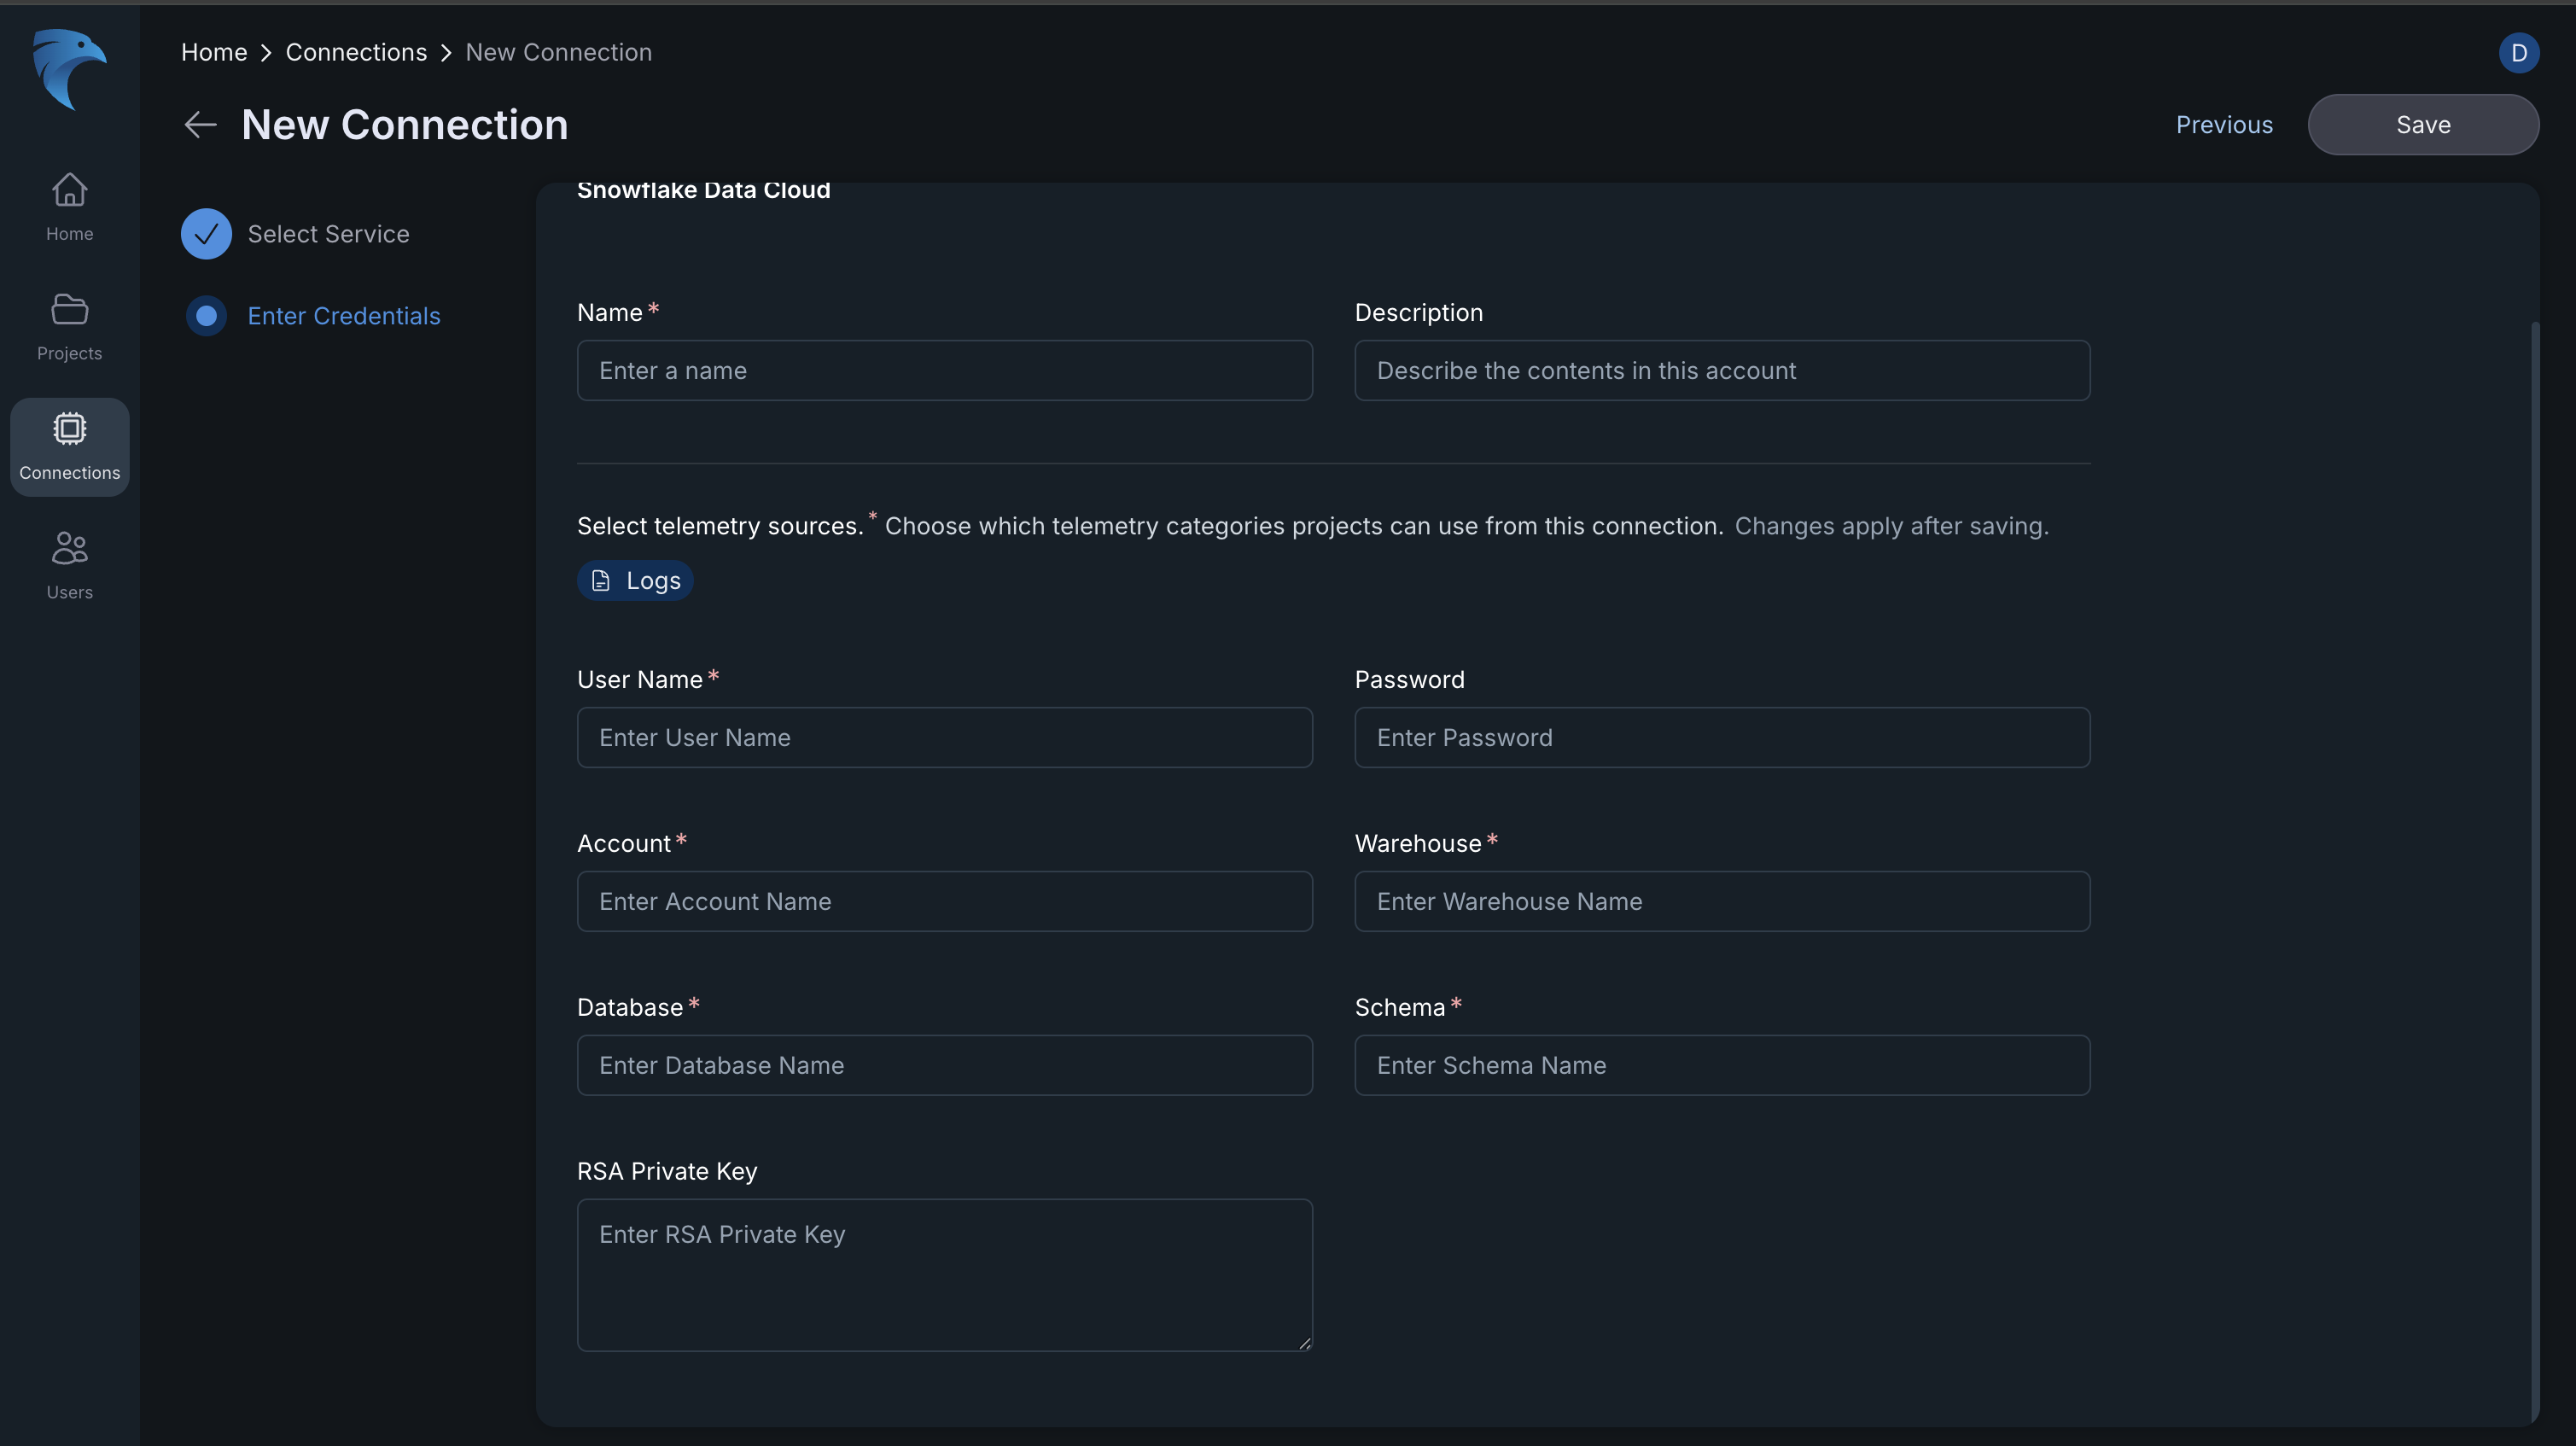
Fig.3 - Add Snowflake connection to Hawkeye
-
-
Verify connection: Click Save and verify that the connection is successful. If so, you’ll see the connection appear as active in the Hawkeye dashboard.