Sysdig
Connecting Hawkeye to Sysdig enables the collection of telemetry data, including security events, monitoring metrics, and system logs from your Sysdig environment.
The integration requires an API Key and a Sysdig API URL. The following steps will guide you through setting up this connection.
Step 1: Retrieve your Sysdig API key and URL
To establish a connection, you need your API Key and the appropriate Sysdig API URL.
-
Sign in to Sysdig: Log in to your Sysdig account with the appropriate permissions.
-
Retrieve your API Key: Navigate to Settings in the Sysdig dashboard.
Under API Access, locate or generate your API Key.
-
Obtain the Sysdig API URL: Identify the API URL specific to your Sysdig region or deployment. The URL typically follows the format:
- For SaaS:
https://<region>.app.sysdig.com - For On-Prem: Your organization’s configured Sysdig API URL.
- For SaaS:
Step 2: Add Sysdig Connection to Hawkeye
Once you have your API Key and URL, configure the connection in the Hawkeye dashboard.
-
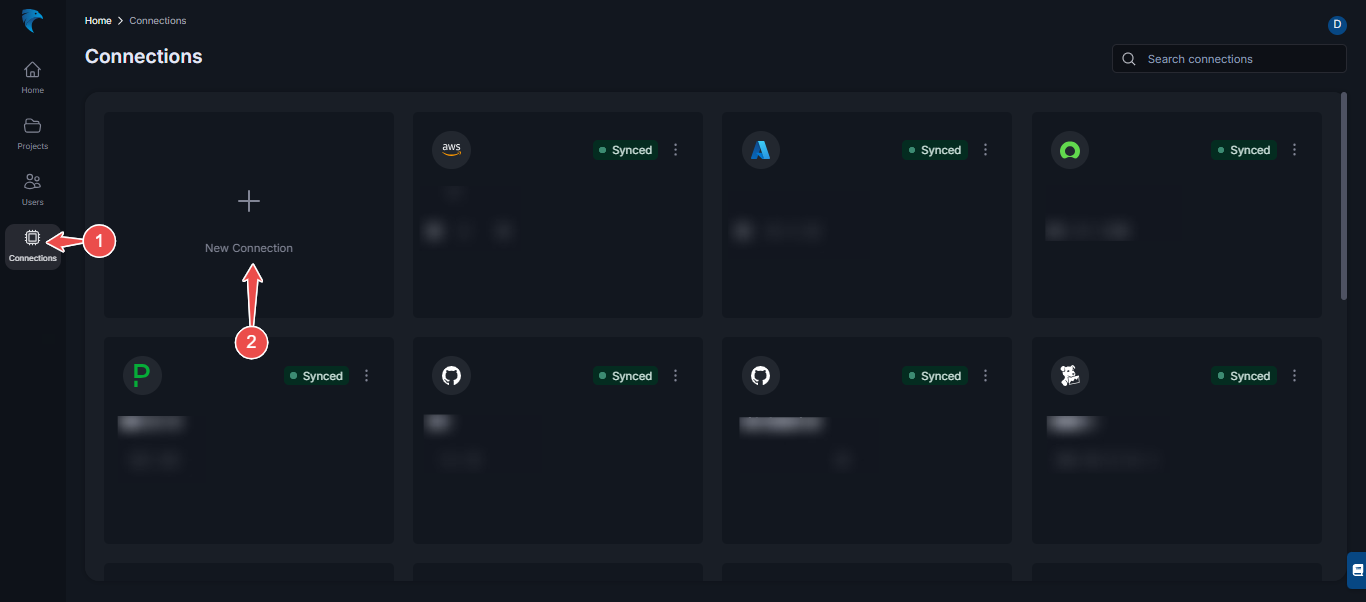
Navigate to the connections tab: On the Hawkeye dashboard, go to the Connections section and select New Connection.

Fig.1 - Create new Sysdig connection dashboard
-
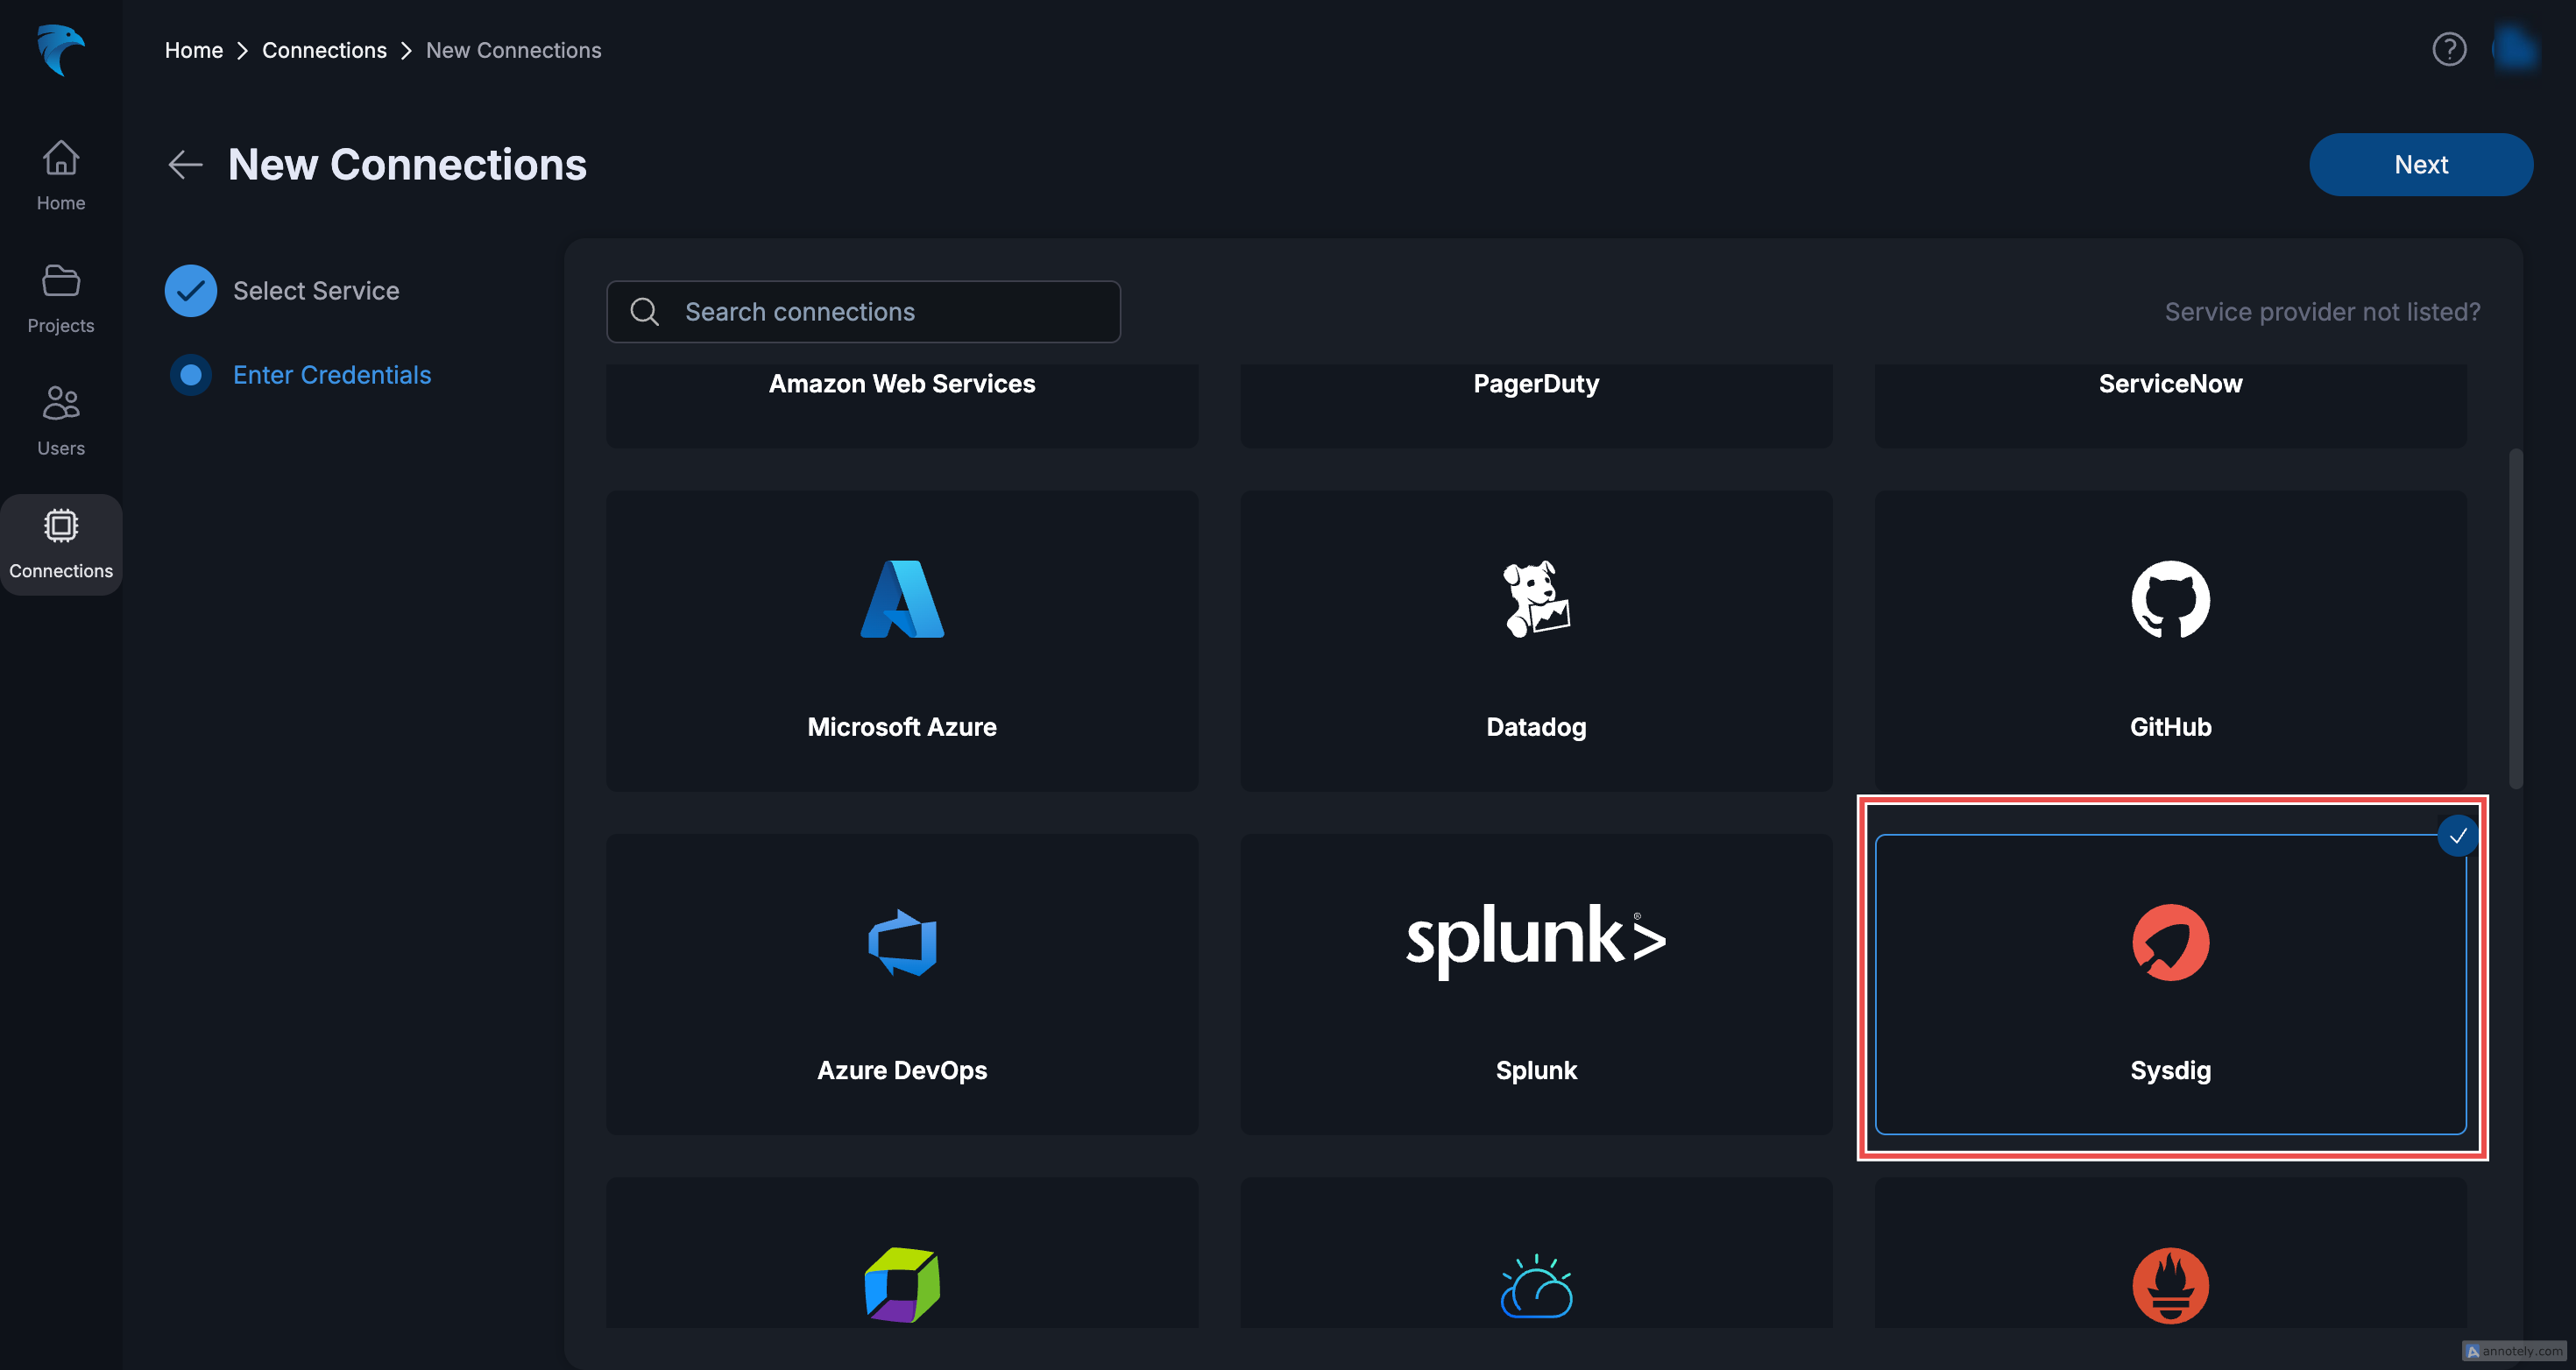
Select Sysdig: From the list of available connections, choose Sysdig.

Fig.2 - Select Sysdig
-
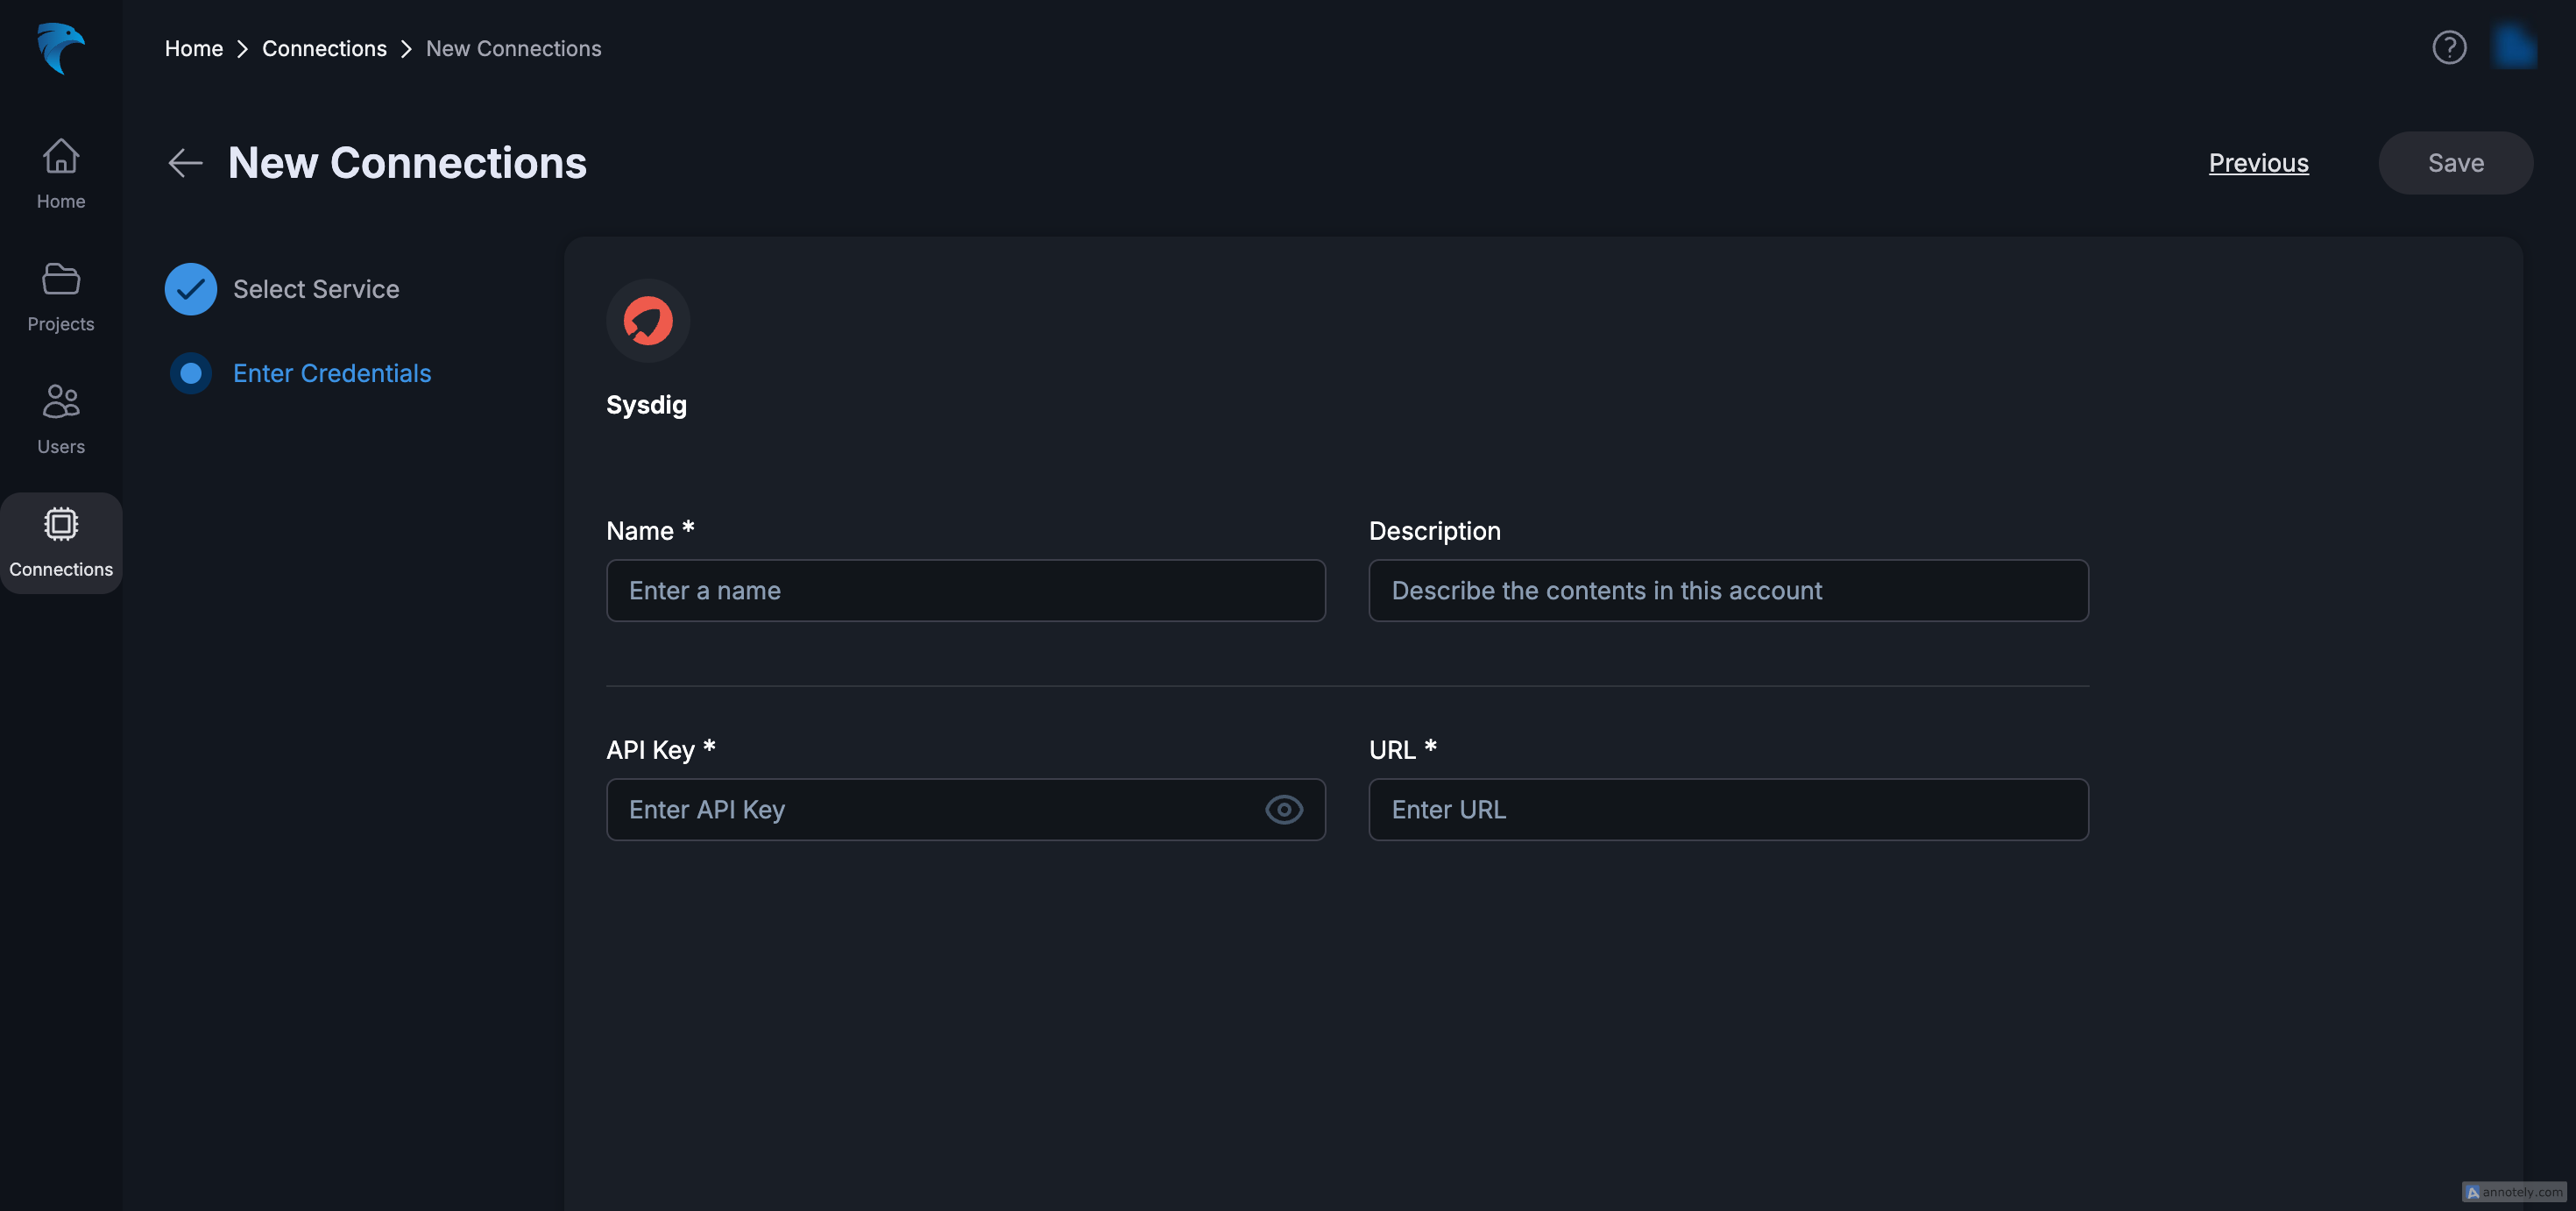
Enter connection details:
-
Connection Name: Provide a name for this Sysdig connection.
-
Description: Optionally, add a description to identify this connection.
-
API Key: Paste the API Key retrieved from Sysdig.
-
Sysdig API URL: Enter the Sysdig API URL associated with your environment.

Fig.3 - Enter connection details
-
-
Verify connection: Click Save and verify that the connection is successful. If so, you’ll see the connection appear as active in the Hawkeye dashboard.