Dynatrace
Connecting Hawkeye to your Dynatrace account allows us to collect telemetry data, such as service performance, environment metrics, and application health.
This data enables real-time monitoring and insights into the performance of your applications running on Dynatrace.
Dynatrace Authentication Tokens
Hawkeye requires two types of authentication credentials to integrate with Dynatrace:
- Classic API Token
- OAuth Client (Client ID and Client Secret)
Each token serves a different purpose and must be configured correctly to enable secure communication between Hawkeye and Dynatrace.
1. Create a Classic API Token
To allow Hawkeye to access Dynatrace APIs, you must create a Classic API Token with the required scopes.
Step 1: Navigate to Access Tokens
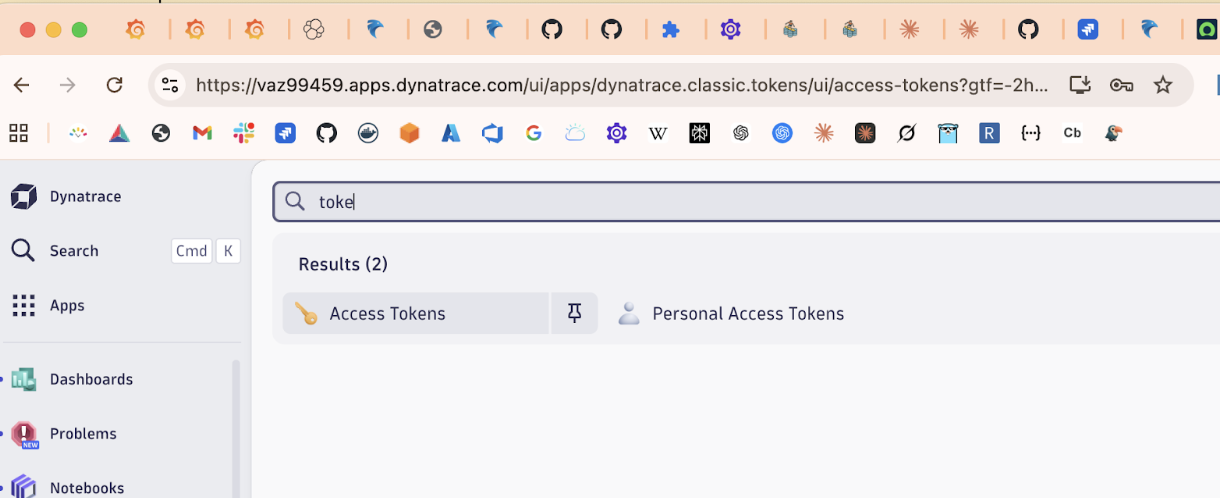
Fig.1 - Navigate to Access Tokens
- Log in to your Dynatrace environment.
- In the top search bar, type Access Tokens.
- Select Access Tokens from the results.
- Click Create new token.
Step 2: Configure Token Scopes
Enable the following scopes:
problems.readproblems.writesettings.readmetrics.readentities.read
Provide a descriptive name for the token, for example: Hawkeye.
After creating the token, copy and store it securely. You will not be able to view it again.
Step 3: Create Token Using API (Optional)
You can also create the Classic API Token using the Dynatrace API:
curl -X POST "https://<your-environment-id>.live.dynatrace.com/api/v2/apiTokens" \ -H "accept: application/json; charset=utf-8" \ -H "Content-Type: application/json; charset=utf-8" \ -H "Authorization: Api-Token <YOUR_EXISTING_API_TOKEN>" \ -d '{ "name": "Hawkeye", "scopes": [ "entities.read", "metrics.read", "problems.read", "problems.write", "settings.read" ] }'Replace:
<your-environment-id>with your Dynatrace environment ID<YOUR_EXISTING_API_TOKEN>with a valid token that has permission to create API tokens
Store the generated token securely and use it when configuring Hawkeye.
2. Generate a Dynatrace API Key
Fig.2 - A walkthrough of how to generate Dynatrace API Key in Dynatrace
To authorize Hawkeye to access your Dynatrace data, you need to create an API key with appropriate permissions.
-
Access Account Management: In the Dynatrace console, navigate to the bottom-left corner of the screen.
- Click your username.
- From the pop-up menu, select Account Management.
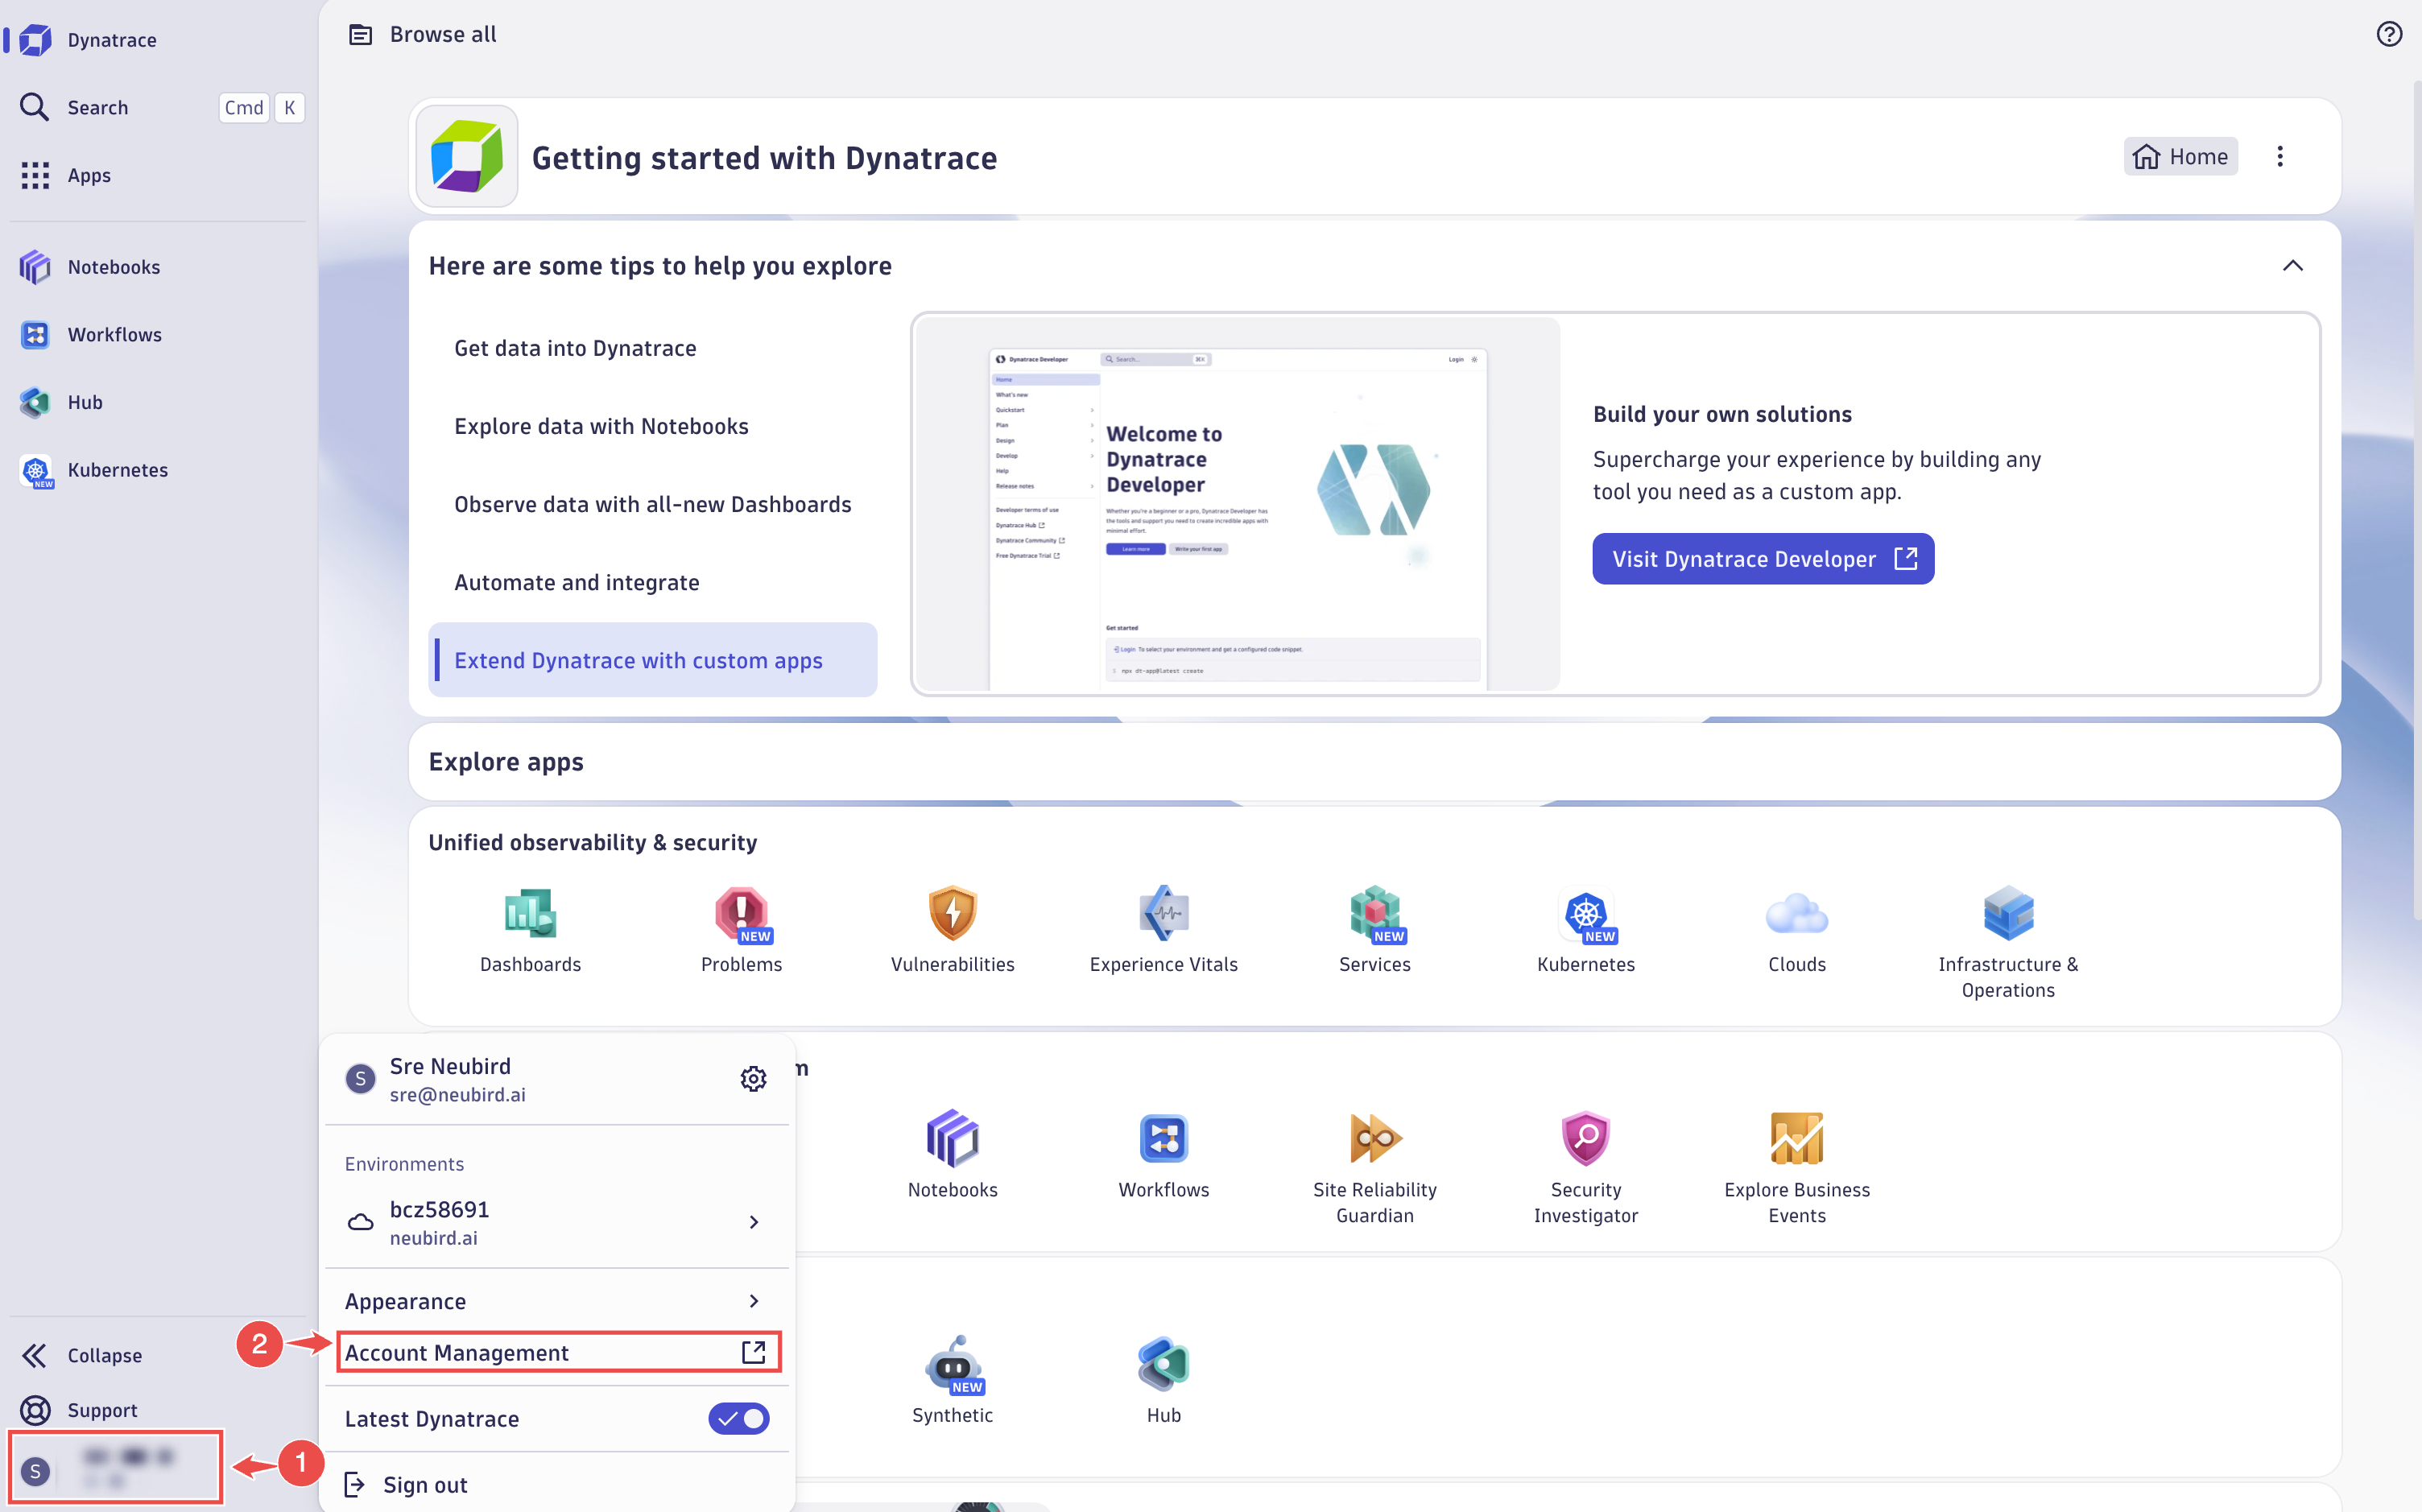
Fig.3 - Access acount management
-
Open Identity & Access Management:
- On the Account Management screen, click Identity & Access Management in the top navigation bar.
- Select OAuth Clients from the list of available options.
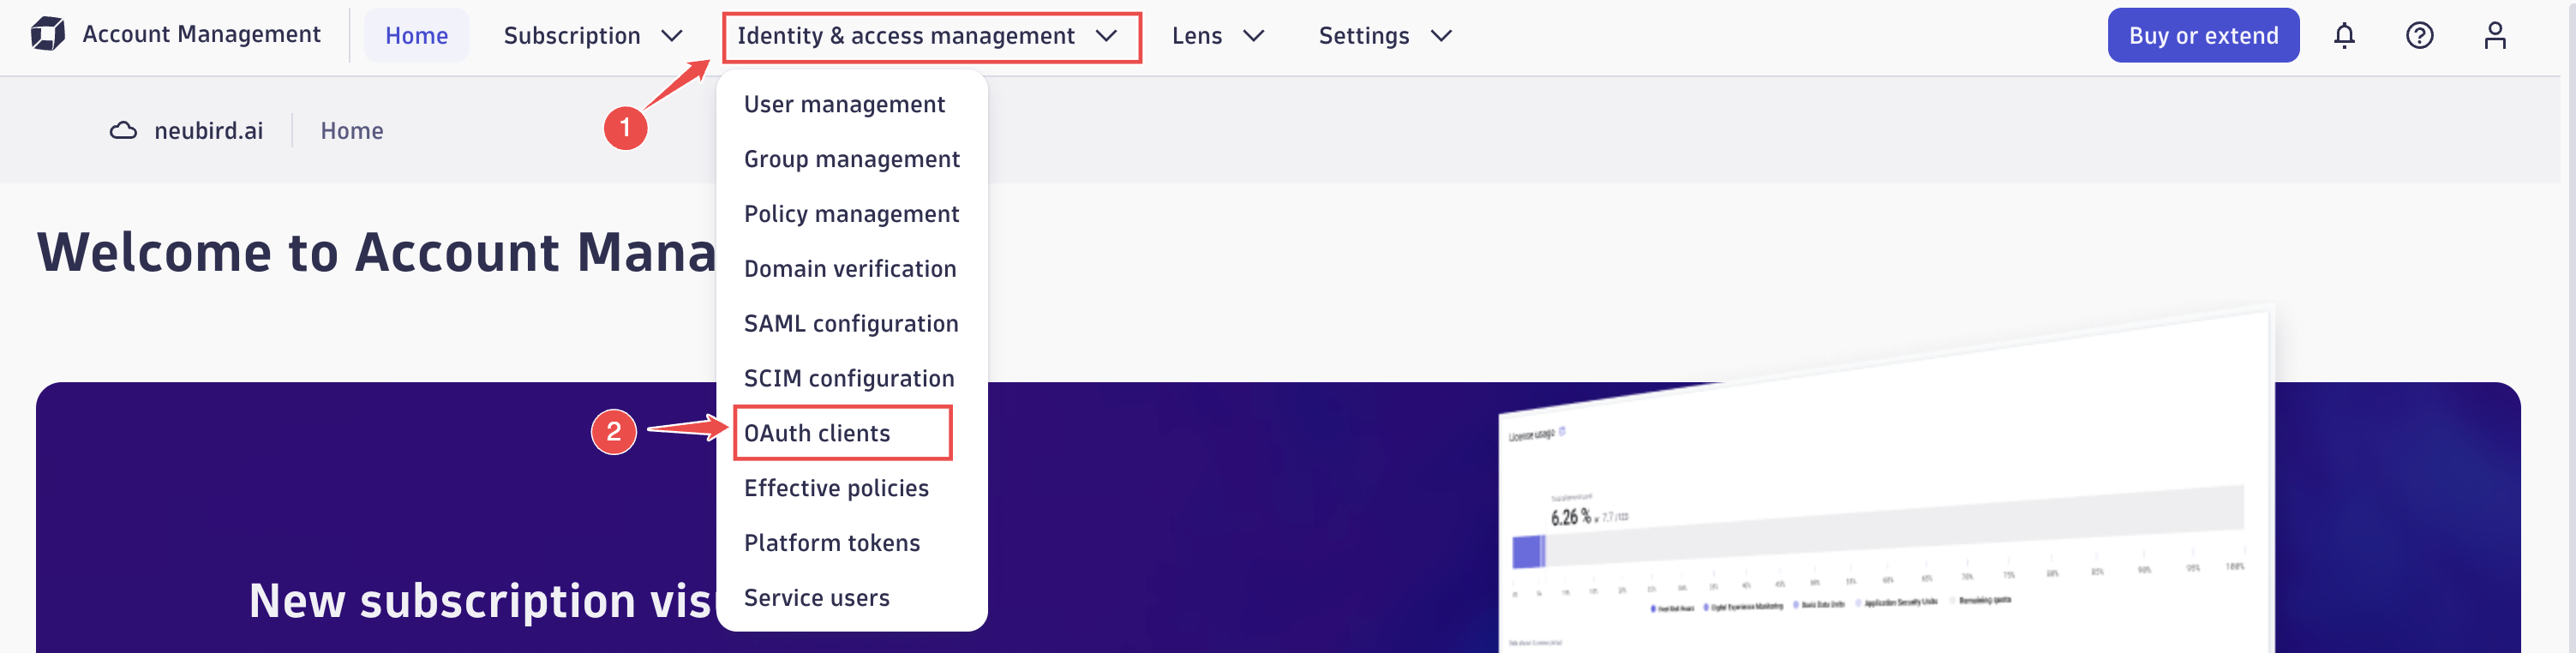
Fig.4 - Open identity & access management
-
Create a New OAuth Client:
- On the OAuth Clients screen, click the Create client button in the upper-right corner.
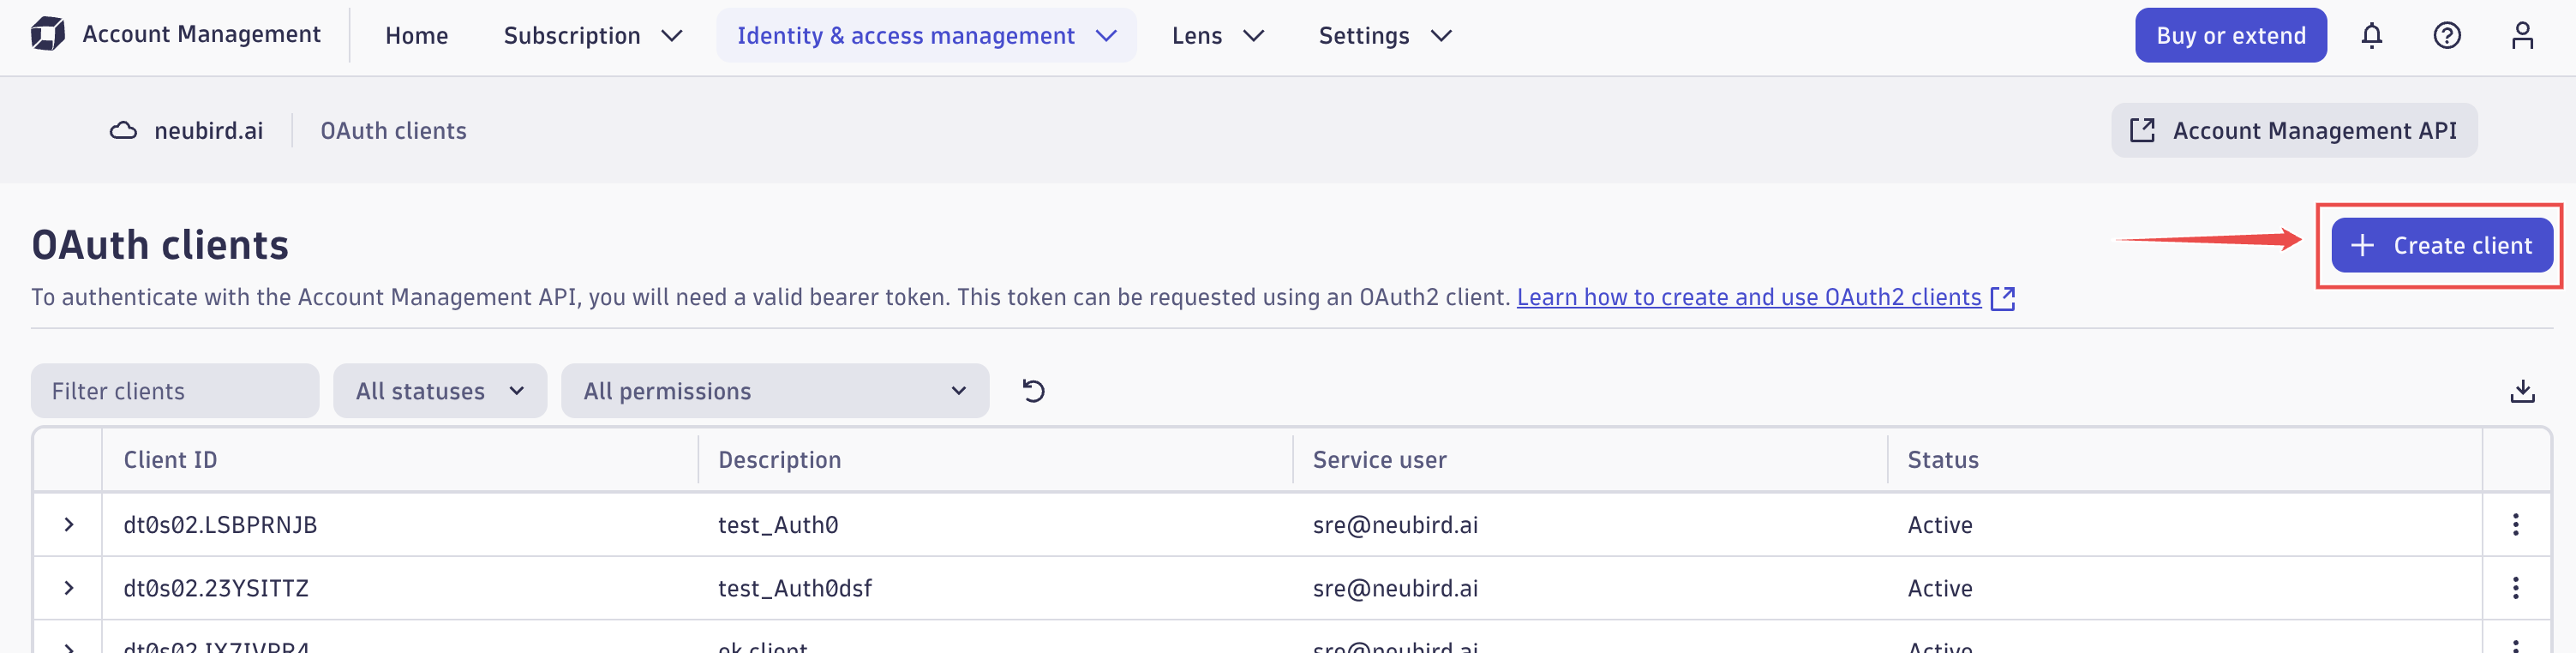
Fig.5 - Create new OAuth client
- On the Create Client screen:
-
Enter the current user’s email address in the Subject user email field.
-
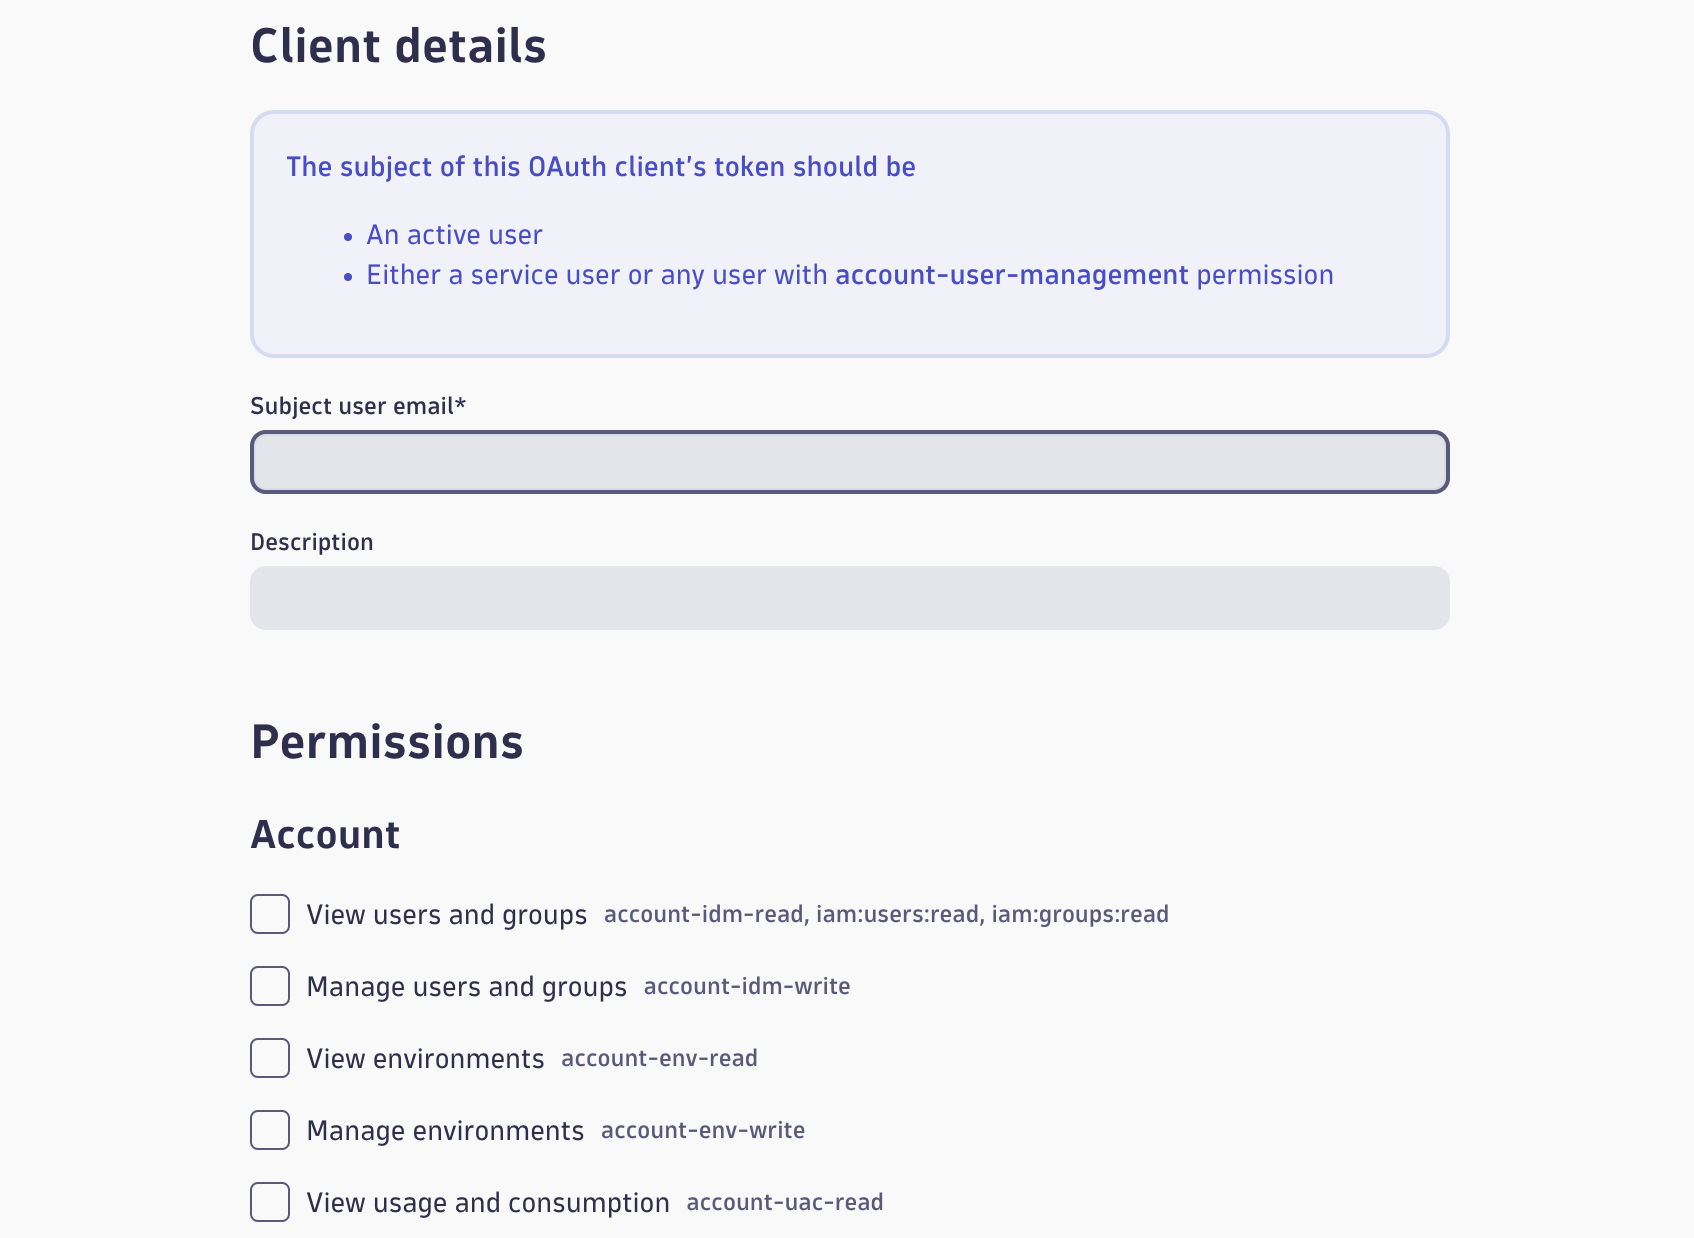
Fig.6 - Enter client details
- On the OAuth Clients screen, click the Create client button in the upper-right corner.
-
Assign Permissions: Grant the following permissions to ensure the OAuth client has the appropriate level of access.
- Scroll to the bottom of the screen.
- Click the Create client button.
3. Retrieve API Key Information
After the client is created, make note of the following credentials:
- Client ID
- Client Secret
- Login URL – for example:
Important: For Hawkeye integration, you must convert the login URL into the live data endpoint.
Replaceappswithlivein the URL.
Example:
- Login URL:
https://bcz58691.apps.dynatrace.com- Live Data Endpoint:
https://bcz58691.live.dynatrace.com
4. Add Dynatrace Connection to Hawkeye
Now that you have your API key and Environment ID, configure the Dynatrace connection in Hawkeye.
-
Navigate to the Connections Tab: In the Hawkeye dashboard, go to the Connections section and click New Connection.

Fig.7 - Create new Dynatrace connection dashboard
-
Select Dynatrace: From the list of available integrations, select Dynatrace, and click Next.
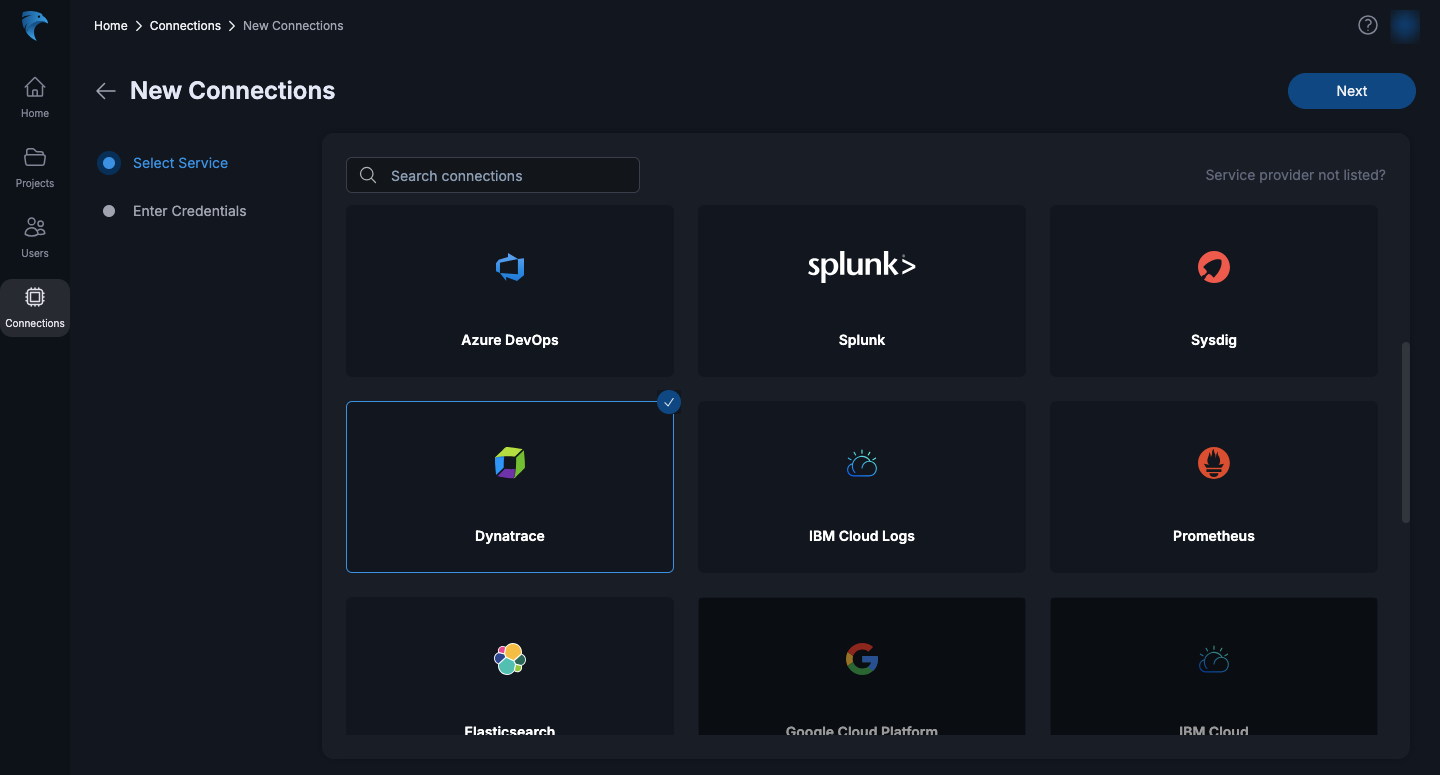
Fig.8 - Select Dynatrace
-
Enter Connection Details: When setting up the connection, you will need to provide the following information:
-
Name (Required)
Enter a unique name for the connection. This field is mandatory and is usually marked with a red asterisk (*).
Example:Dynatrace-Production-Integration -
Description (Optional)
Provide a short description of the integration to help identify its purpose or scope.
Example:Integration for monitoring production environment -
Endpoint (Required)
Specify the Dynatrace API endpoint.- Use the live data endpoint (replace
appswithlivein the login URL). - Example:
https://bcz58691.live.dynatrace.com - Use the live data endpoint (replace
-
Client ID (Required)
Enter the Client ID that was generated when you created the OAuth client in Dynatrace. -
Client Secret (Required)
Enter the Client Secret associated with the Client ID. This is used to authenticate API requests securely.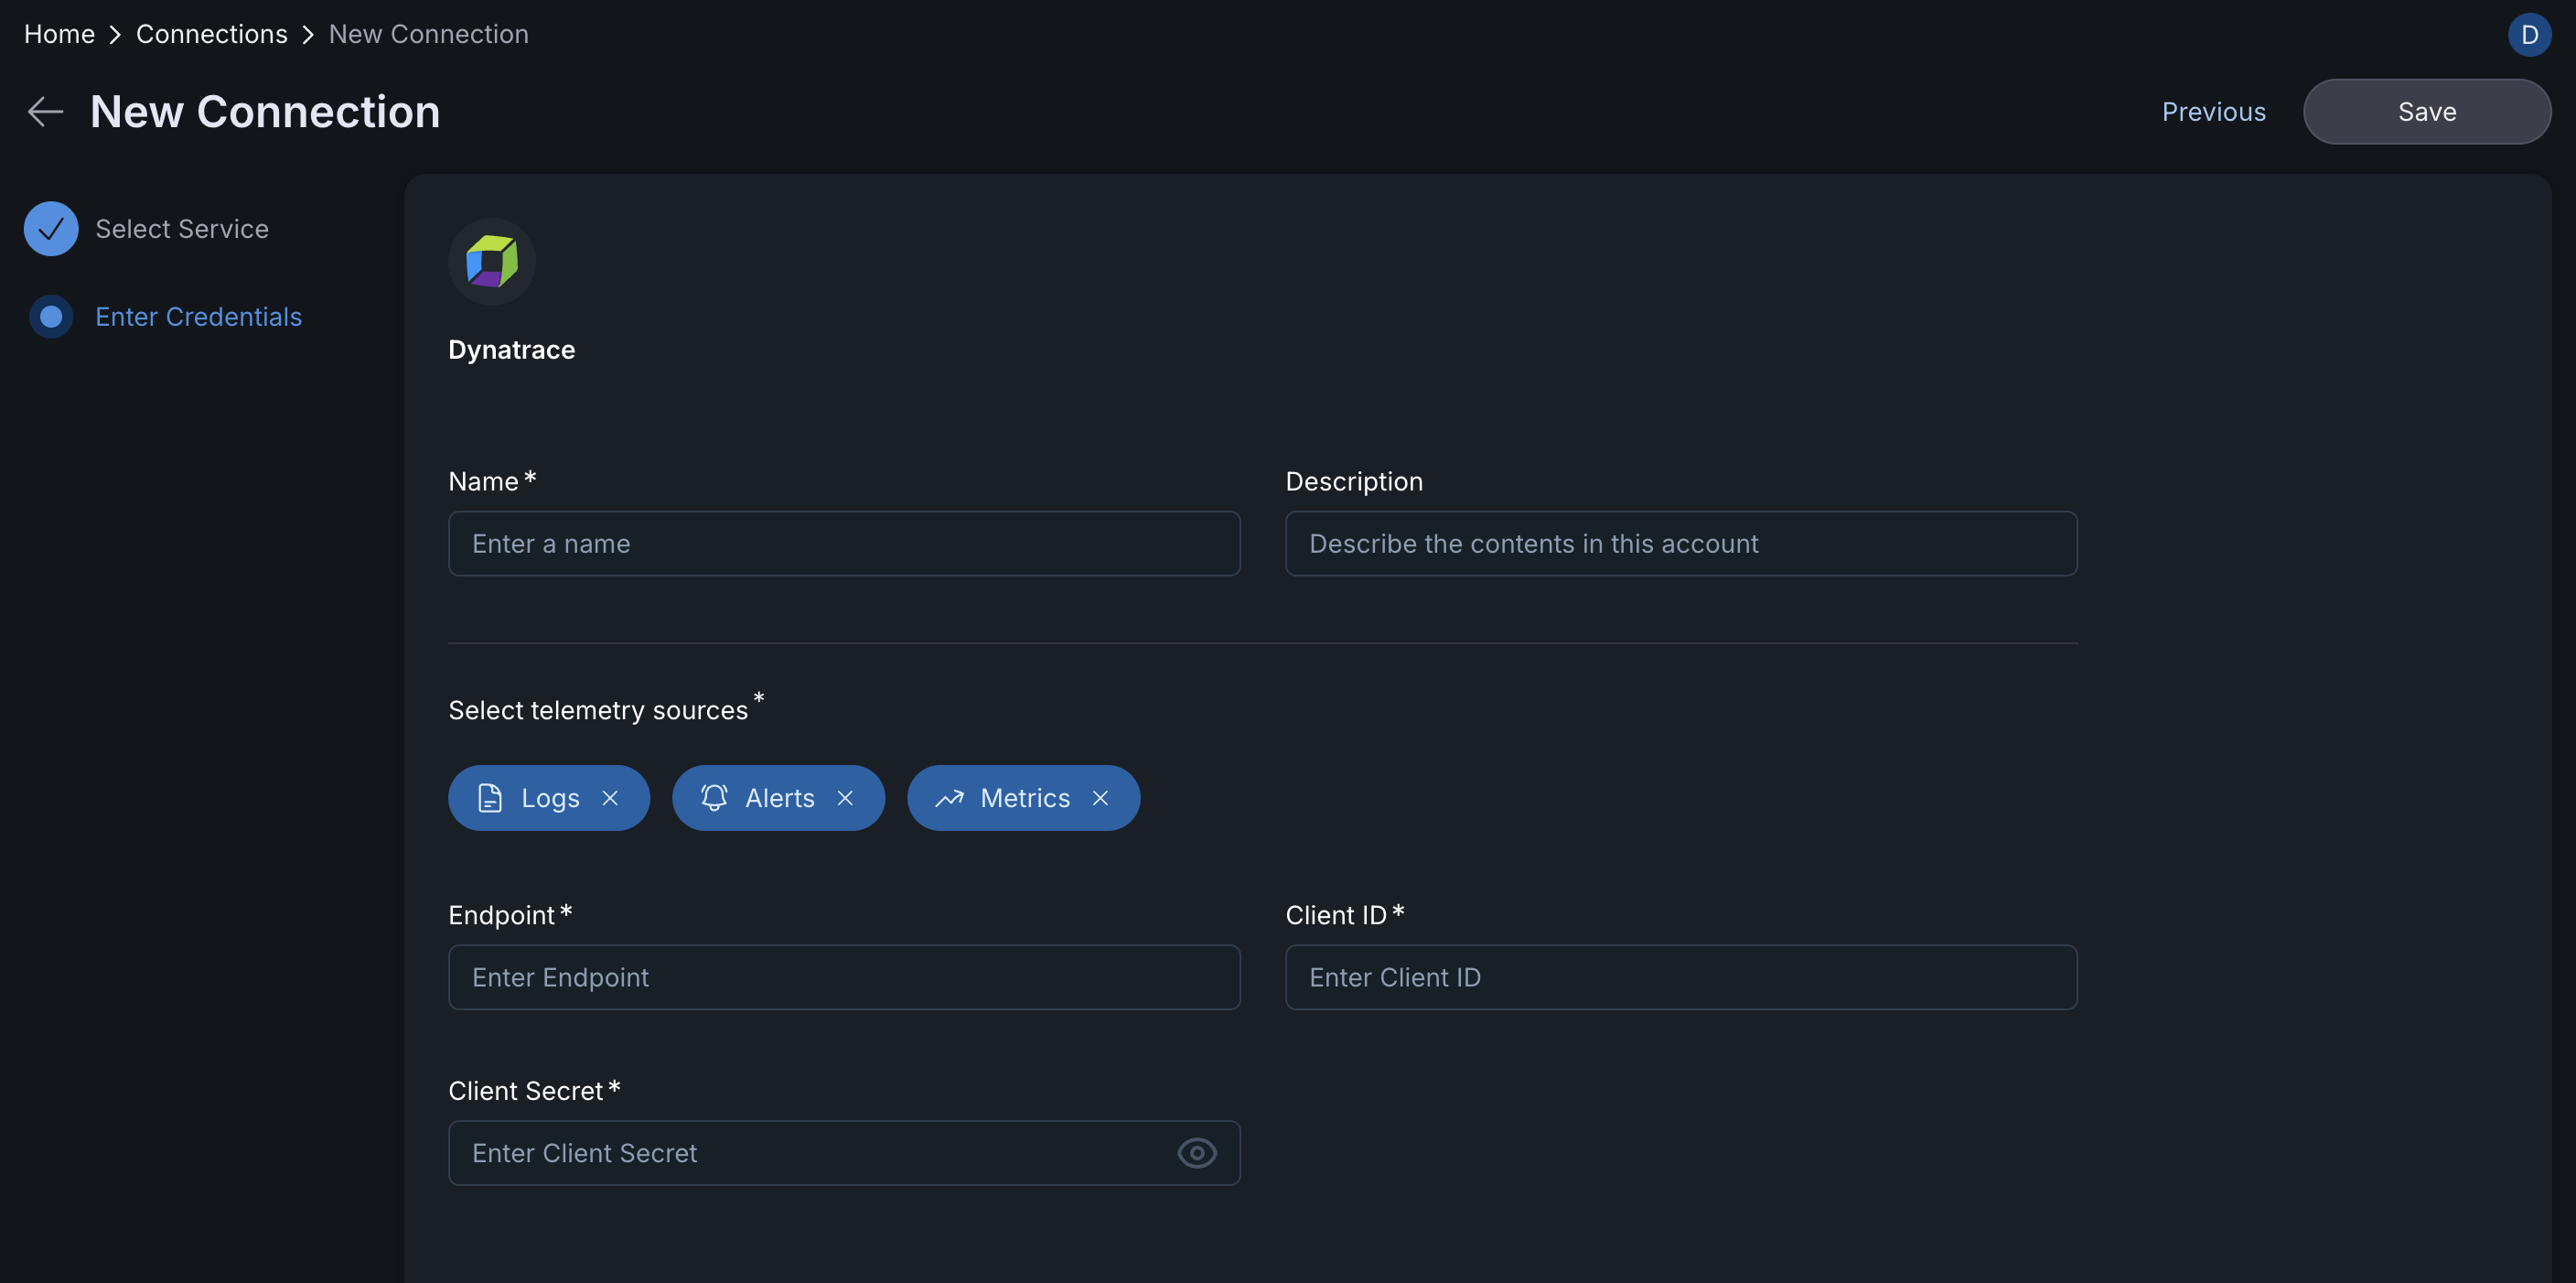
Fig.9 - Enter connection details
-
-
Verify the Connection: Hawkeye will verify the connection to Dynatrace. Once the verification is complete, the Dynatrace connection card will be visible on your dashboard.