Projects
The projects section on the Hawkeye dashboard allows you to organize your company’s services and resources in a structured manner, similar to folders.
In this section, you can create new projects, view newly created and existing project and you can also search through them using the search bar at the top-right corner of the dashboard.
This guide will walk you through how to create a new project and how to navigate an existing project.
Creating a new project
- Login to your Hawkeye dashboard: Use your login details to access your Hawkeye dashboard. Ensure your details are accurate.
- Click on Projects: Locate the sidebar navigation on your right and click on Projects to view all the existing projects.
- Create a new project: Click on the card with a plus icon (+) display to get started with your new project.
Fig.1 - A walkthrough of how to create projects on Hawkeye
Follow the steps as shown below to set up your new project.
-
Setup the project: On the new project page, You’ll be prompted to set up some basic project information, such as:
- Project Name: Choose a relevant name for your project.
- Project Description: Provide a short description about the project, as well as what the project will do. For example, what the project is for, what tools or services it uses and what information you expect to access.
- Project Thumbnail: Select a color to represent the project, allowing for easy identification later.
After inputting the required details, click on the Next button at the top right corner of the screen.
-
Select Connections: The next step in creating a new project is to select the connections associated with it. You’ll see a screen like the one below with all your available connections, and you’ll make a choice from them. After selecting, click on the Next button at the top right corner of the screen.
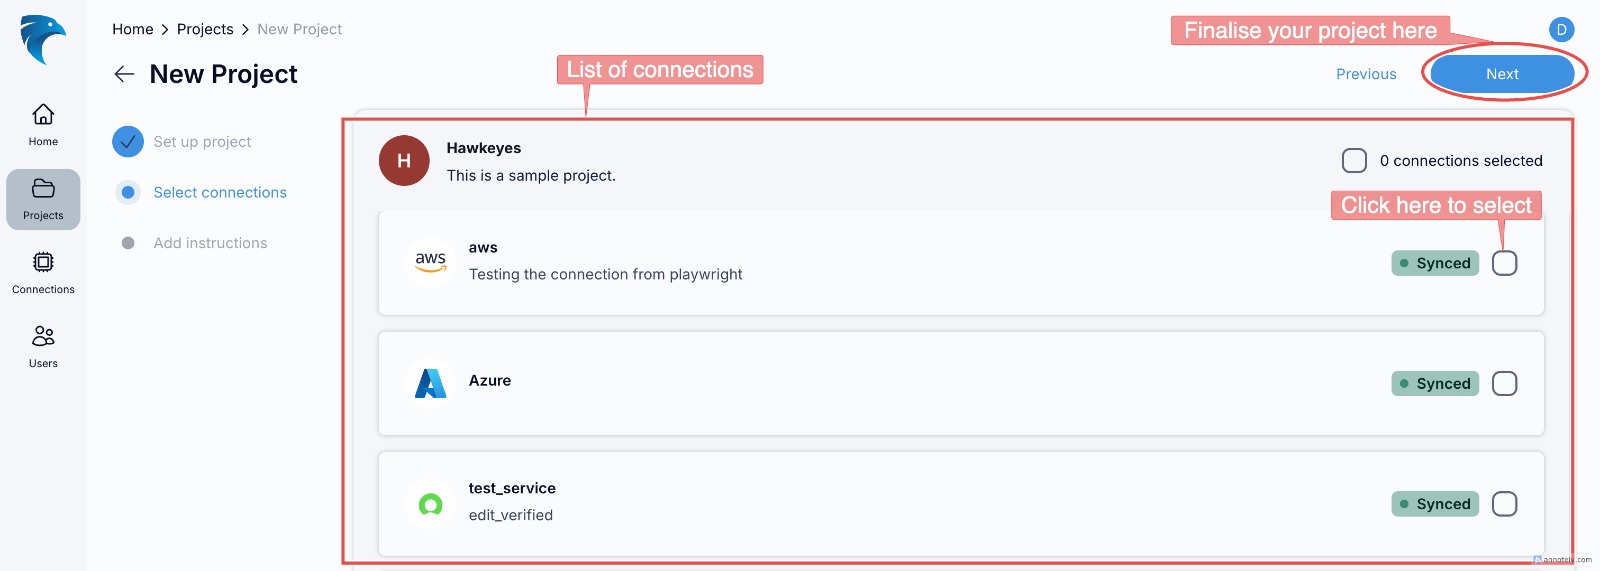
Fig.2 - An illustration of how to add connection to your project
-
Finalizing the project setup: After filling out the required details, the next step is to check your project’s configuration by clicking on the Validate button, then click on Save to store your project. A confirmation message indicating that the project was successfully created will be displayed. The project will now appear in your list of existing projects, ready to be worked on.
Navigating an existing project
Once you have several projects set up, you can easily navigate to and manage them from the projects section. Each project card features a menu that offers various management options.
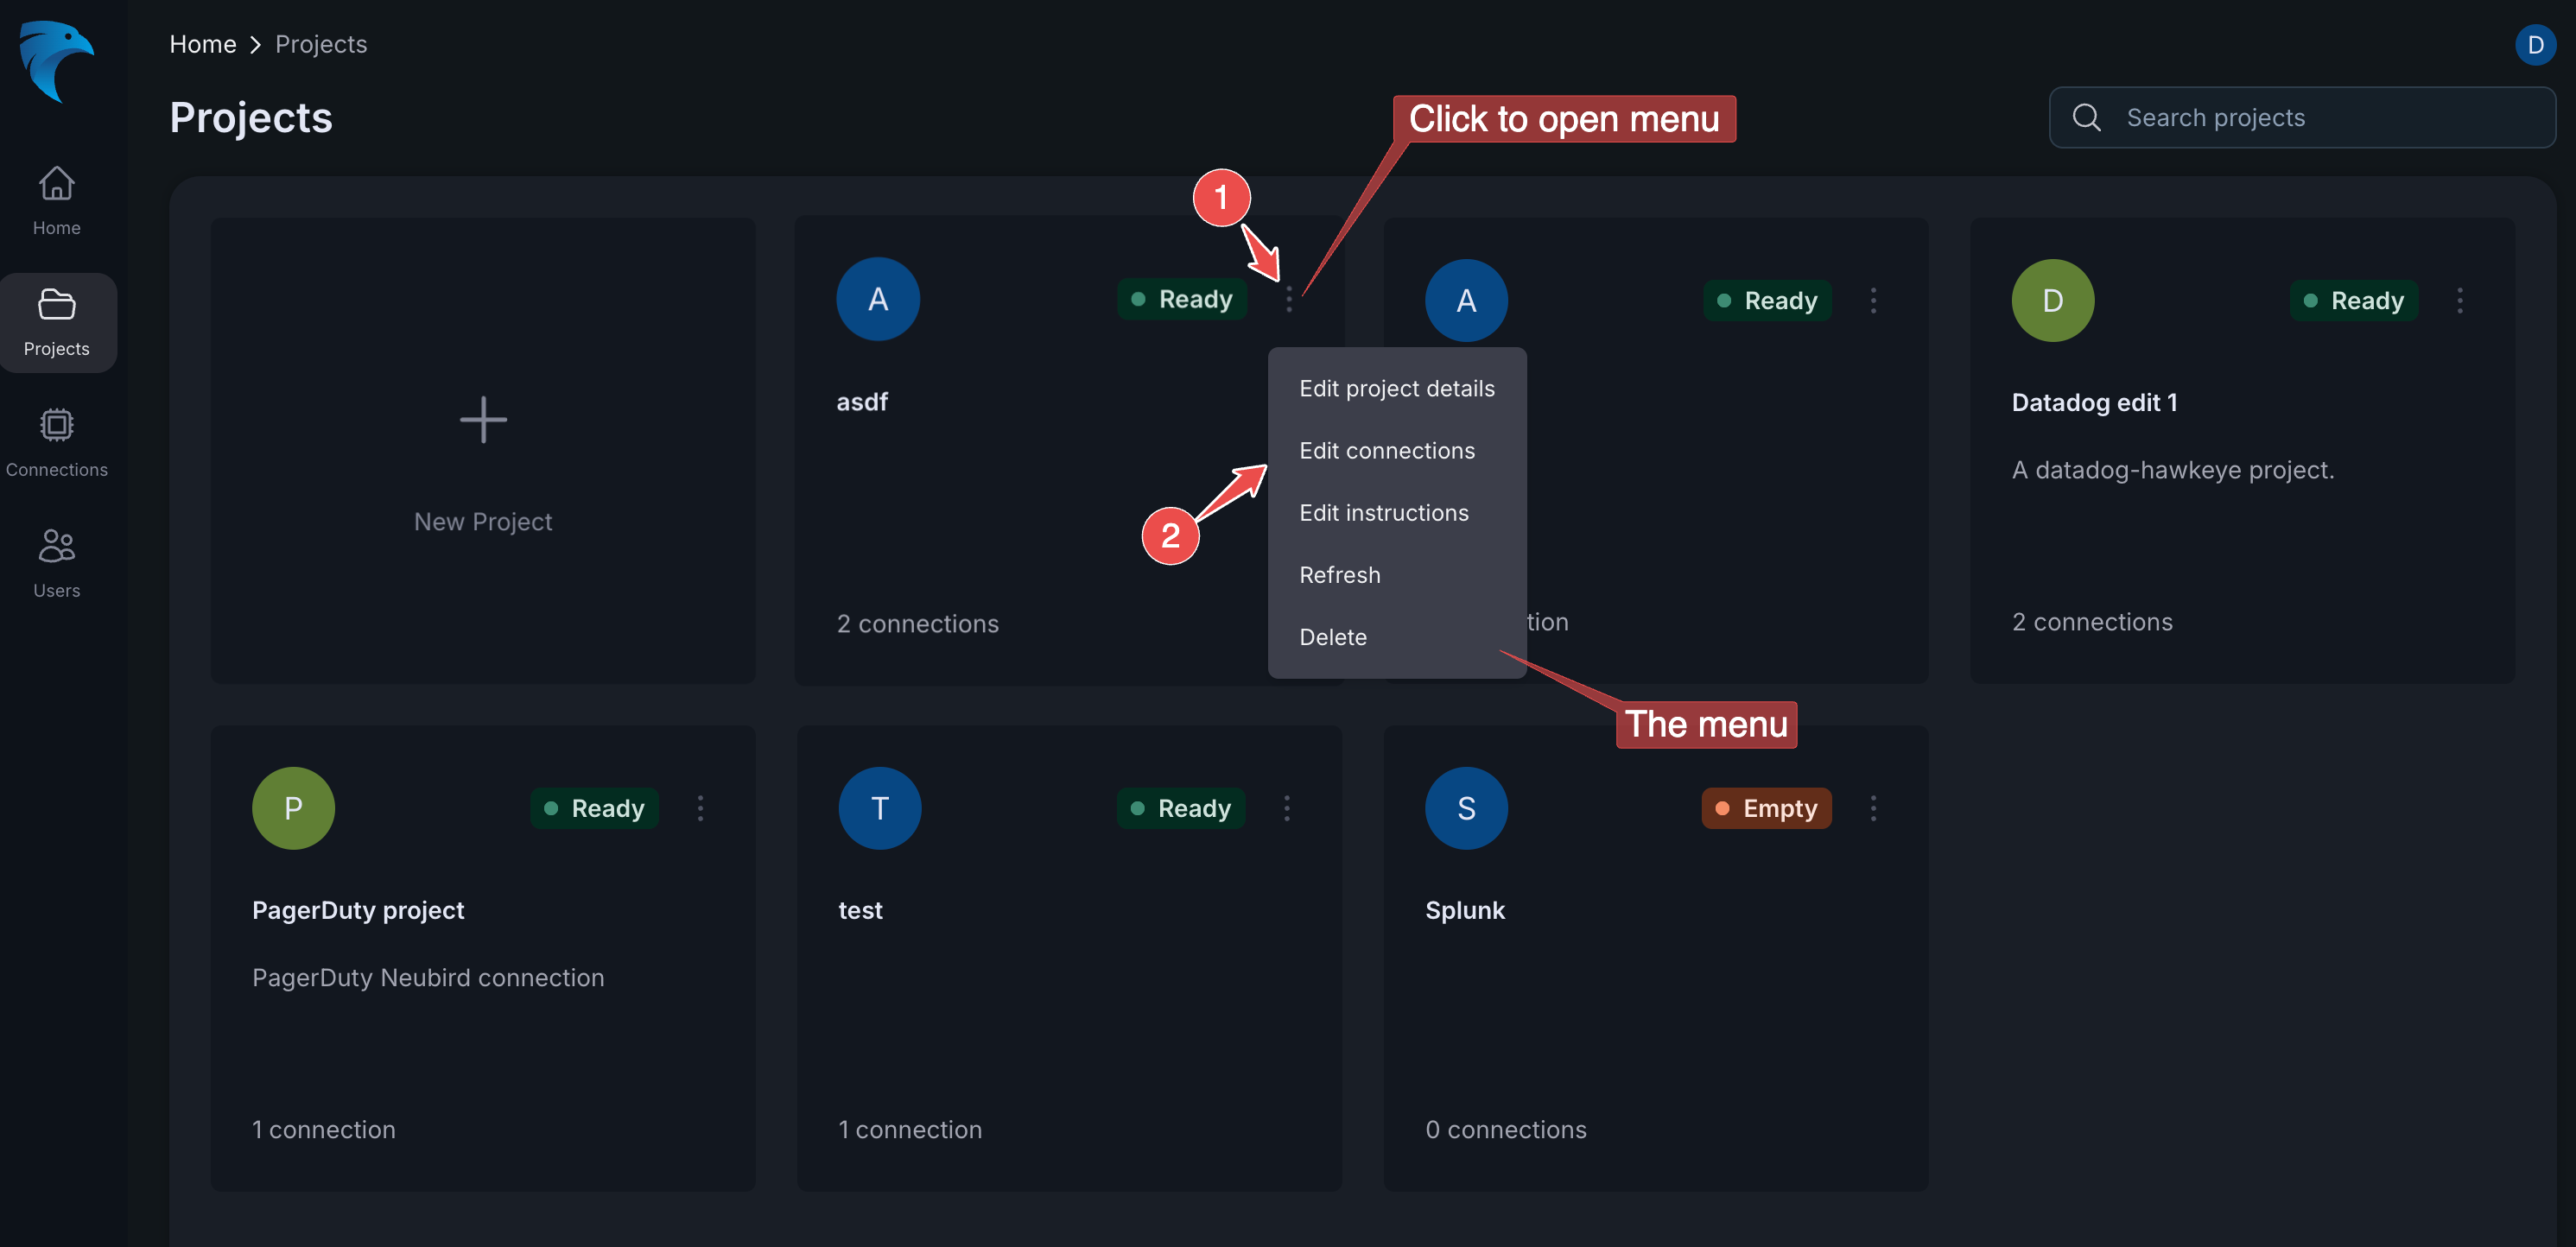
Fig.3 - Project menu
Follow the steps below to access and manage an existing project:
-
Accessing project options: Locate the three-dotted menu icon on your project card at the top-right corner. Clicking on this icon will open a dropdown menu providing options which include the following:
- Edit project details: Change the project’s name or description.
- Edit connections: Change or update the links your project uses.
- Edit instructions: Update the steps or notes saved for your project.
- Refresh: Reload the project to see the latest changes.
- Delete: Remove the project from your list.
-
Editing project details: If you choose the Edit option, you will be taken to a screen where you can modify key project details like the project name, description, and color.
Fig.4 - A walkthrough of how to edit your project details
After updating the information, be sure to save your changes by clicking the Save button at the top right corner.
-
Edit Connection: After updating your project details, you can also update your connection. Connections link your Hawkeye project to your existing infrastructure, allowing it to gather telemetry data, monitor performance, and analyze events from different services in real-time.
You can deselect a previous connection or alert to add a new one, or you can add a new connection to an already selected one.
To Edit connection, follow the steps below:
- Select a service (e.g AWS) you want to connect to your project.
- If you want to select a specific alert to monitor, select the “create automated session” checkbox, then click on the drop-down menu to select your alert of choice.
- Next, click Save to update your changes (you can also click on prev to go to the previous step).
Follow the demo below to guide you:
Fig.5 - A walkthrough of how to edit your project connection