Jira
Connecting Hawkeye to your Jira account lets you track issues and project activities in real time.
With this integration, you can view data like issue statuses, project progress, and sprint metrics on the Hawkeye dashboard.
To connect Jira with Hawkeye, you will need a Jira API Token and your Jira Instance URL.
Step 1: Setup Jira Integration
To retrieve the required credentials, follow these steps to set up a Jira API Token:
-
Navigate to Atlassian API token page: Log into your Atlassian account and go to the API tokens page. This is where you can generate and manage API tokens.
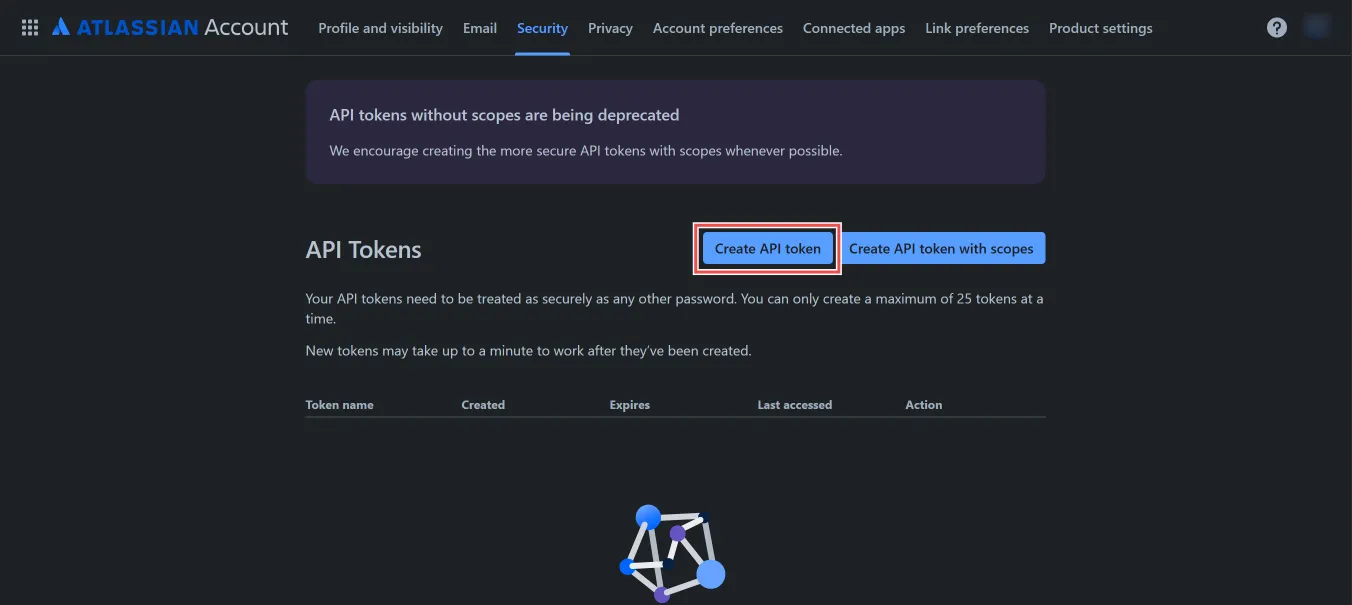
Click on Create API Token.
-
Create API token: Provide a name for the token to identify it later.
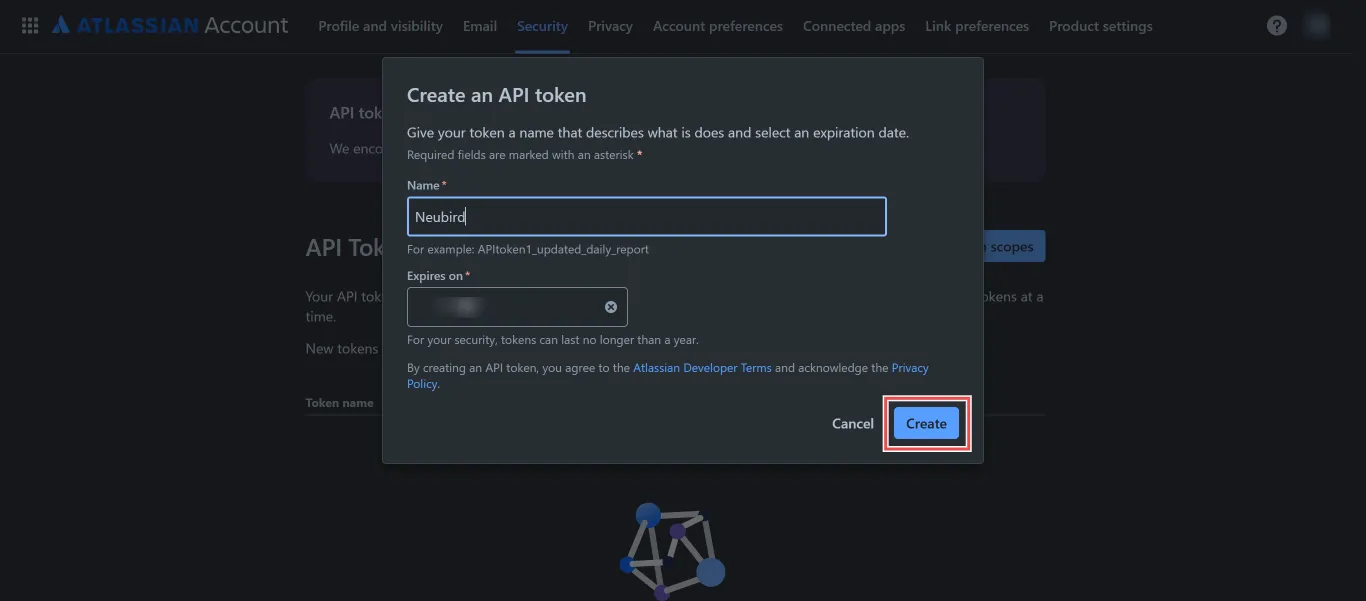
Click on Create.
-
Copy API token: Once generated, click on Copy to save the token.
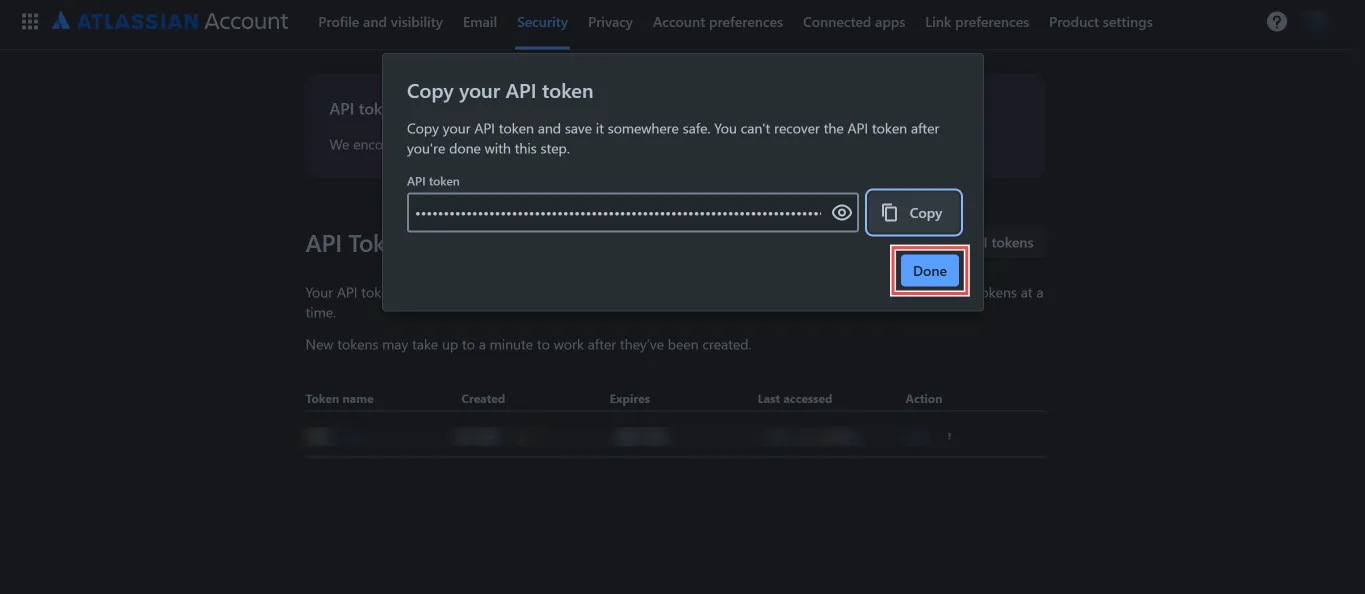
Store this token securely, as it won’t be displayed again.
-
Retrieve Jira instance URL: Open your Jira instance in your browser (e.g.,
https://yourcompany.atlassian.net).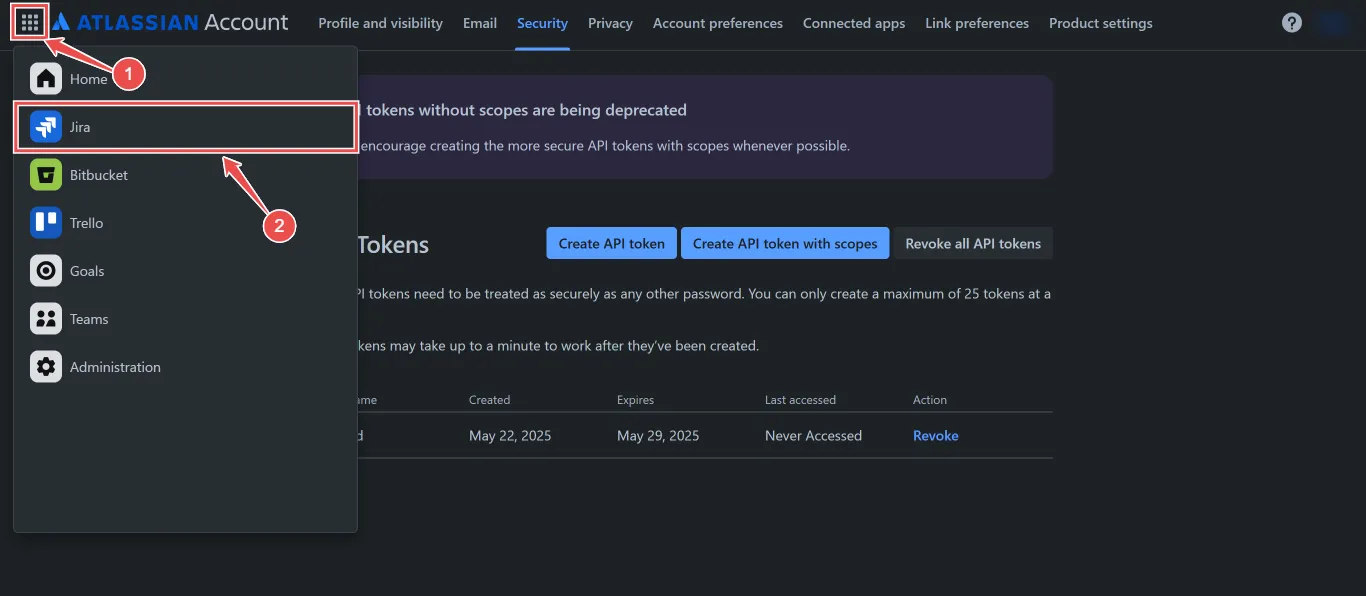
Copy this URL, as it’s required to complete the connection.
Step 2: Add Jira Connection to Hawkeye
Now that you have your API Token and Instance URL, follow these steps to connect Jira to Hawkeye.
-
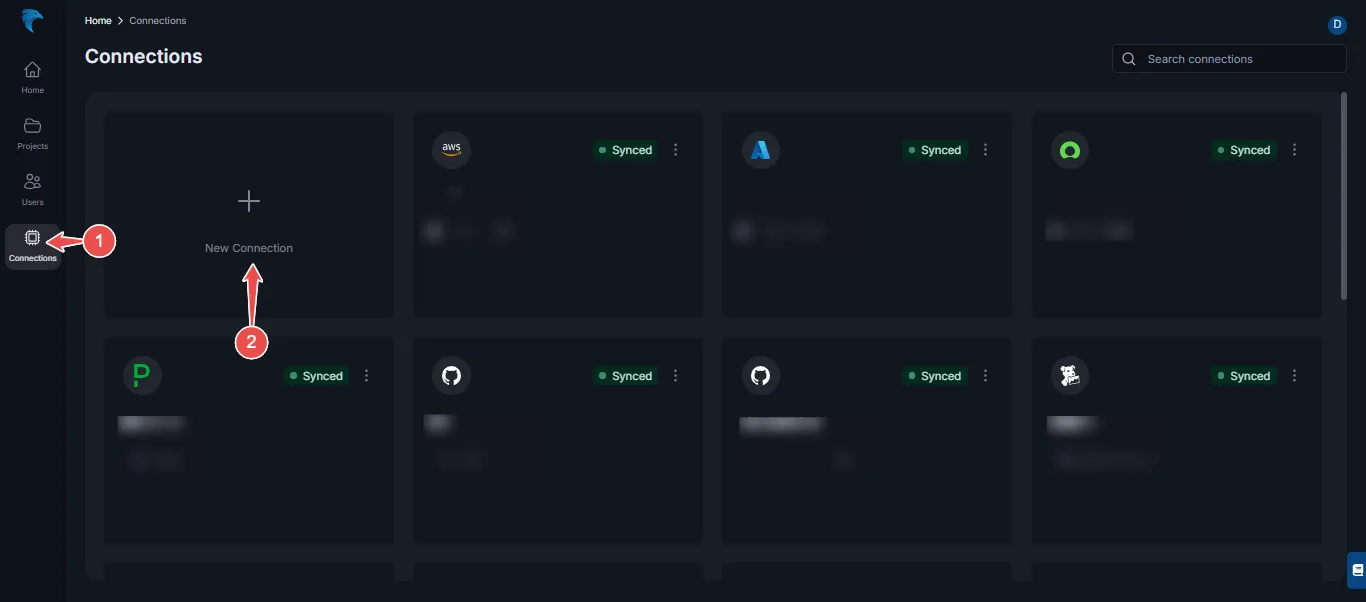
Open connections tab in Hawkeye: In the Hawkeye dashboard, go to Connections and select New Connection.
-
Select Jira: From the available integrations, select Jira.
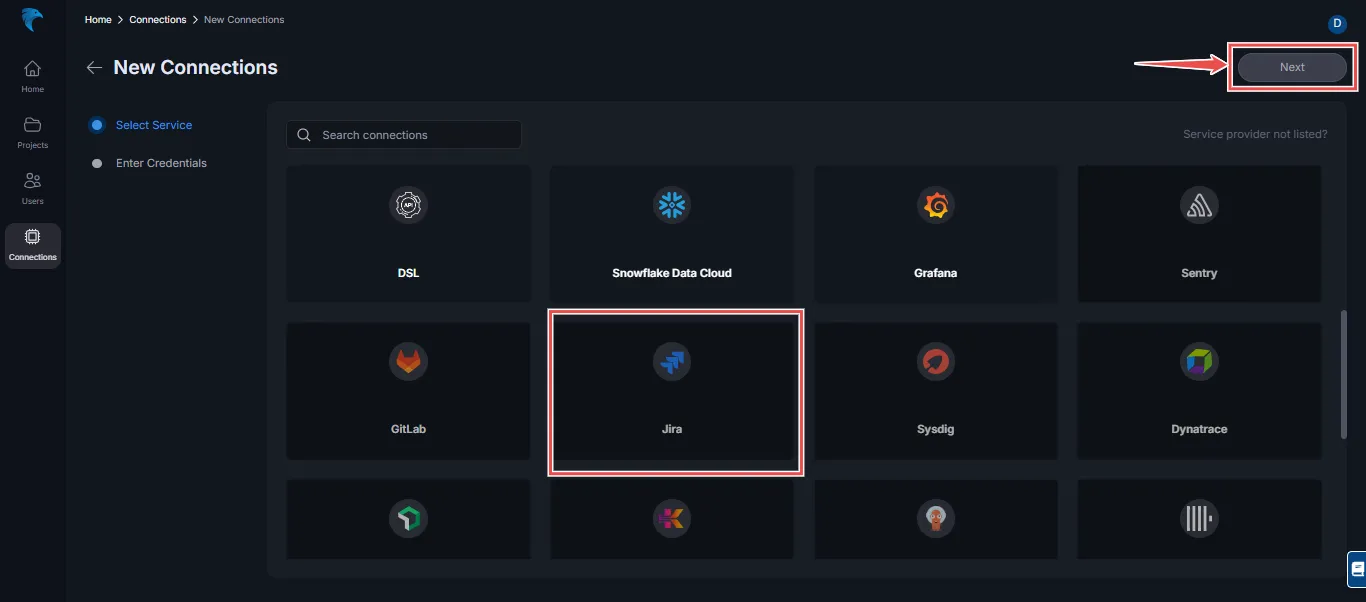
Click Next to proceed.
-
Enter credentials:
- Name: Give your Jira connection a descriptive name (e.g., “Jira Project Tracker”).
- Description: Optionally, add a description.
- API Token: Paste the API Token generated from the Atlassian API page.
- Instance URL: Enter the URL of your Jira instance.
Click Save to finalize the setup.
-
Verify connection: After saving, the connection should be visible on the Connections tab. A successful setup will show the Jira connection card on your dashboard.