Redis
Connecting Hawkeye to your Redis environment allows us to collect important telemetry data, such as cache usage metrics, performance logs, and key-value store configurations. These insights help you monitor and optimize your Redis instances.
Step 1: Create a Redis User and API Key
Fig.1 - A walkthrough of how to create a Redis user and API key in Hawkeye
To securely connect Hawkeye to Redis, you will need to create a user with appropriate permissions and generate an API key to allow data collection.
-
Log in to Redis: Go to the Redis Console and log in to your Redis Cloud account.
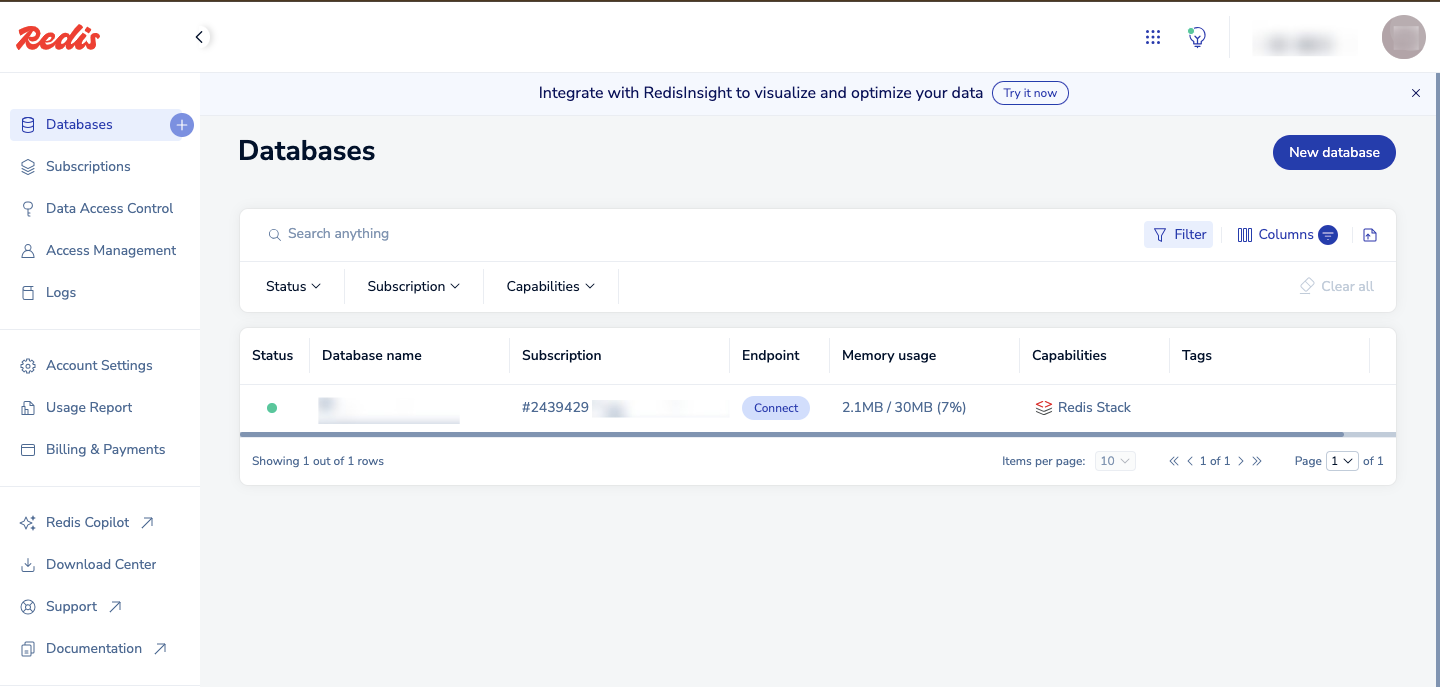
Fig.2 - Log in to Redis
-
Navigate to Data Access Control: From the Redis console, go to Data Access Control.
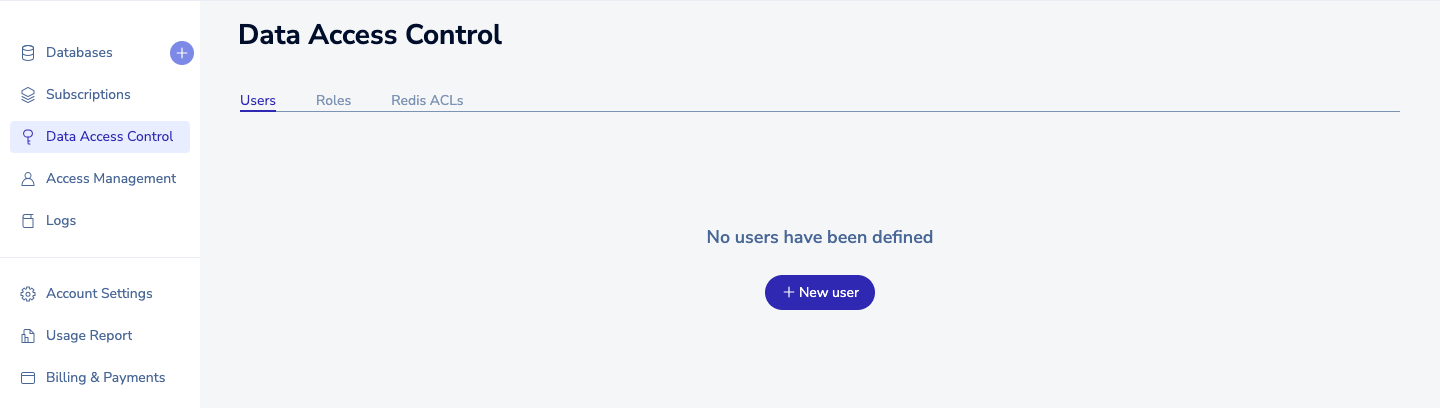
Fig.3 - Data Access Control
-
Create a Role: Without a Redis role, you won’t be able to create a Redis user. Therefore, on the Data Access Control section, navigate to the Roles tab.
-
Click on the cross icon to add a new role.

Fig.4 - Add new role
-
Fill in the details for your Redis role. This includes the name, ACL rule and Database.
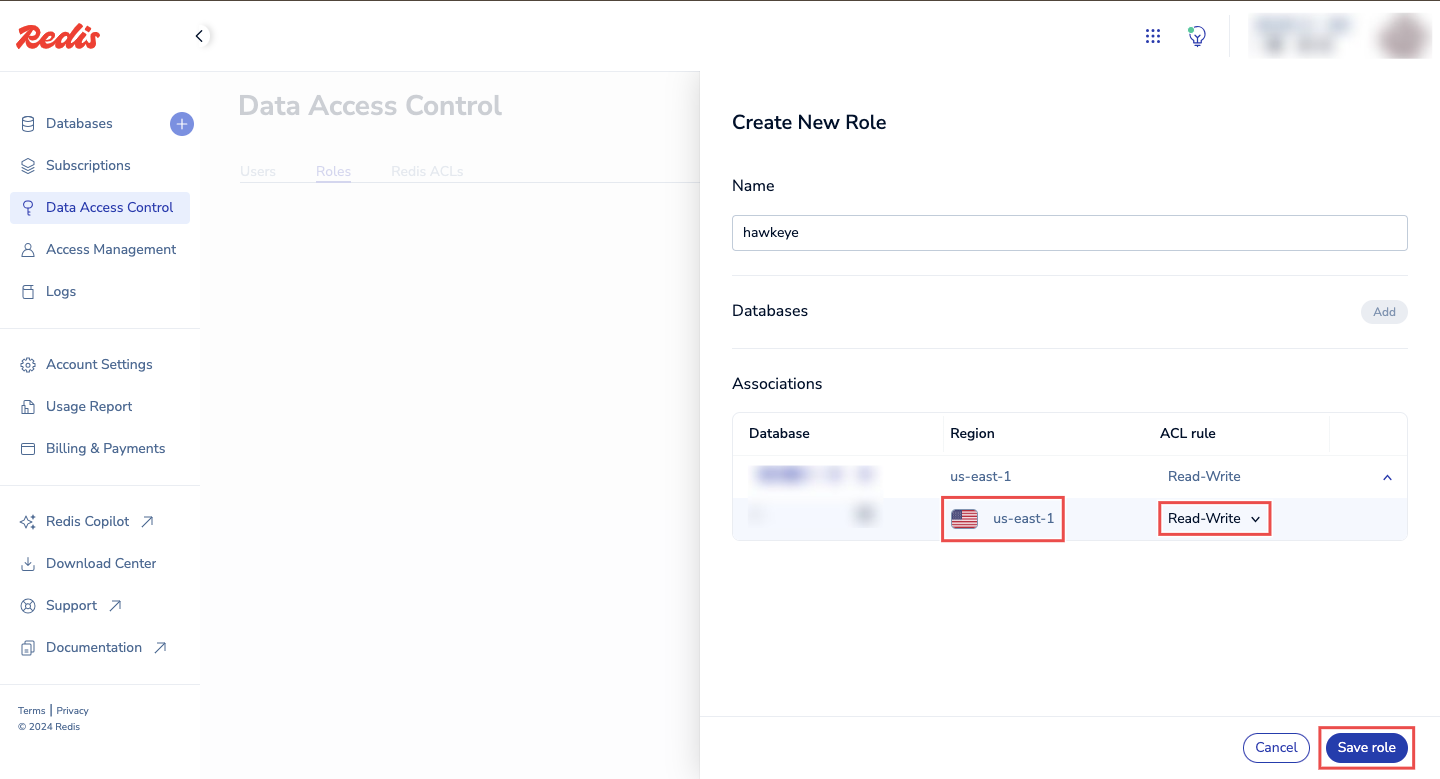
Fig.5 - Enter role details
-
-
Create a Redis User: To add a new user, navigate to the Users tab.
-
Click on New user button to add a new user.
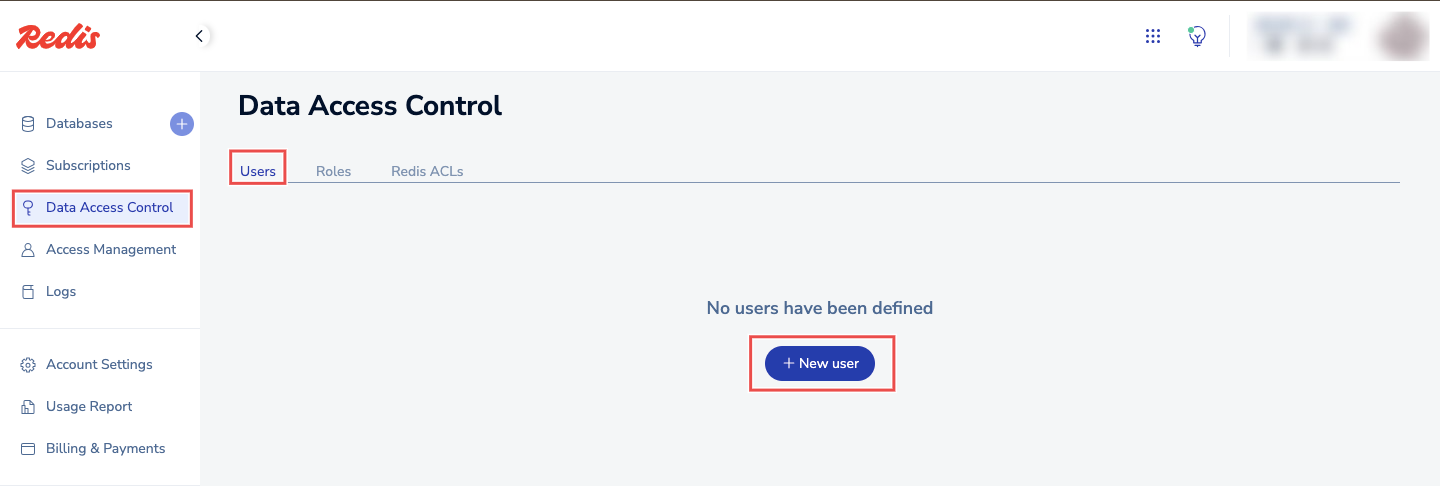
Fig.6 - Create new user
-
Give the user a name, attach the Role created in the step above, and append a Password for this user.
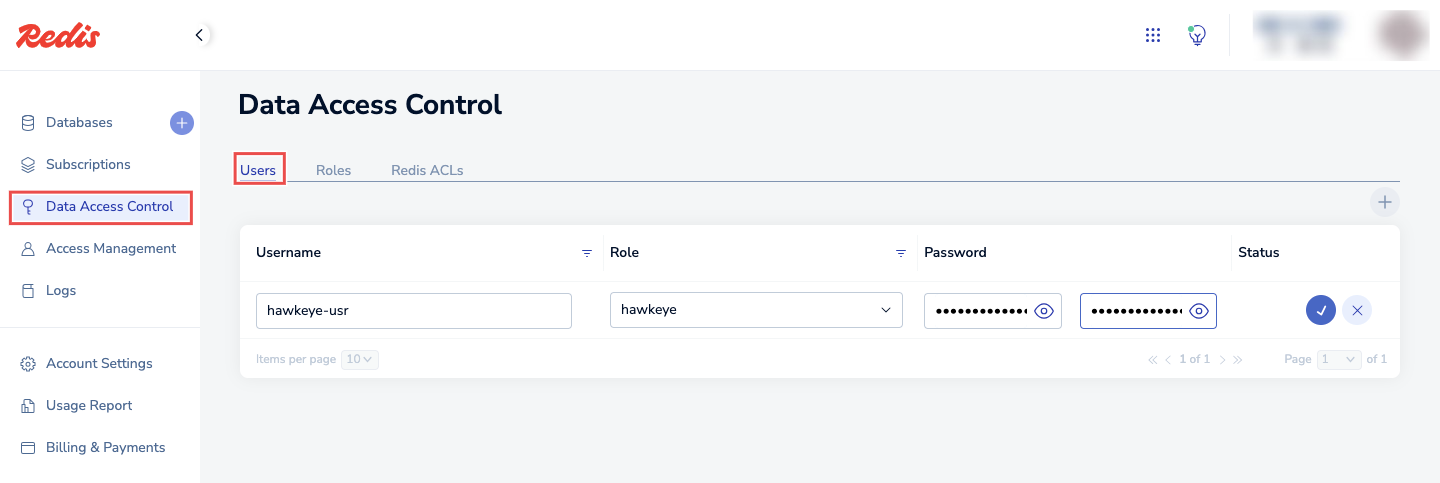
Fig.7 - Enter username and role
-
-
Generate an API Key: From the Redis console, navigate to Access Management > API Keys.
-
Click on the cross icon and add a name for your API Key.
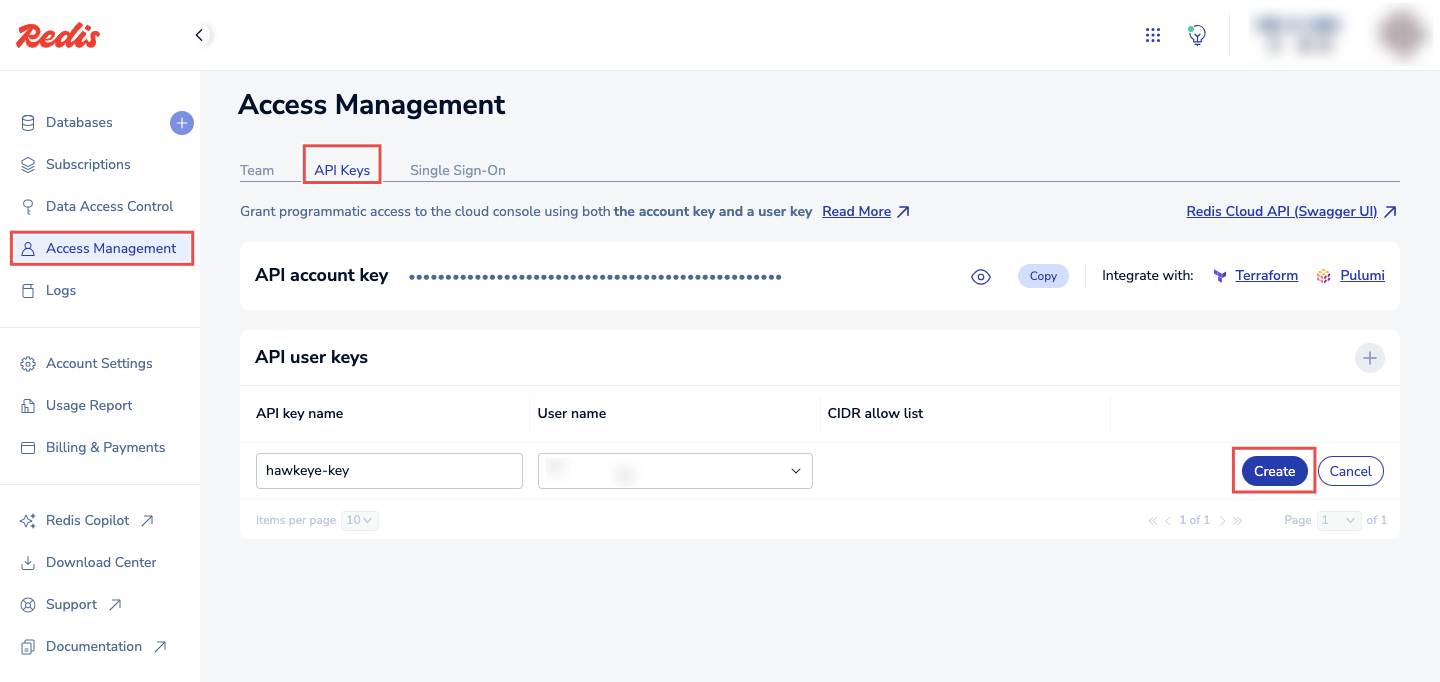
Fig.8 - Generate an API key
-
Click on the Create button to complete the process.
-
Once created, copy the API user key.
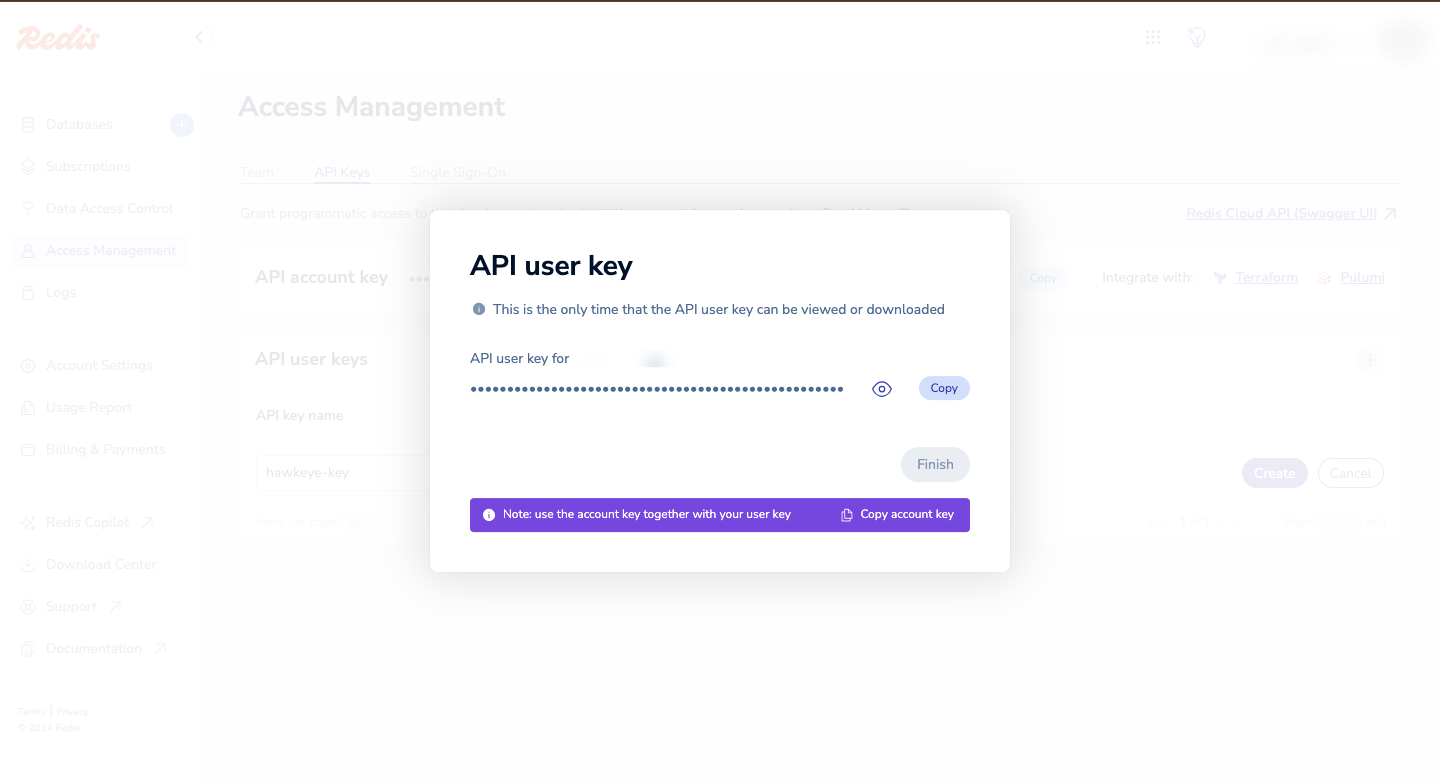
Fig.9 - Copy the API user key
-
Step 2: Add Redis Connection to Hawkeye
With the Redis credentials ready, follow these steps to set up the connection in the Hawkeye dashboard.
-
Navigate to the connections tab: On the Hawkeye dashboard, go to the Connections section and click on the New Connection card.
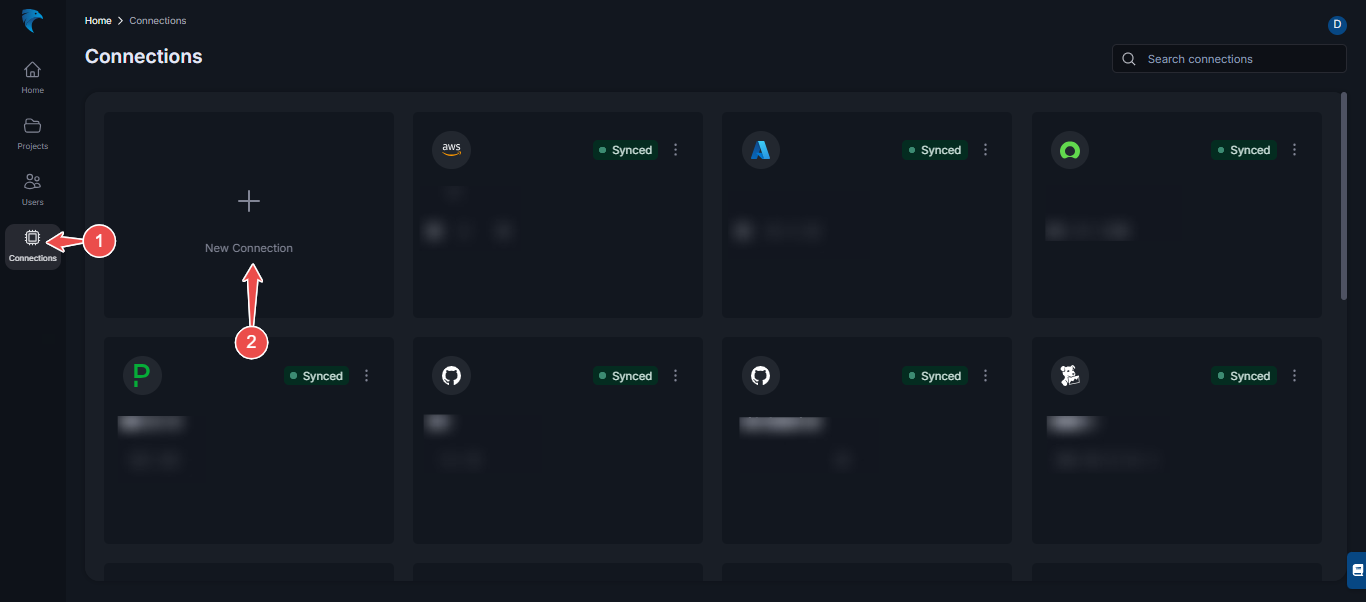
Fig.10 - Create new Redis connection dashboard
-
Select Redis connection: From the list of available connections, choose Redis.
-
Enter credentials:
-
Name: Provide a name for the connection.
-
Description: Add a brief description of the Redis connection.
-
API Key: Paste the API key you created in Step 1.
-
Host: Enter the Redis Cloud endpoint URL.
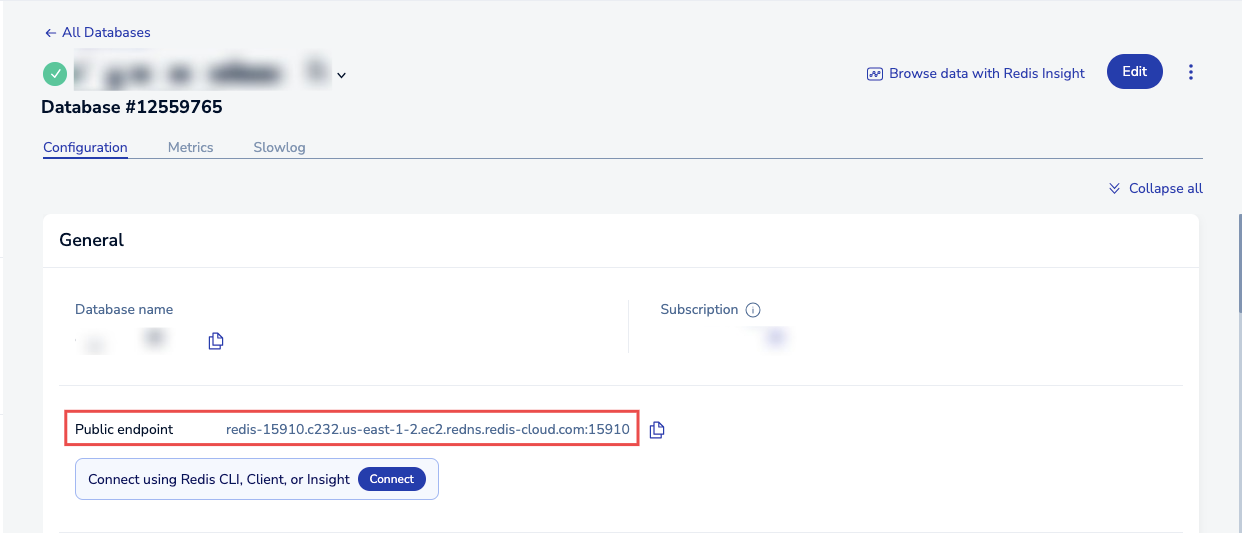
Fig.11 - Enter credentials
-
-
Save the connection: Verify all credentials, and click the Save button.
-
Confirm connection: Once the connection is established successfully, the Redis connection card will appear on your Hawkeye dashboard.