PagerDuty
PagerDuty is an incident management platform that helps IT and DevOps teams quickly monitor and resolve critical issues.
Integrating a PagerDuty connection on your Hawkeye dashboard enhances our incident response capabilities by allowing you to receive and manage alerts in real-time.
To set up a PagerDuty connection, you must create an API key, which you’ll need as a credential. The following steps will guide you in creating one.
Step 1: Create an API Key
Fig.1 - A walkthrough of how to create an API key for PagerDuty connection
Sign in to your PagerDuty dashboard and follow the instructions below:
-
Navigate to My Profile: On the top right corner of your dashboard, click the profile icon, then navigate to My Profile.
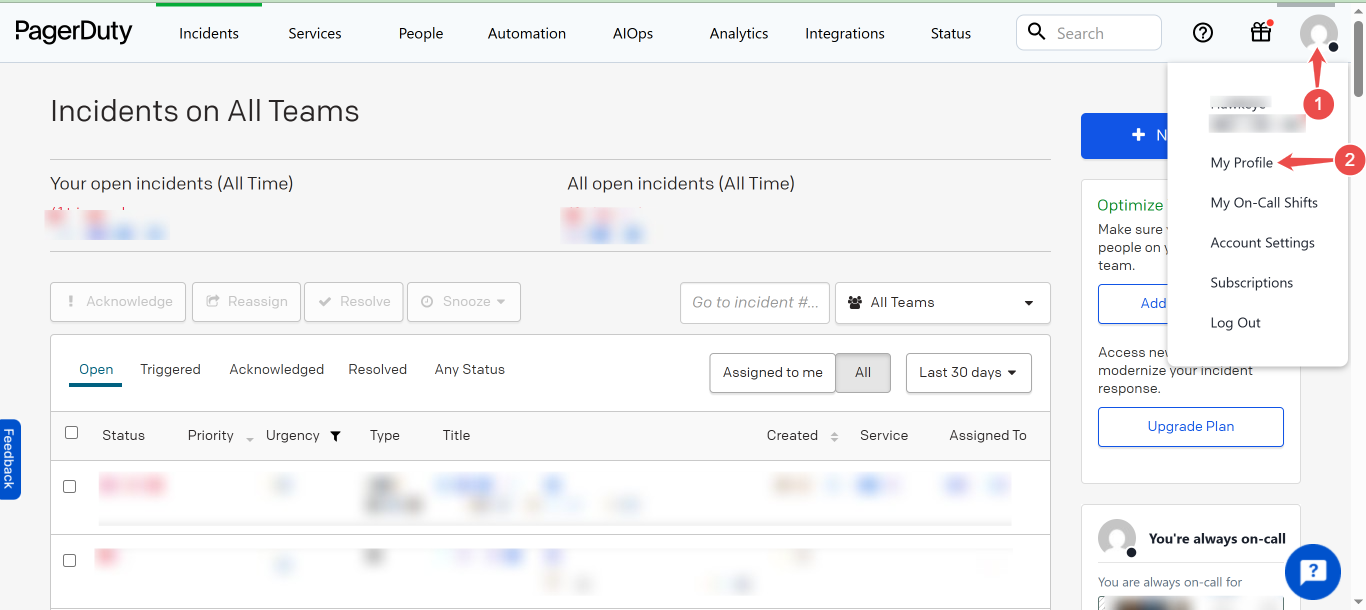
Fig.2 - PagerDuty profile
-
Locate User Settings: In the Profile page, click on User settings tab.
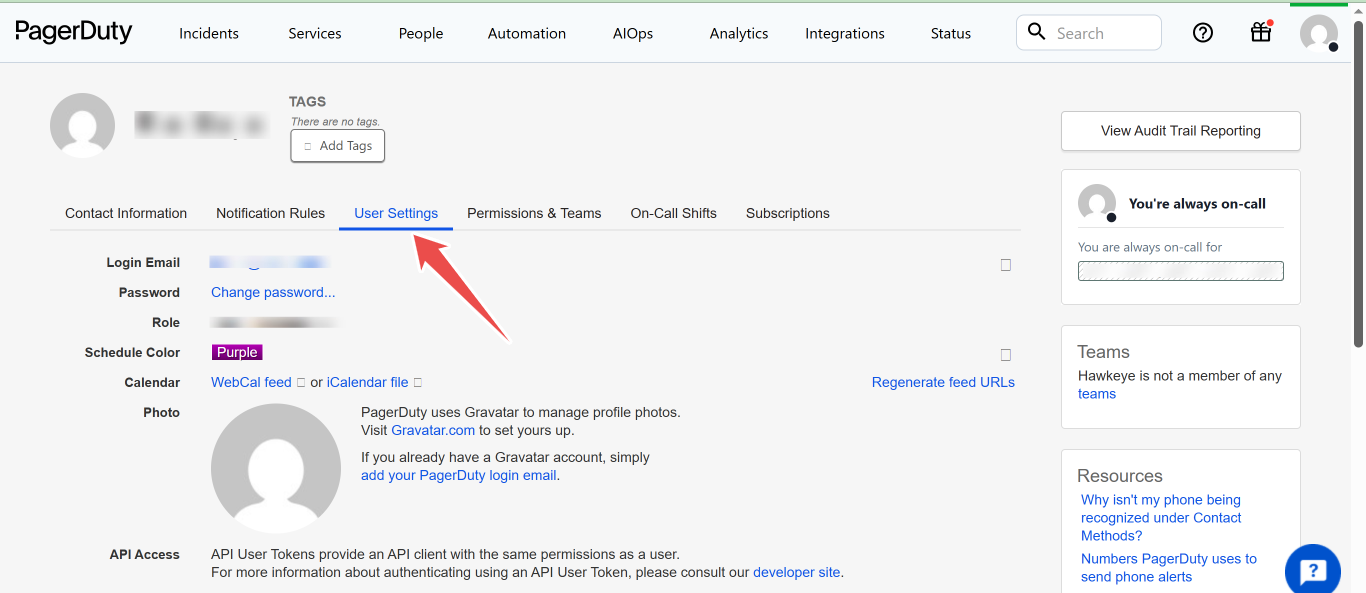
Fig.3 - PagerDuty user settings
-
Create a new API User Token: On the User Settings page, click the button labeled Create API User Token.
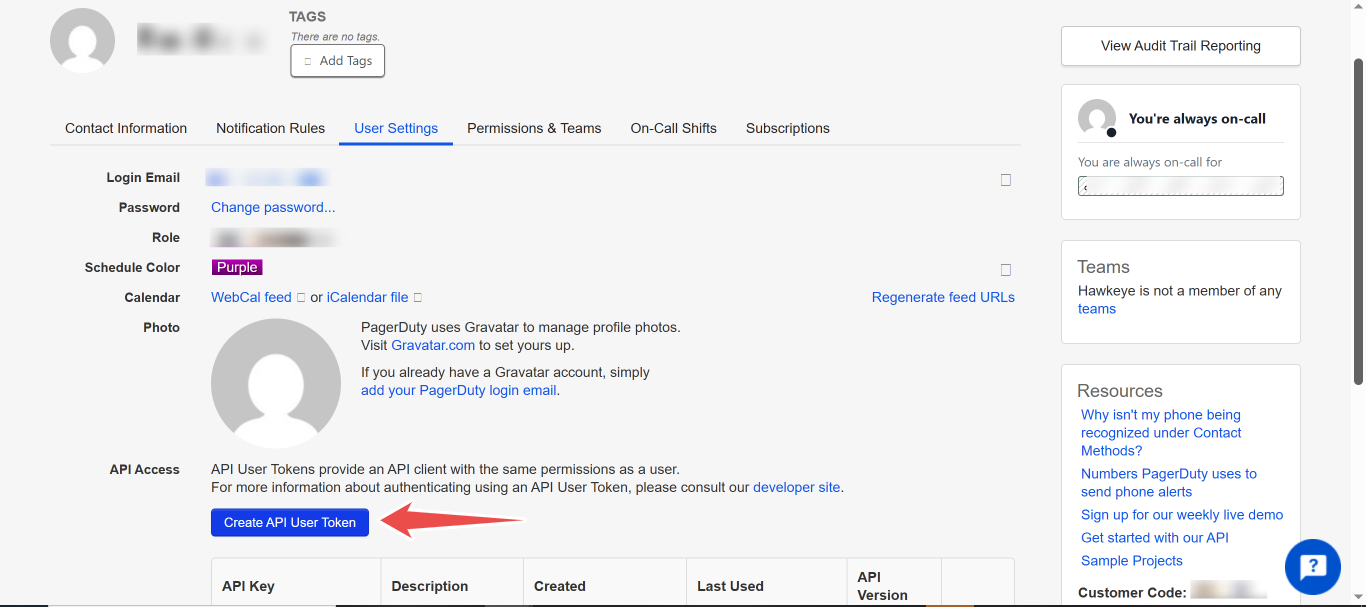
Fig.4 - PagerDuty create API user token
-
Input Description: Provide a description for the API token and click the Create token button.
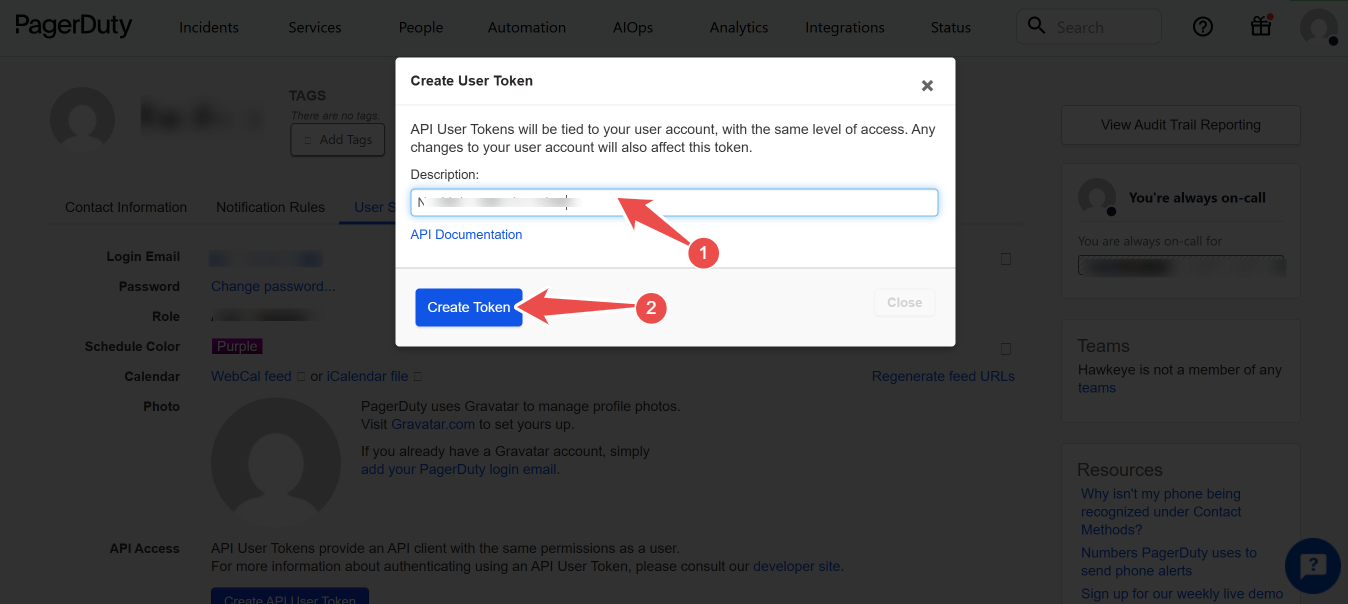
Fig.5 - PagerDuty user token description
-
Securely copy and save your new API User Token.
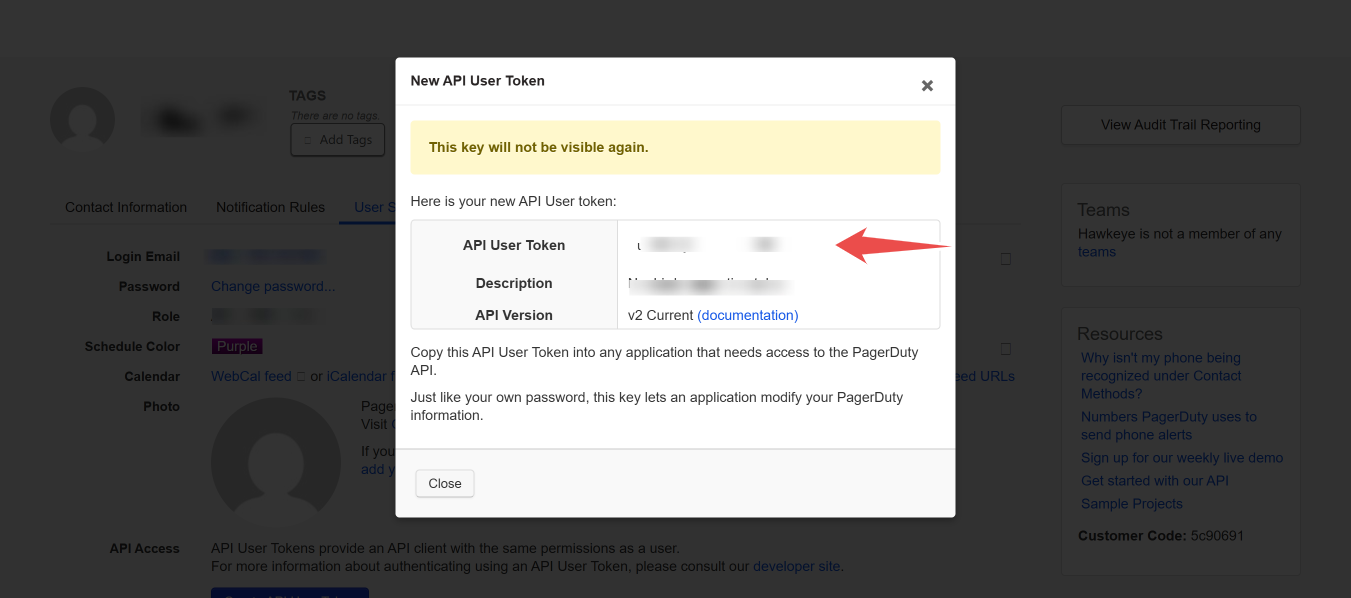
Fig.6 - Copy and save API user token
Step 2: Add PagerDuty connection to Hawkeye
Fig.7 - A walkthrough of how to add PagerDuty connection to Hawkeye
With your API Key ready, navigate to the Hawkeye dashboard and follow these next steps:
-
Navigate to the connections tab: On the dashboard, navigate to the Connections section and select the New Connection card.
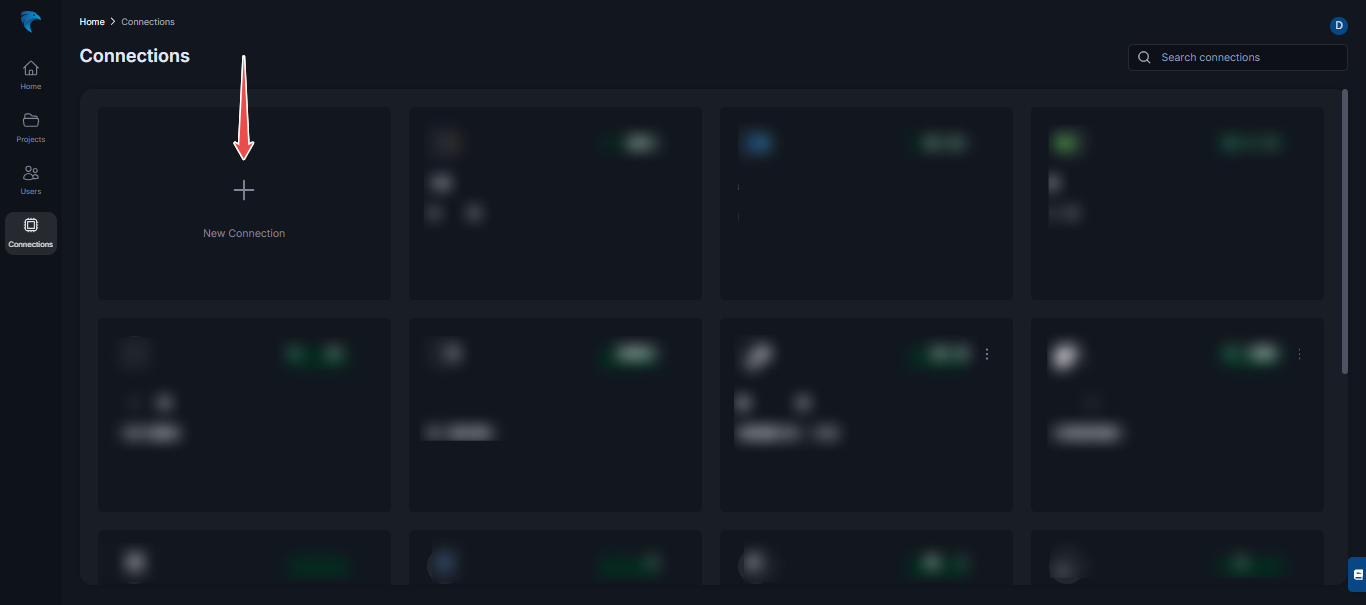
Fig.8 - Connection dashboard page
-
Select PagerDuty connection: Select PagerDuty from the list of available connections.
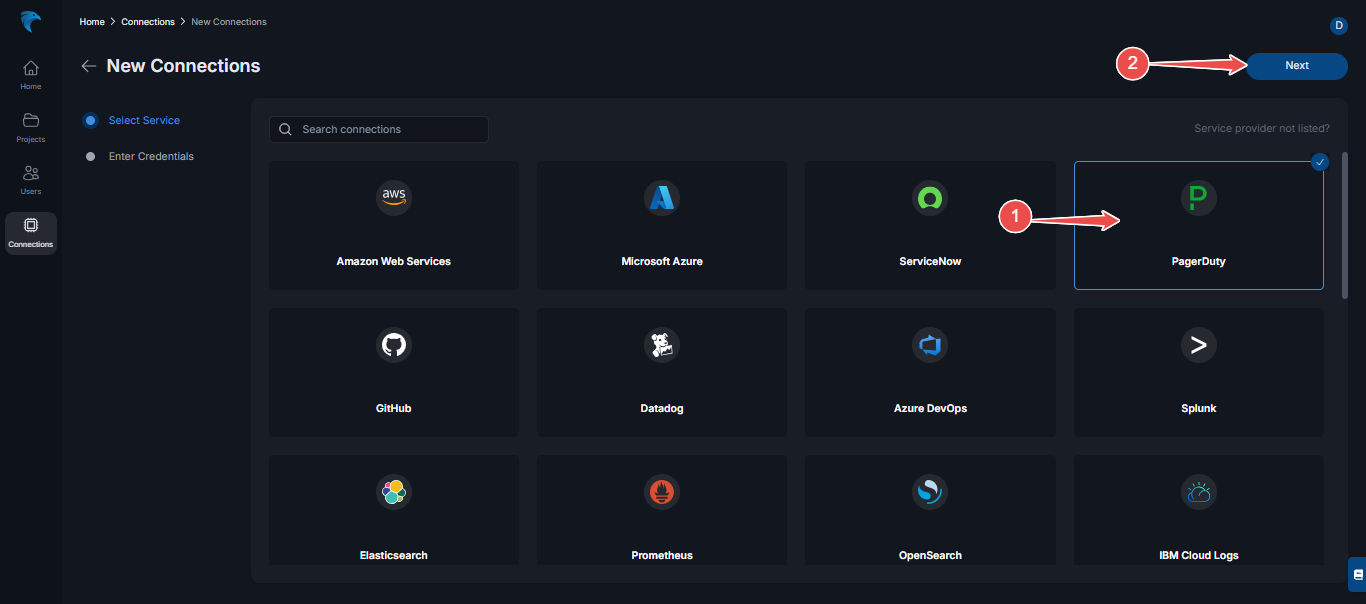
Fig.9 - PagerDuty connection page
After this, click on the Next button in the top right corner.
-
Enter credentials: Provide the following credentials:
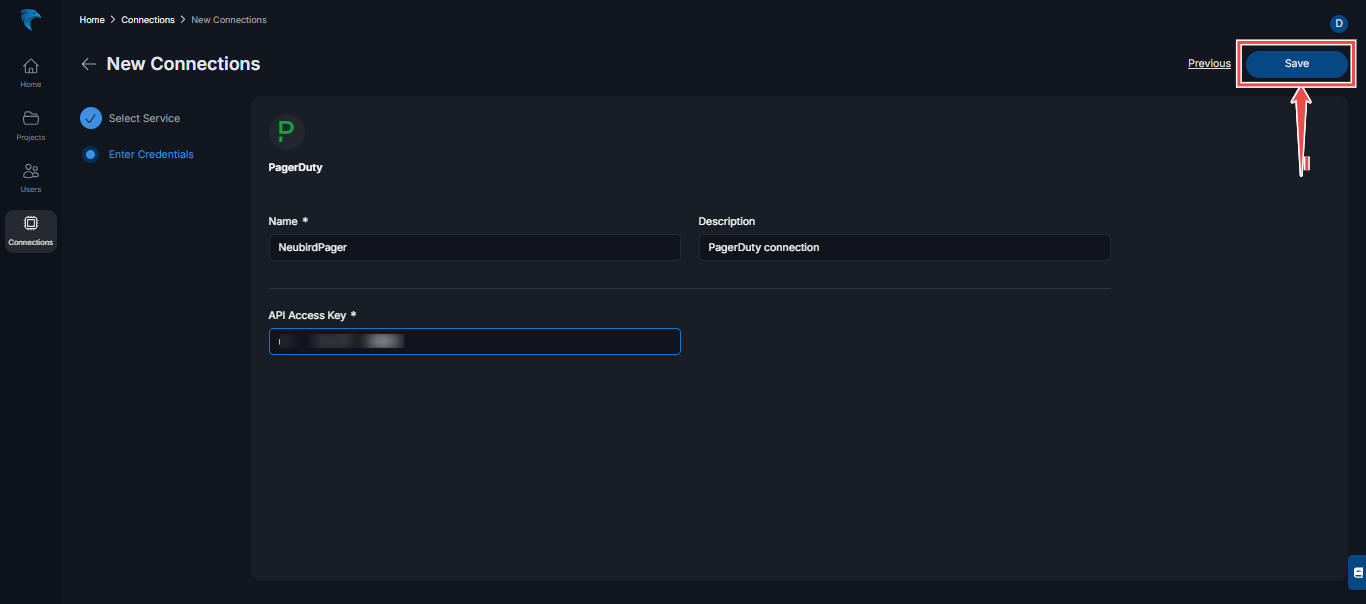
Fig.10 - Enter PagerDuty credentials
- Name: This is the name of the connection you’re about to create.
- Description: This gives an overview of the connection.
- API Key: This is the PagerDuty API Key you created in Step 1.
Verify all the credentials are correct and click the Save button at the top right corner.
-
Confirm that the PagerDuty connection was successfully created. If it did, you’ll see the connection card display like this on the Connections tab:
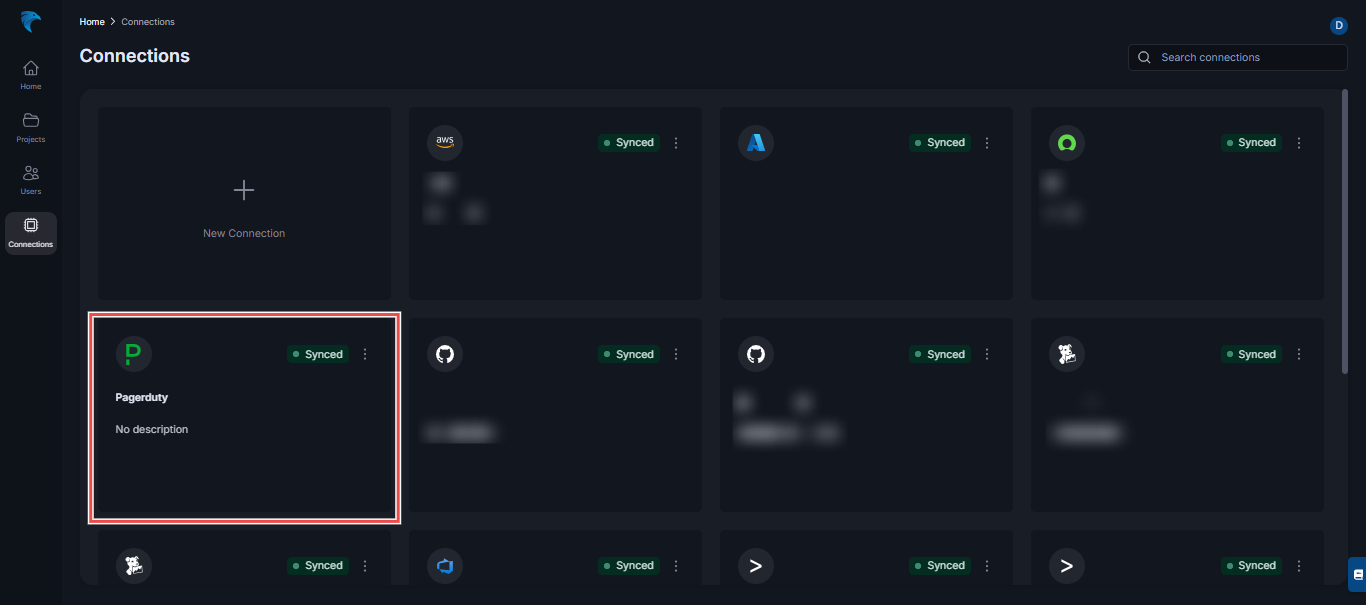
Fig.11 - Confirm PagerDuty connection
Step 3: Add PagerDuty connection to Project
Fig.12 - A walkthrough of hoow to add PagerDuty connection to Project
The following steps will guide you on how to add your PagerDuty connection to projects.
-
Navigate to the Projects Tab: In the Hawkeye dashboard, go to the Projects section and click on New project.
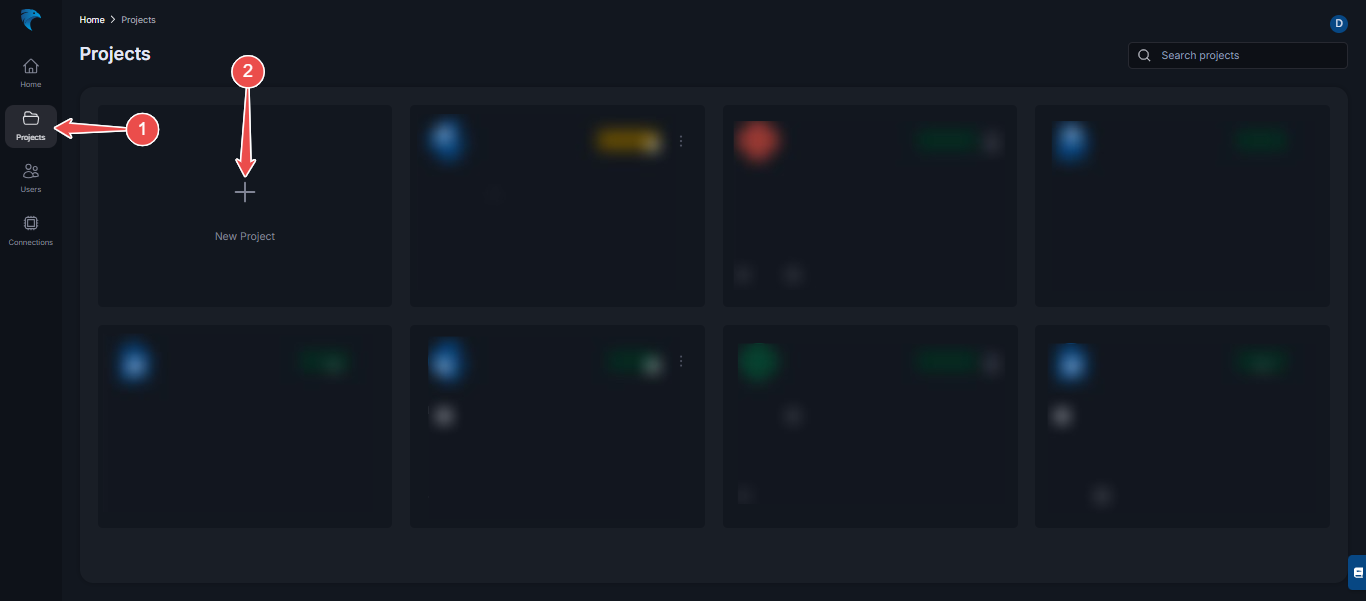
Fig.13 - Project dashboard page
-
Enter project details: In the new project page, enter the following details:
- Project name: Give your project a descriptive name.
- Project description: Enter a detailed description for your project.
- Color: Select a color you want to identify your project with.
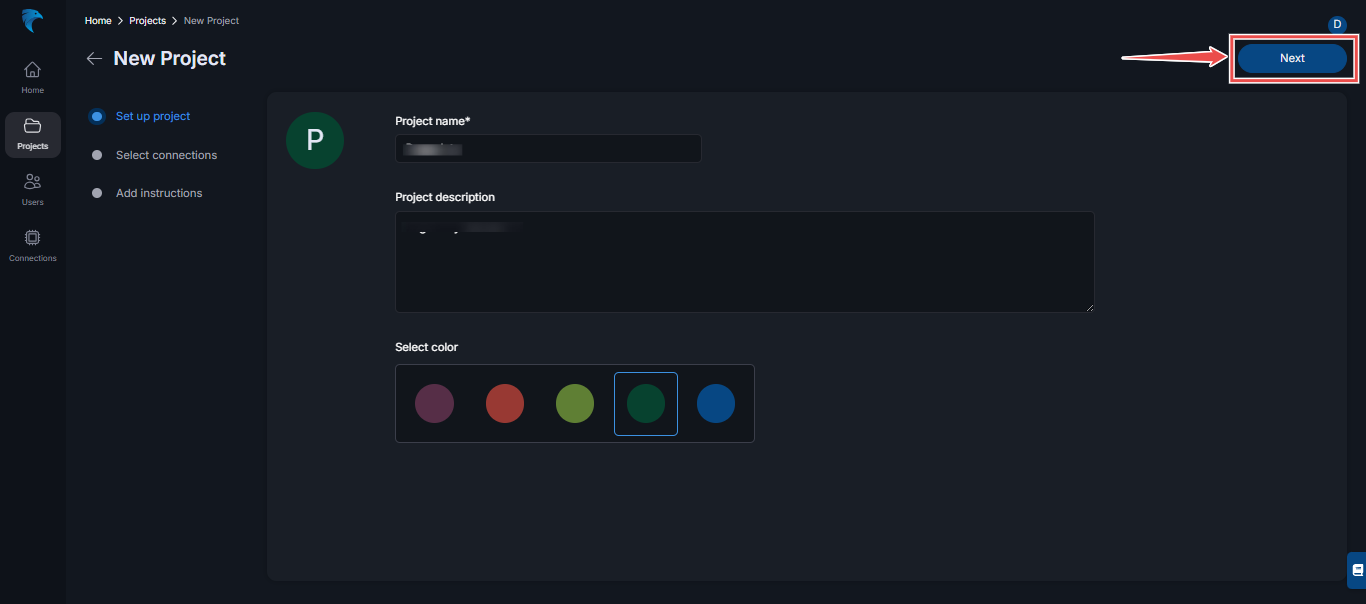
Fig.13 - Pager project details
-
Select connection: From the list of connections that appear, select PagerDuty. In the PagerDuty accordion;
- Check the Create automated session box to enable automated session
- Select the Treshold for priority: High, High & Medium or All
Click Next when done.
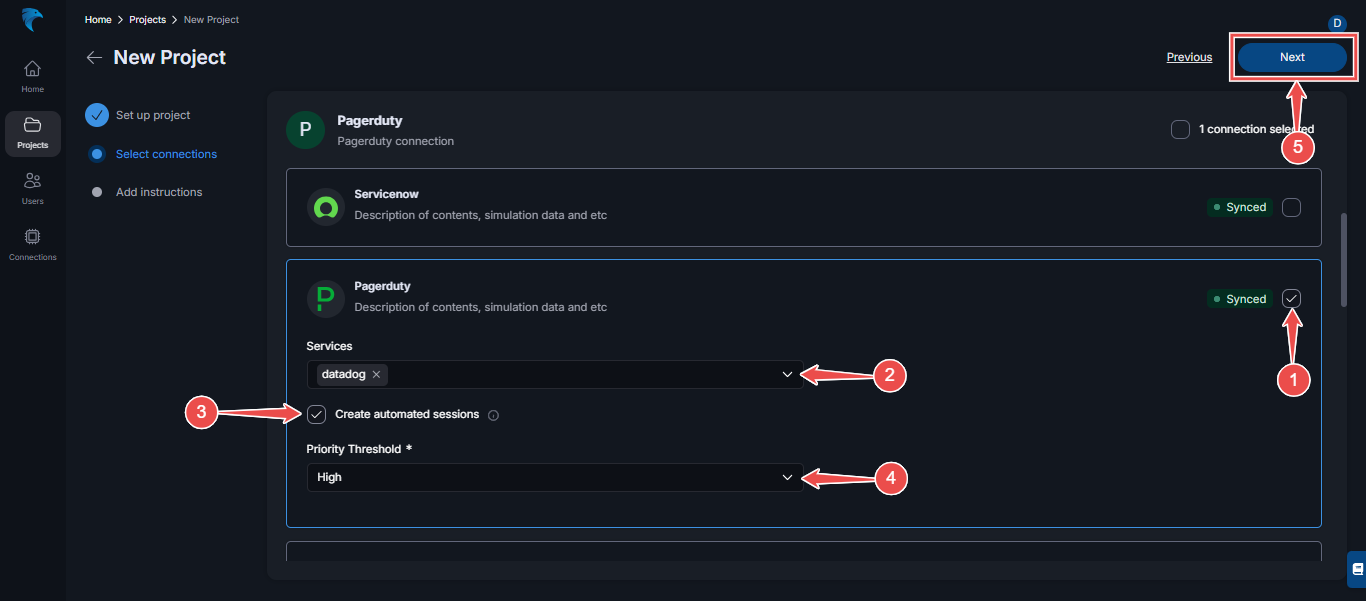
Fig.14 - PagerDuty project connection
-
Enter project Instructions: State precisely, the details of your project, and what resources you expect to monitor or ignore. (This helps Hawkeye understand the context of your project and to deliver better and more relevant analysis).
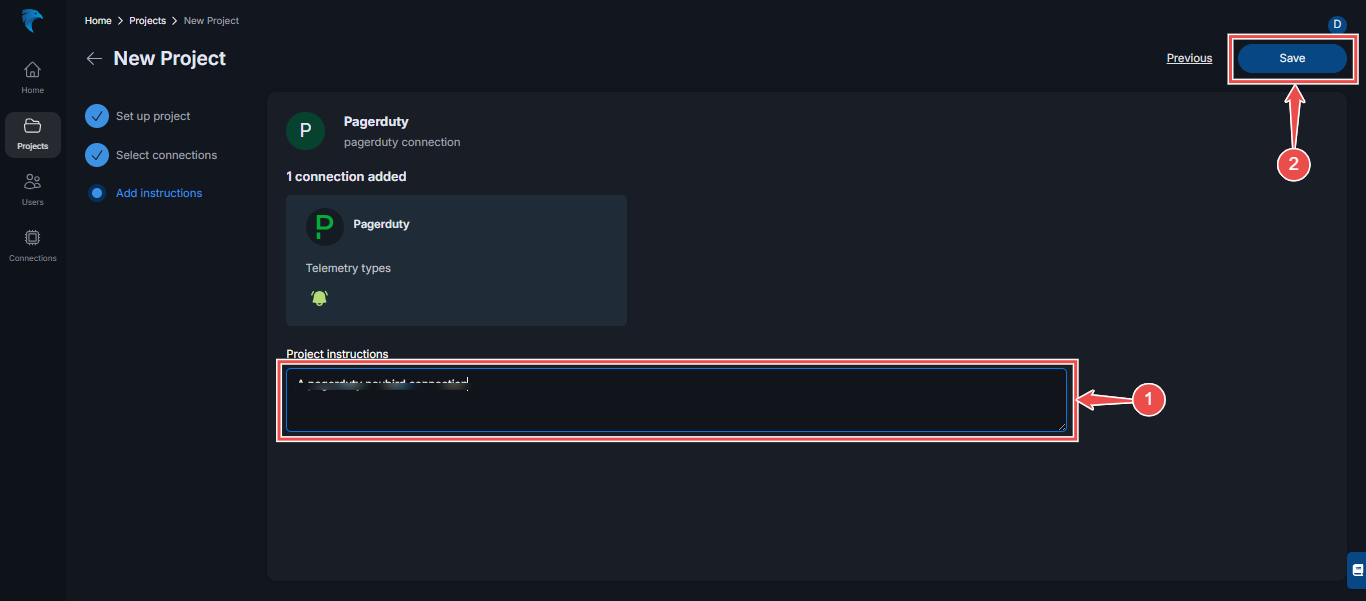
Fig.15 - PagerDuty project instructions
-
Navigate back to Project: After your Project has been created successfully, navigate back to Projects page.
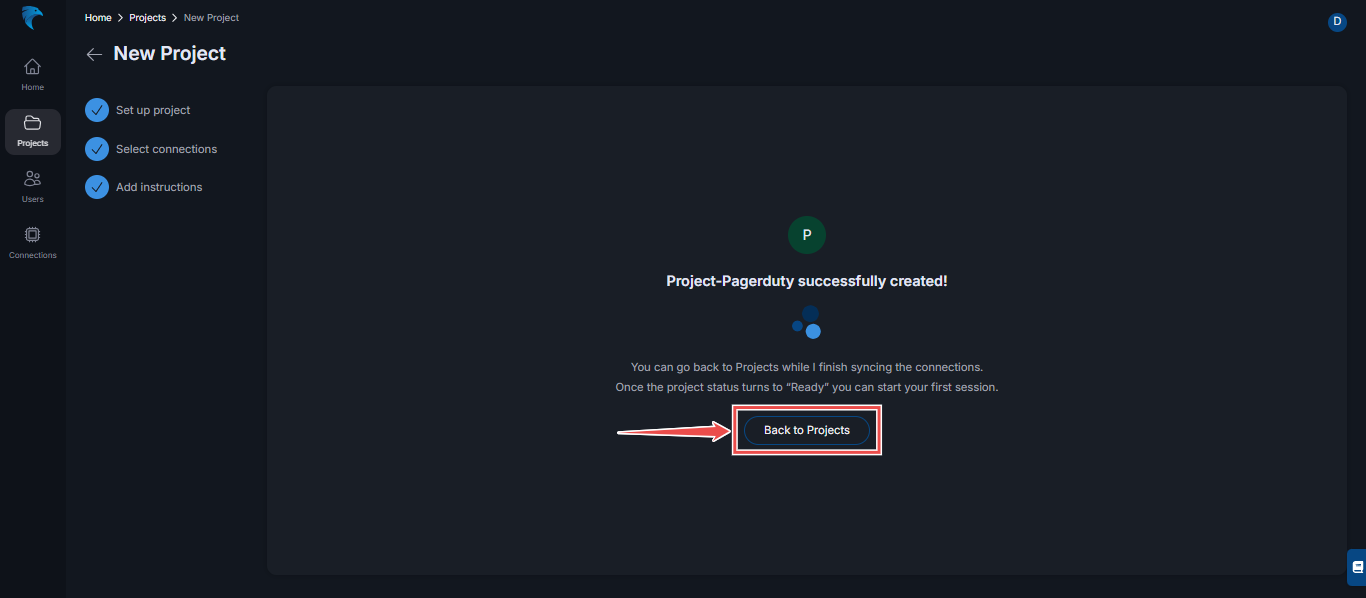
Fig.16 - PagerDuty back to Projects
-
View new project: In the list of Projects in the Projects page, you’ll find your newly created Project with PagerDuty connection.

Fig.17 - PagerDuty project ready
-
Start Session: If project status is Ready, click to start a new session.

Fig.18 - PagerDuty Session
-
Sessions Interface: The following tabs on the session interface, will help you navigate your alerts.
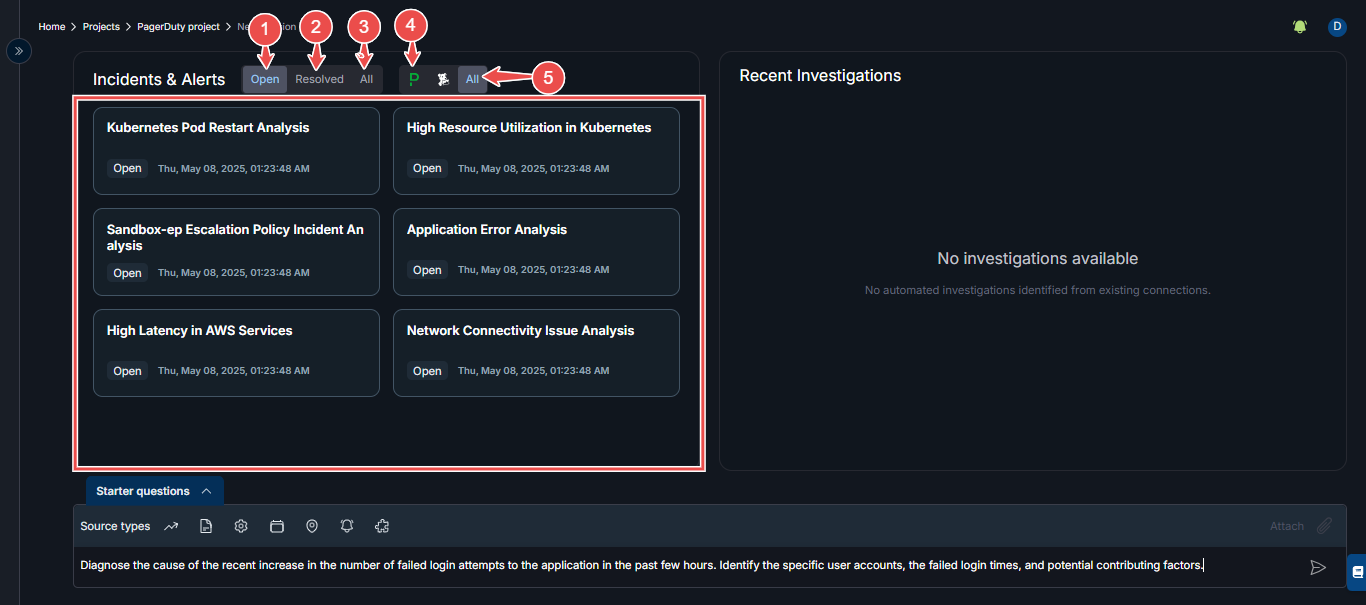
Fig.18 - PagerDuty Session interface
- Open tab displays only the alerts that are yet to be resolved.
- Resolved tab displays only the alerts that have been resolved.
- The All tab displays all both open and resolved alerts.
- This logo tabs display the services that are connected to automated sessions.
- You can view all the connected services using the last All tab.
-
Enter a prompt: Enter a question regarding your services or alerts to start a session.
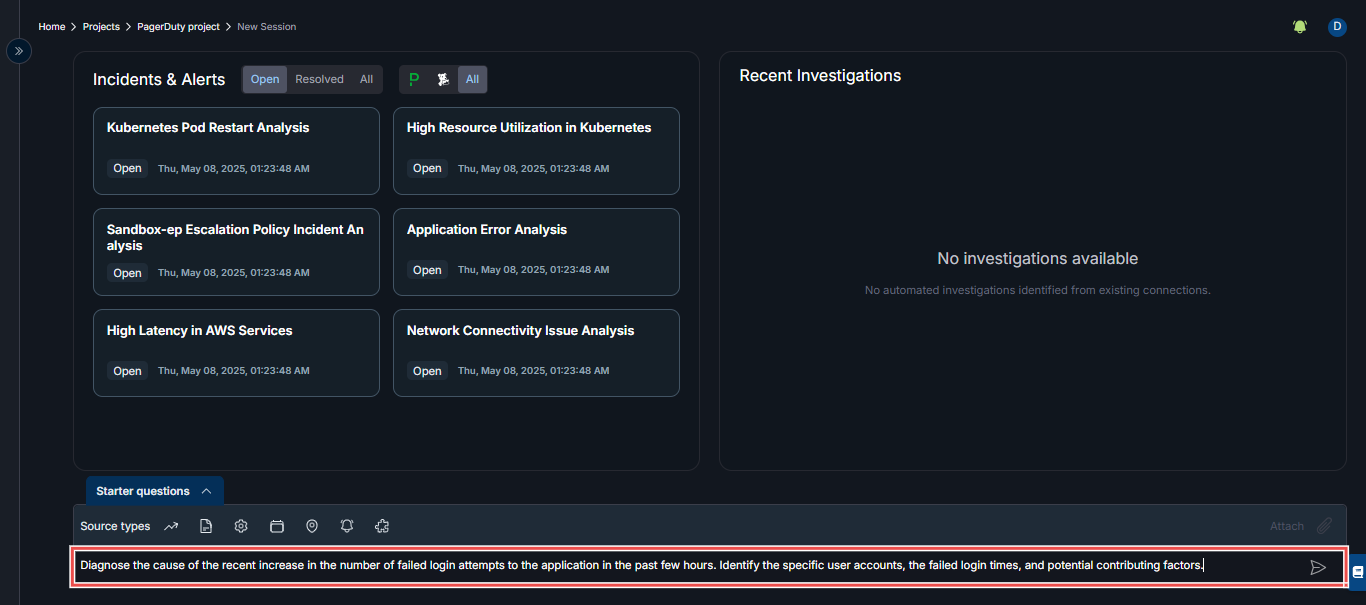
Fig.19 - PagerDuty Session prompt
-
Your session analysis is displayed
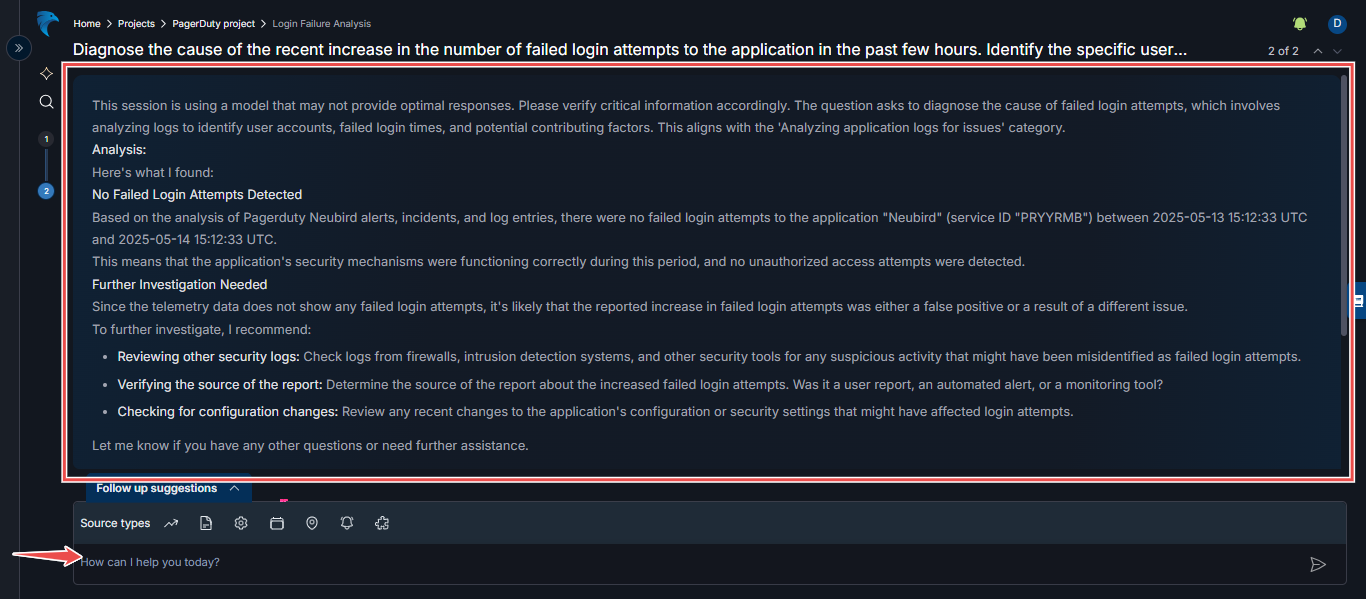
Fig.20 - PagerDuty Session analysis