Datadog
Connecting Hawkeye to your Datadog account allows us to collect application and infrastructure telemetry, which includes metrics, traces, and logs. These telemetry data enable real-time monitoring and alerting through the Hawkeye dashboard.
To ensure an easy connection with Hawkeye, you will authenticate using a Datadog API Key, APP ID, and Endpoint.
Step 1: Setup Datadog Integration
Fig.1 - A walkthrough of Datadog integration
To retrieve these credentials, you’ll need to sign into your Datadog account. The following steps will guide you on how to retrieve your credentials.
Generate API Key.
-
Sign in to your Datadog account and navigate to the User profile.

Fig.2 - Datadog user profile
-
From the drop-down menu that appears, under Organization Settings, select API Keys.
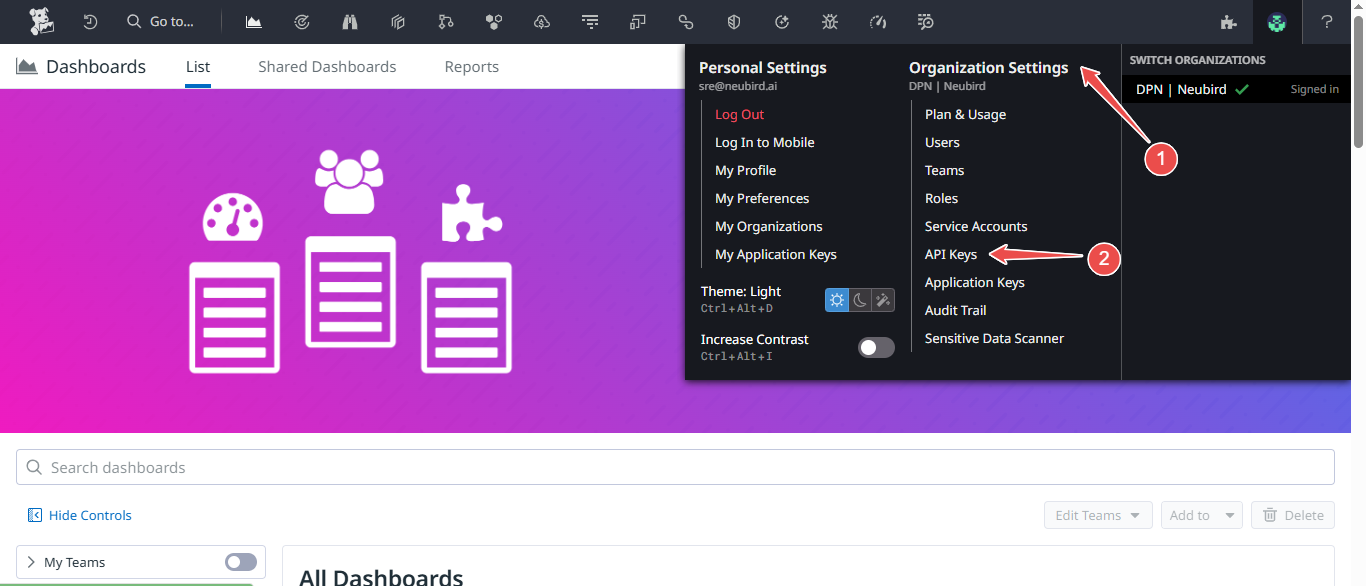
Fig.3 - Datadog organization settings
-
At the top-right corner of the page, click New Key to generate a new API Key.
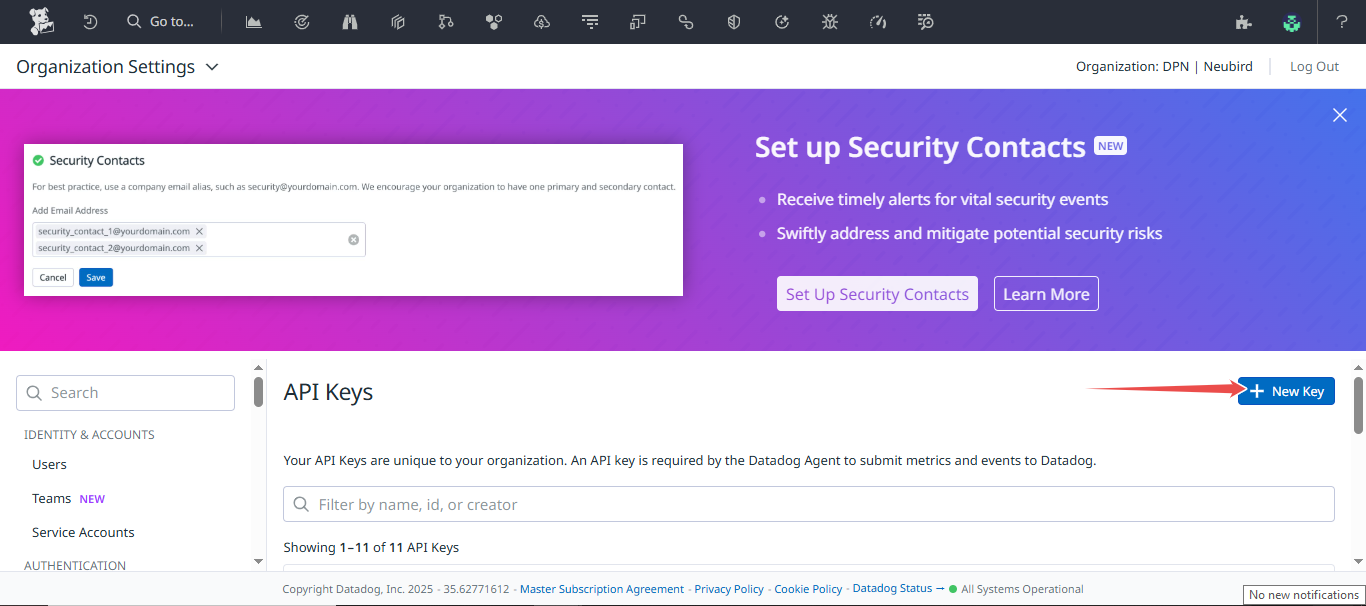
Fig.4 - Generate new API key
-
Enter a name for your API Key in the input provided, and click create to continue.

Fig.5 - Enter API key name
-
Your new API Key has been created. Securely copy your key.
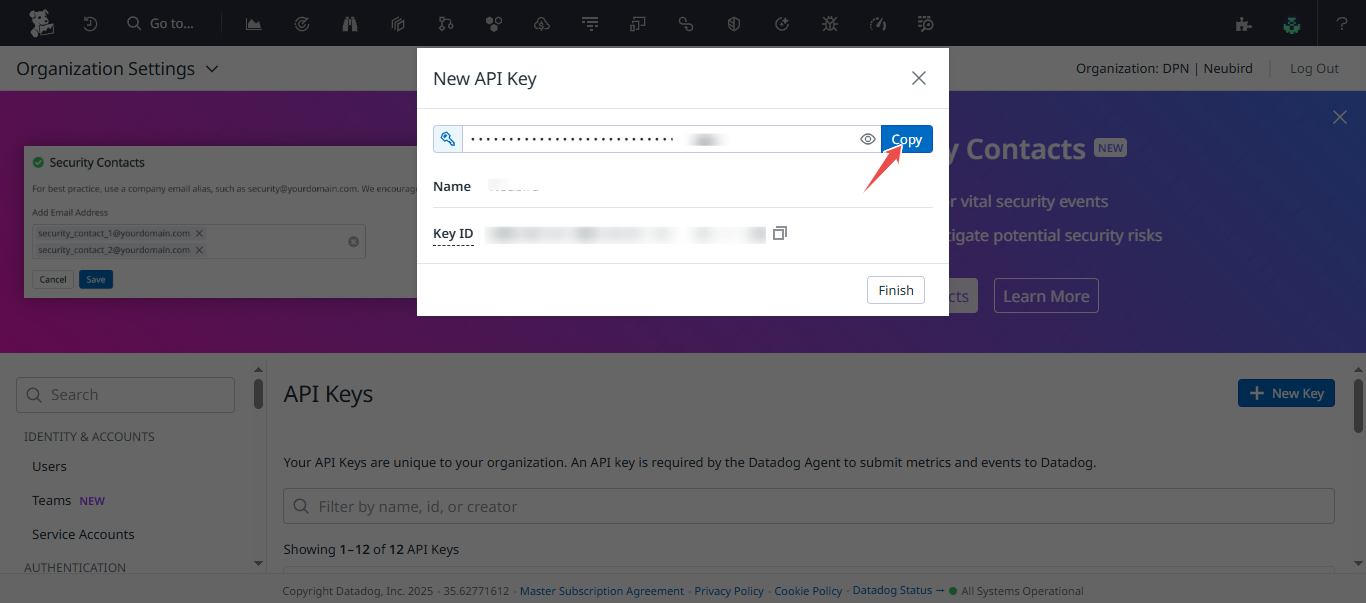
Fig.6 - Copy API key
Generate Application Key.
-
Navigate to the User profile at the top-right corner of your Datadog dashboard.
Fig.7 - Datadog user profile
-
From the drop-down menu that appears, under Organization Settings, select Application Keys.
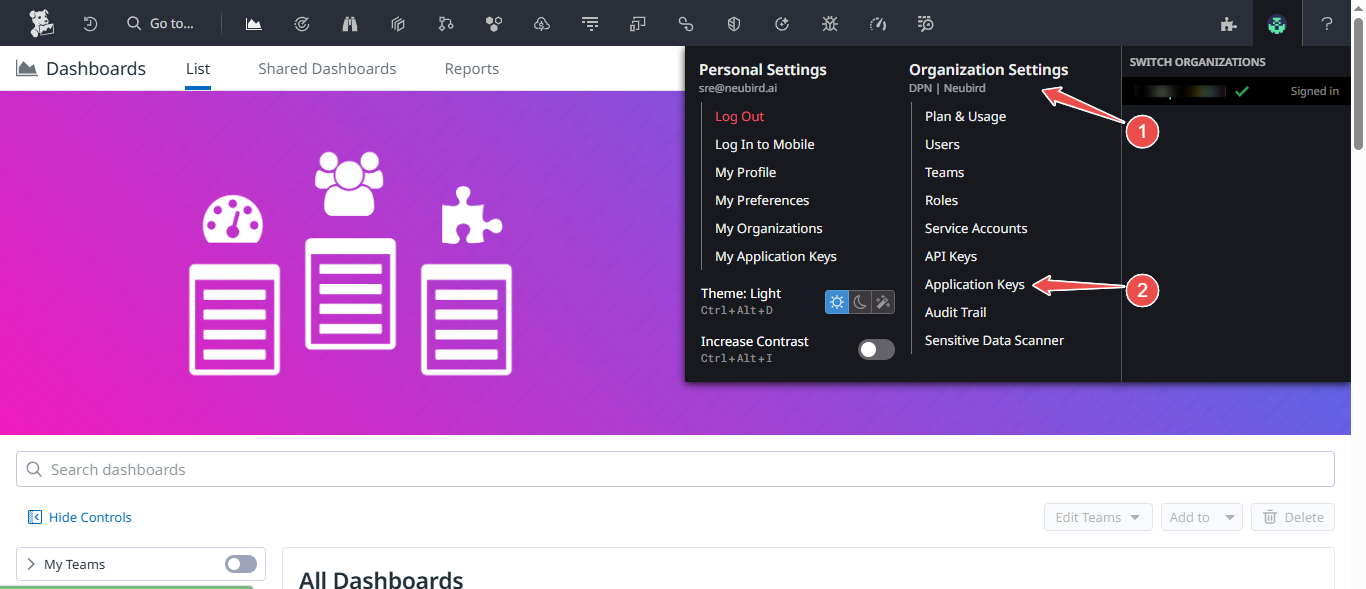
Fig.8 - Datadog organization settings
-
At the top-right corner of the page, click New Key to generate a new Application Key.
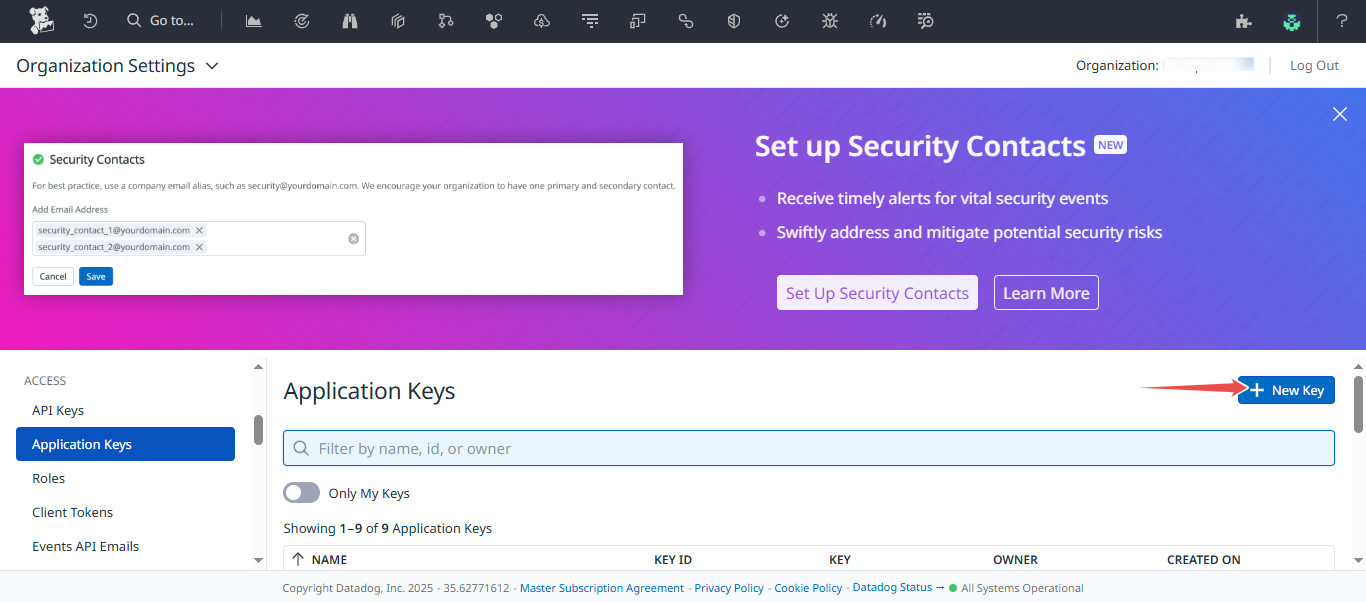
Fig.9 - Generate new application key
-
Enter a name for your Application Key in the input provided, and click create to continue.
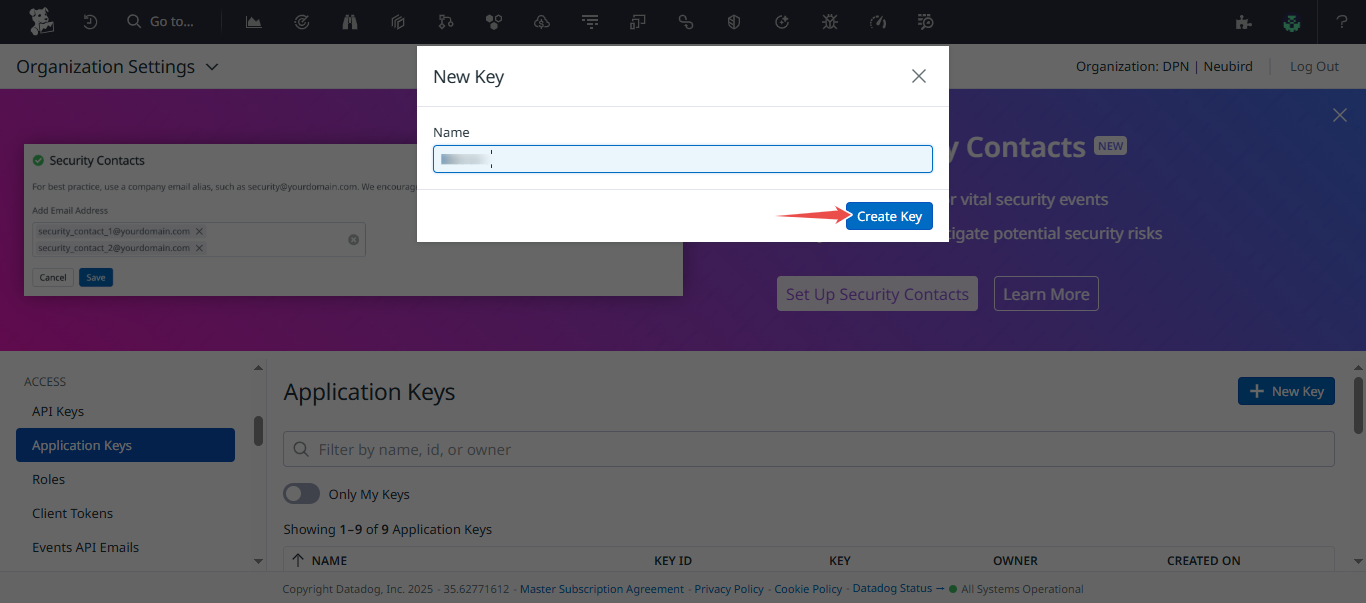
Fig.10 - Enter a name for your appplication key
-
Click Edit to modify Application key access
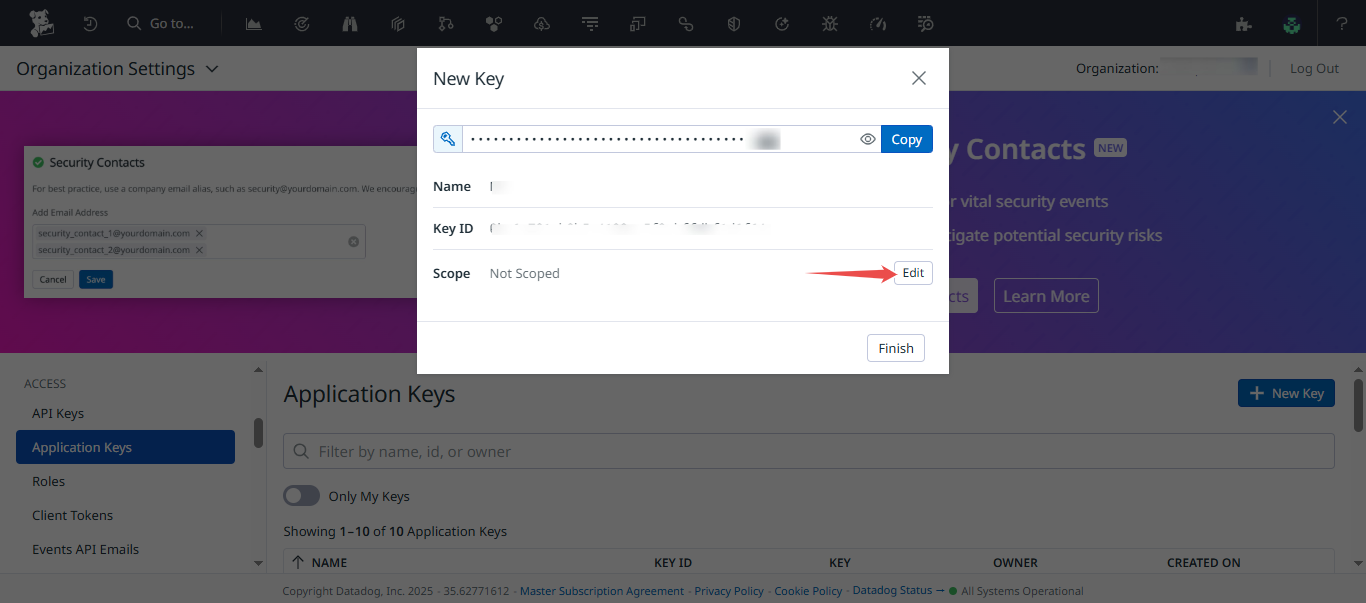
Fig.11 - Modify application key access
Select the following permissions and click Save after selection, to save configuration
- apm_read
- events_read
- metrics_read
- monitors_read
- logs_read_data
- logs_read_index_data
- logs_modify_indexes
- logs_read_workspaces
- logs_read_config
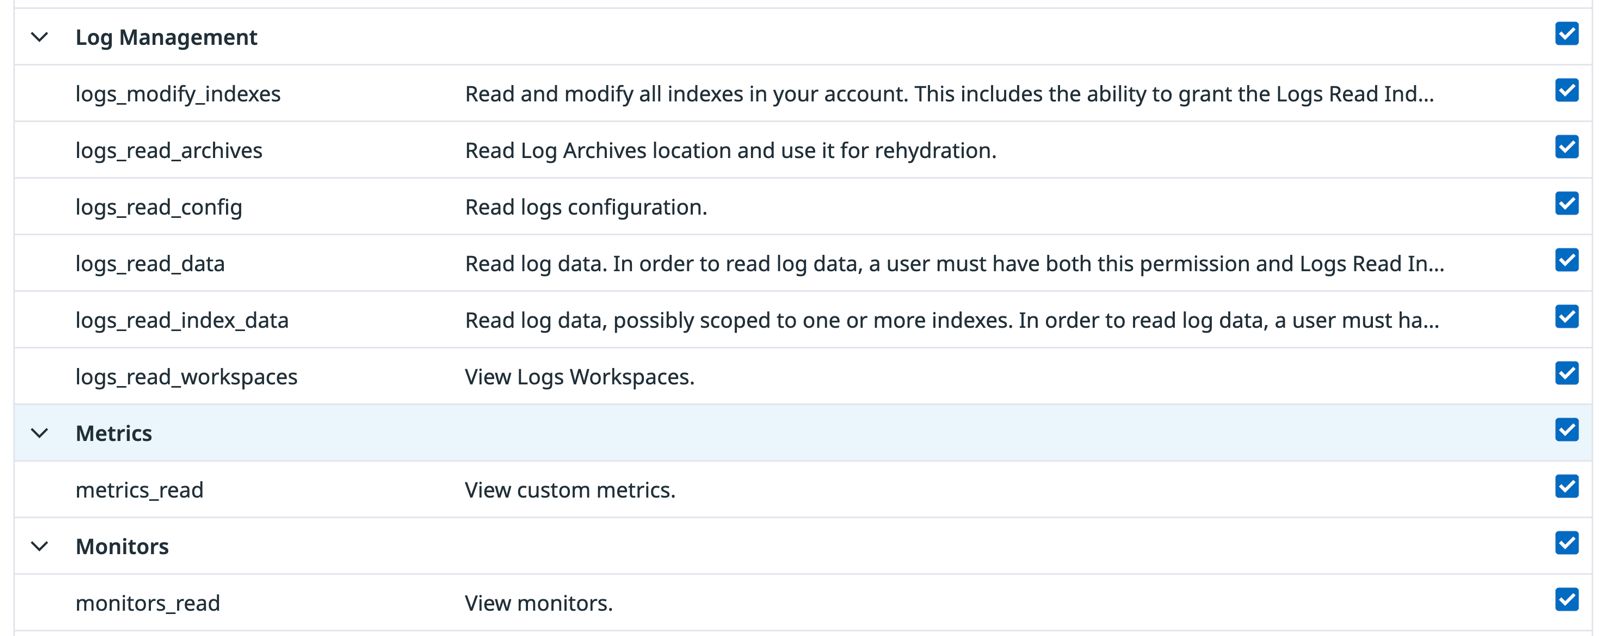
Fig.12 - Save configuration
-
Safely copy your newly created Application key.
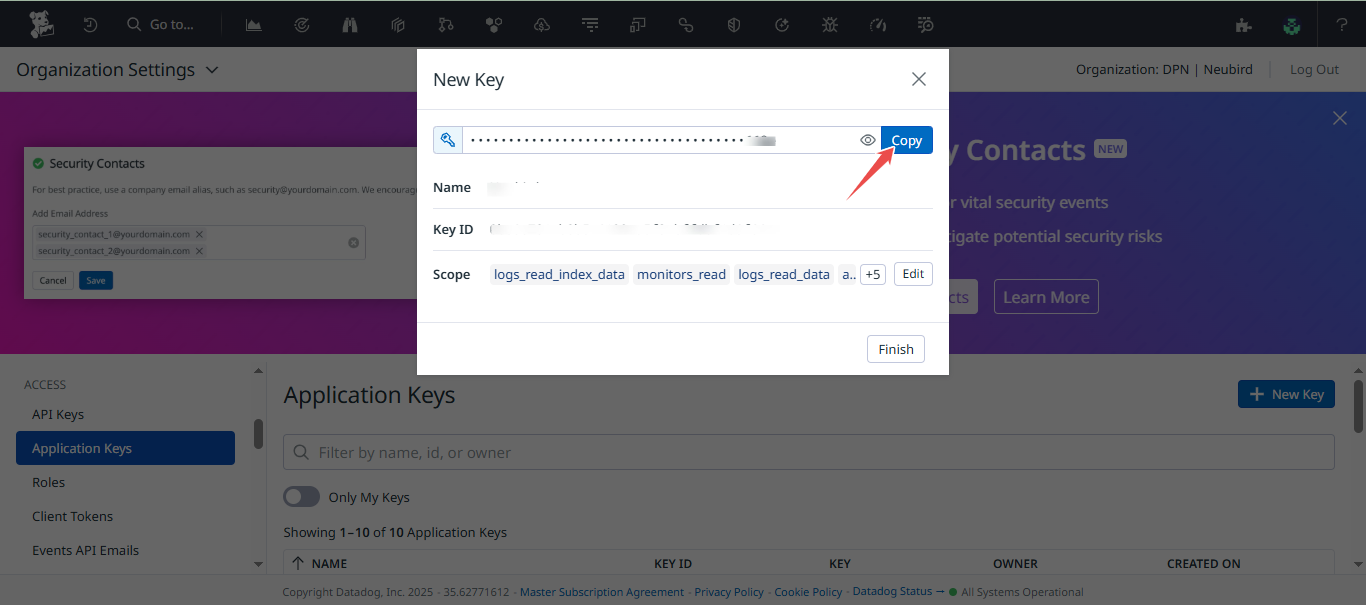
Fig.13 - Copy application key
Obtain Endpoint
To obtain your Datadog Endpoint, copy the datadog url from your browser . E.g - https://app.datadoghq.com or https://us5.datadoghq.com/
Step 2: Add Datadog Connection to Hawkeye
Now that you have your API Key, APP ID, and Endpoint, proceed to the Hawkeye dashboard to complete the connection setup.
-
Navigate to the Connections Tab: In the Hawkeye dashboard, go to the Connections section and click on New Connection.
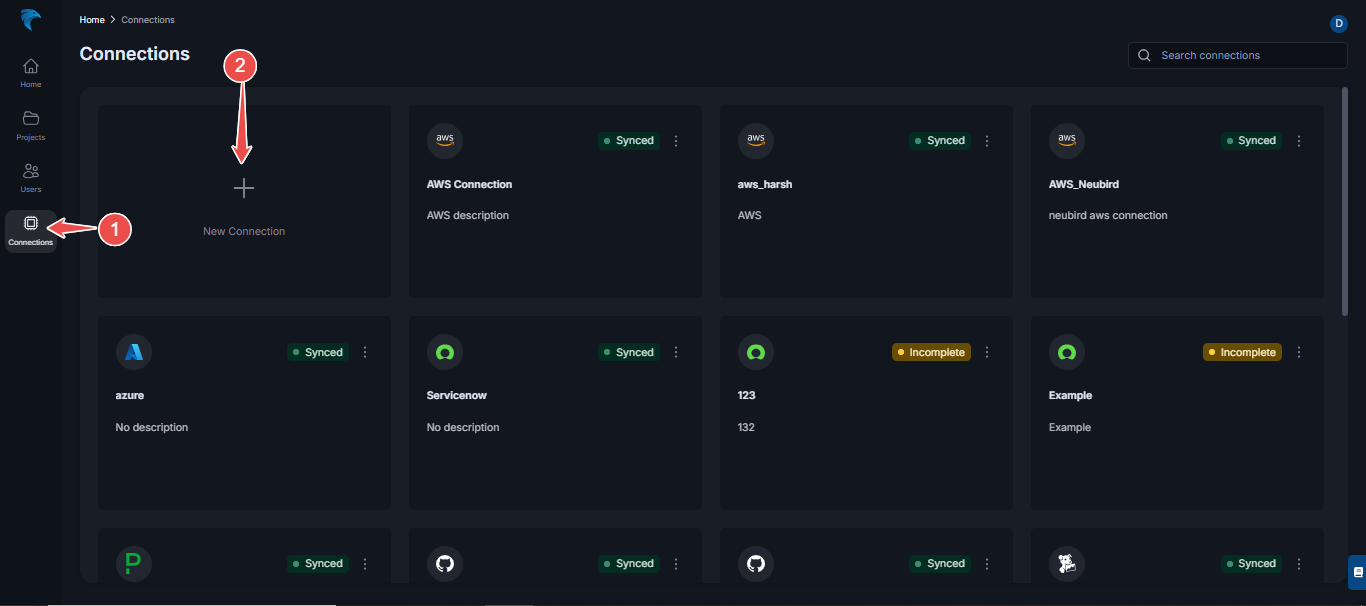
Fig.14 - Create new Datadog connection dashboard
-
Select Datadog: From the list of available integrations, select Datadog.
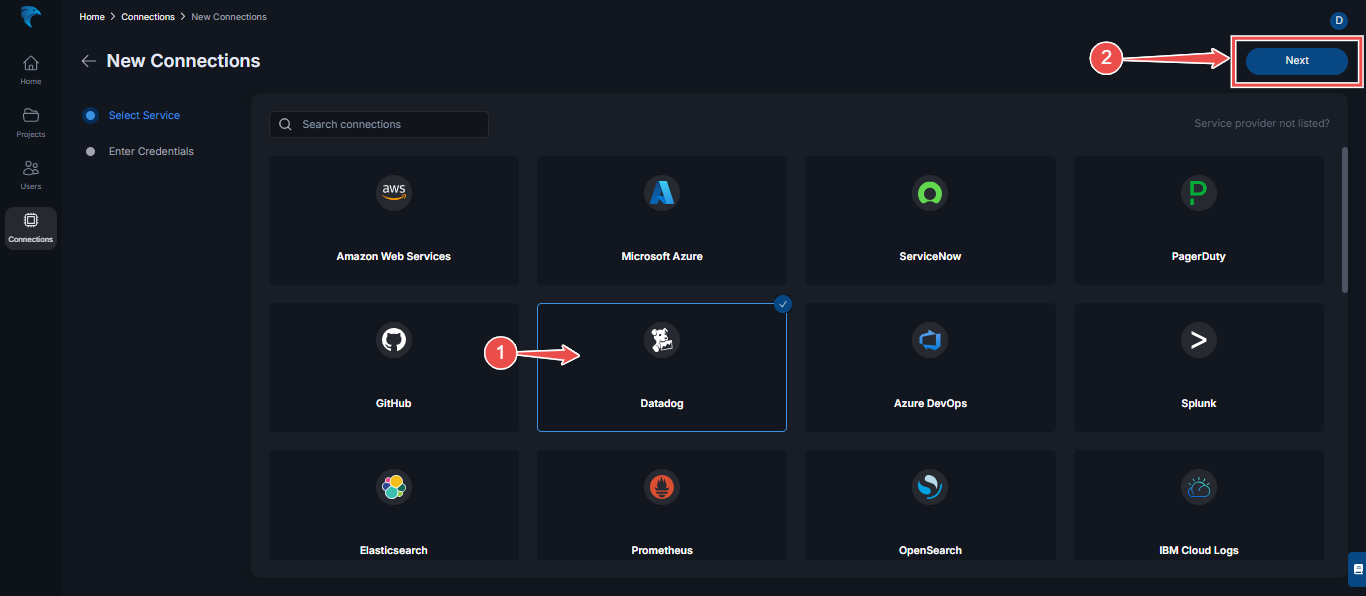
Fig.15 - Select Datadog
Then, click Next at the top right corner.
-
Enter Credentials: Provide the following credentials:
- Name: Give your connection a descriptive name.
- Description: Optionally, add a description for the integration.
- API Key: Paste the API Key you generated from your Datadog account.
- APP ID: Enter the APPLICATION ID you generated from your Datadog account.
- Endpoint: Enter the DATADOG URL from your browser.

Fig.16 - Enter credentials
Click Save to complete the setup.
-
Verify connection: Once the connection is successfully established, navigate to the connections section in Hawkeye. You should see the Datadog connection card displayed on your dashboard.
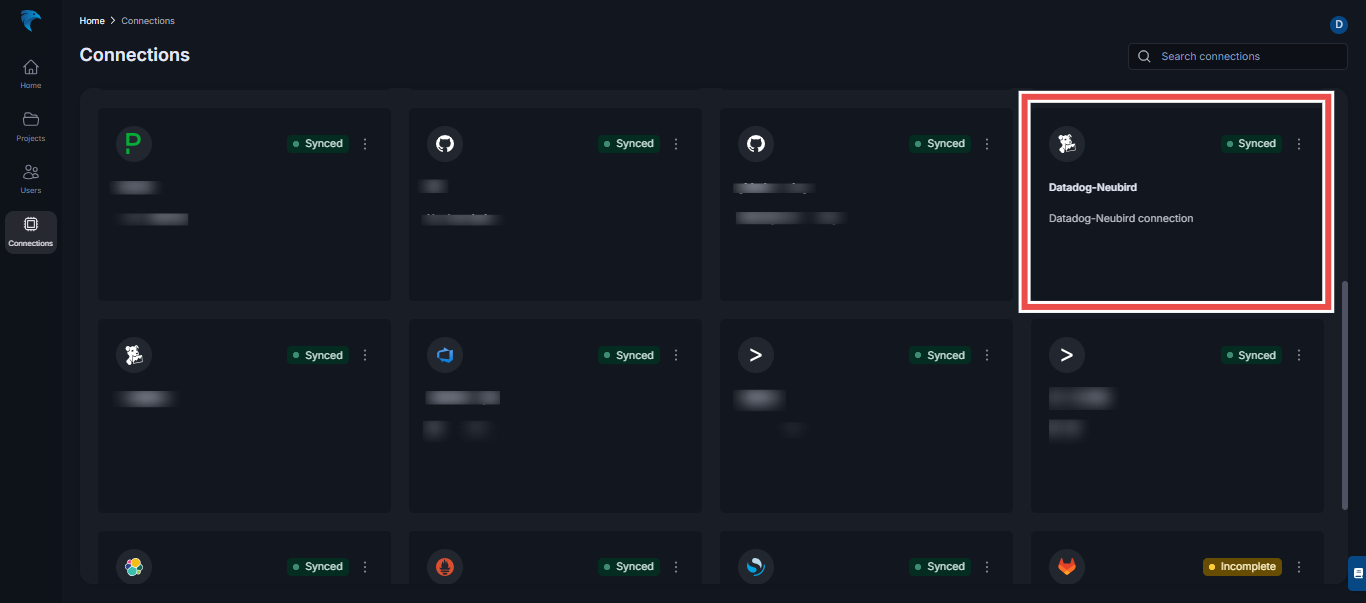
Fig.17 - Verify connection
Step 3: Adding Datadog connection to Project
Fig.18 - A walkthrough of how to add Datadog connection to Project
The following steps will guide you on how to add your Datadog connection to projects.
-
Navigate to the Projects Tab: In the Hawkeye dashboard, go to the Projects section and click on New project.
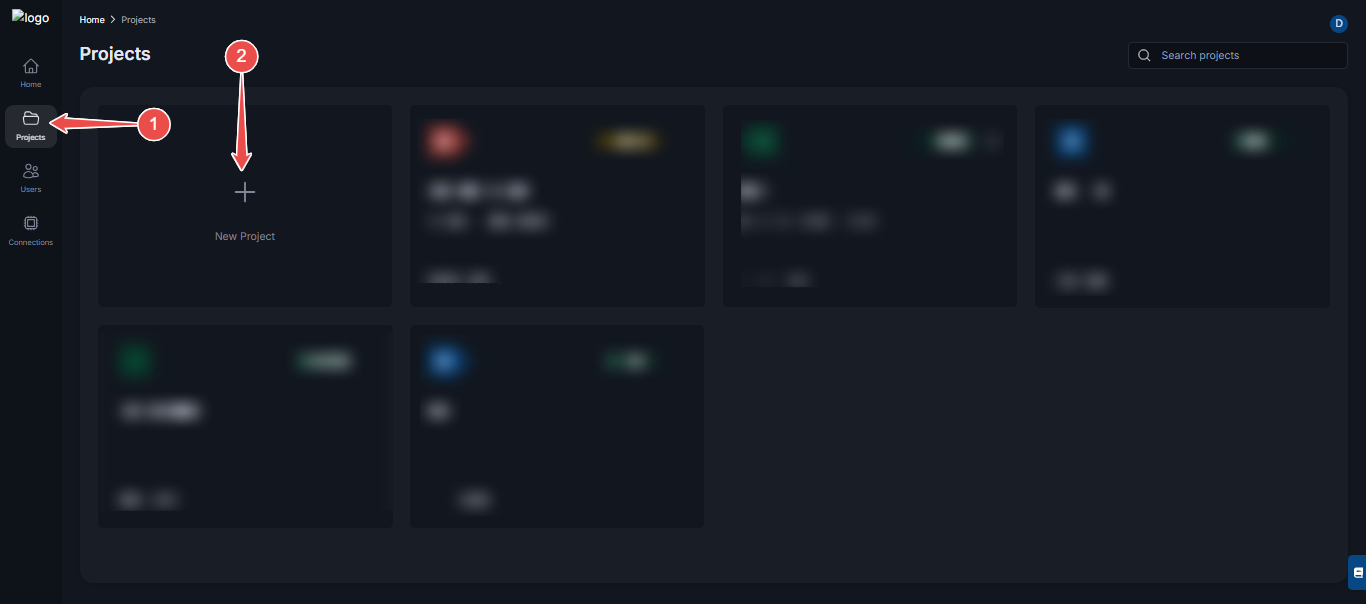
Fig.19 - Datadog new project
-
Enter project details: In the new project page, enter the following details:
- Project name: Give your project a descriptive name.
- Project description: Enter a detailed description for your project.
- Color: Select a color you want to identify your project with.
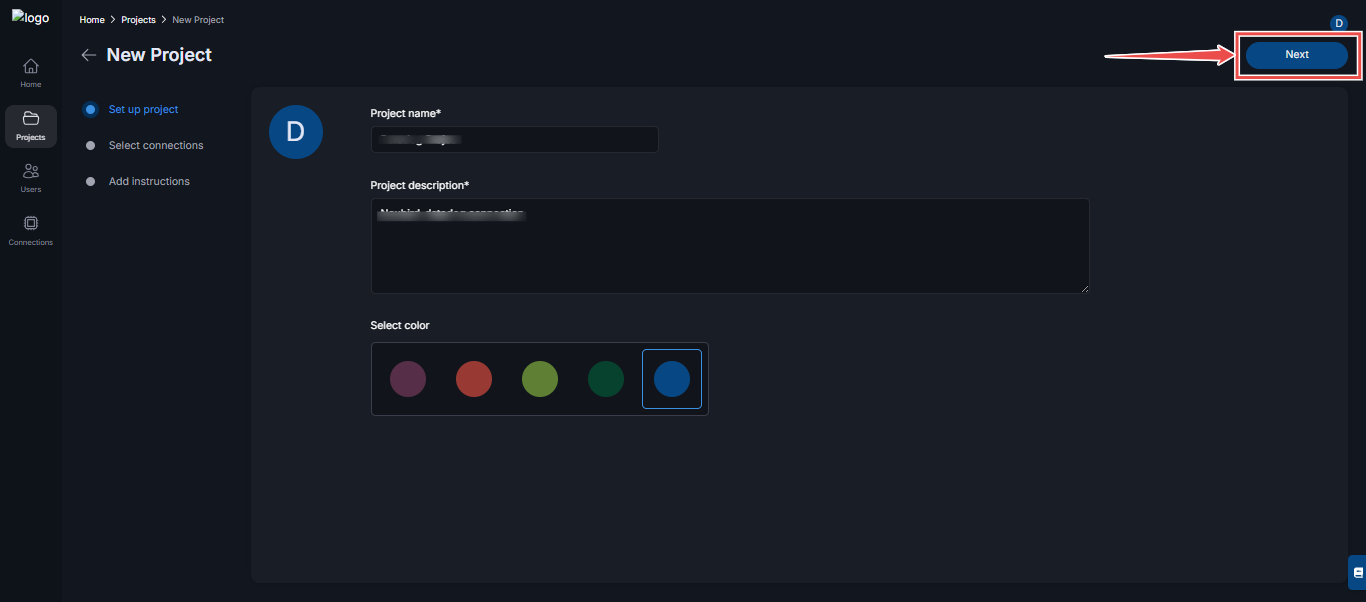
Fig.20 - Datadog Project details
-
Select connection: From the list of connections that appear, select Datadog. In the Datadog accordion;
- Check the Create automated session box to enable automated session
- Select the Treshold for priority: High, High & Medium or All
Click Next when done.
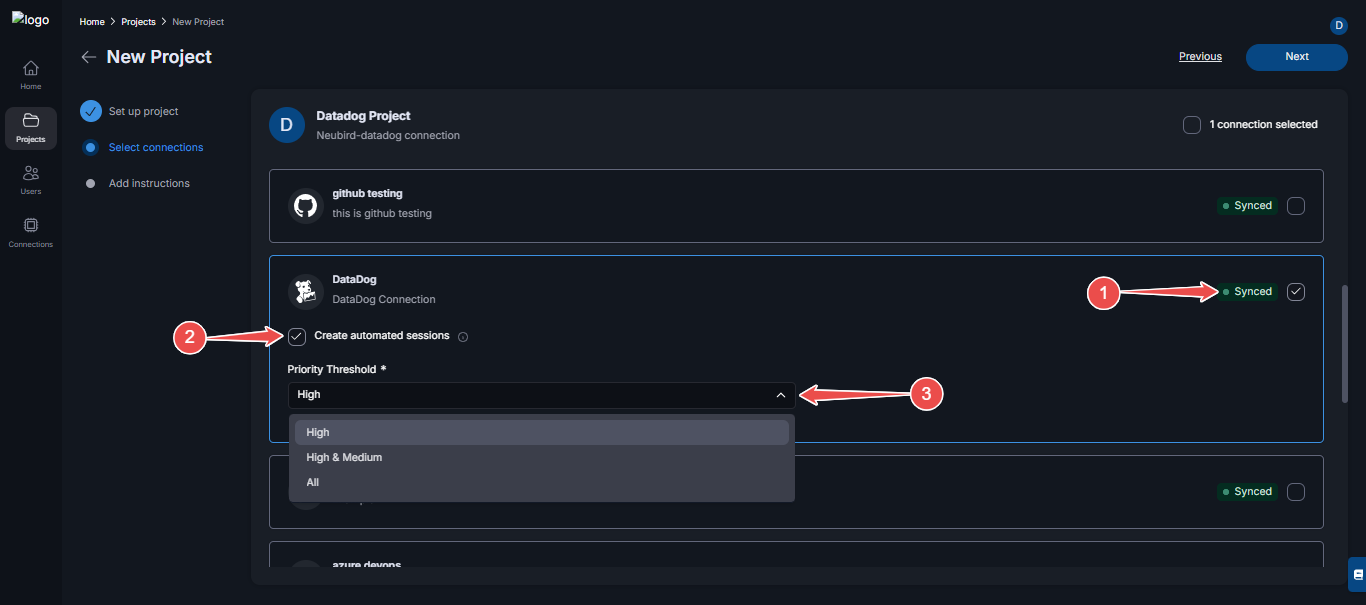
Fig.21 - Select connection
-
Enter project Instructions: State precisely, the details of your project, and what resources you expect to monitor or ignore. (This helps Hawkeye understand the context of your project and to deliver better and more relevant analysis).
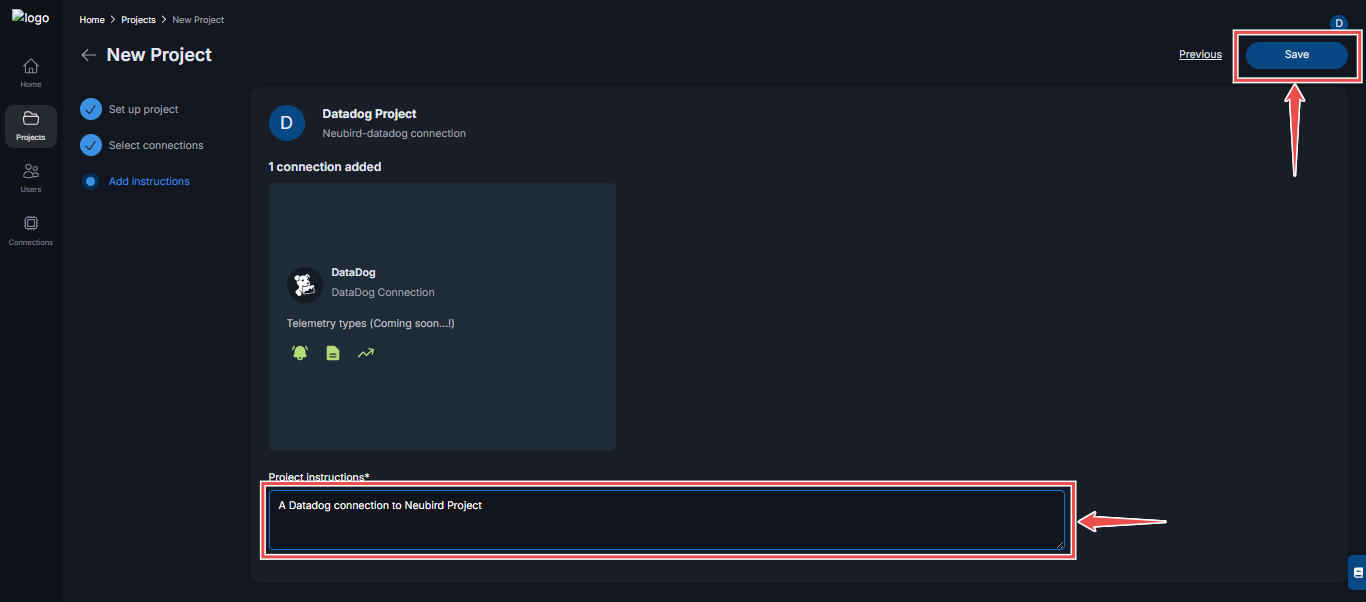
Fig.22 - Enter Datadog project instructions
-
Navigate back to Project: After your Project has been created successfully, navigate back to Projects page.
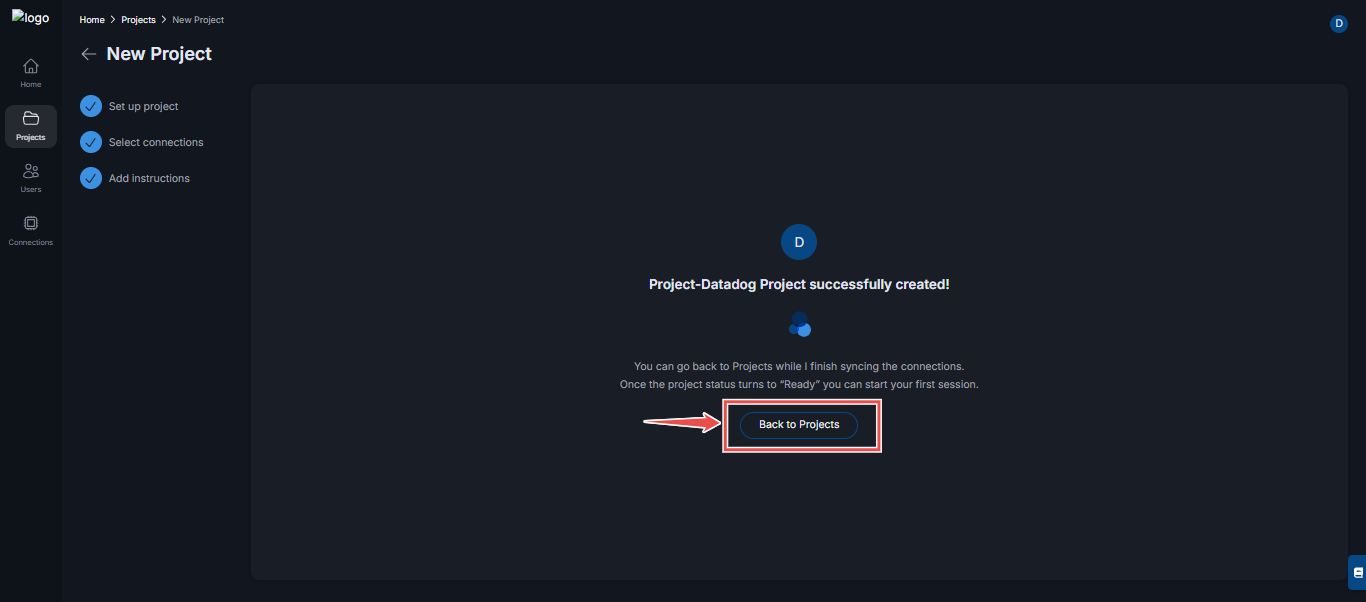
Fig.23 - Datadog Project page
-
View new project: In the list of Projects in the Projects page, you’ll find your newly created Project with Datadog connection.

Fig.24 - Datadog Project ready
-
Start Session: If project status is Ready, click to start a new session.
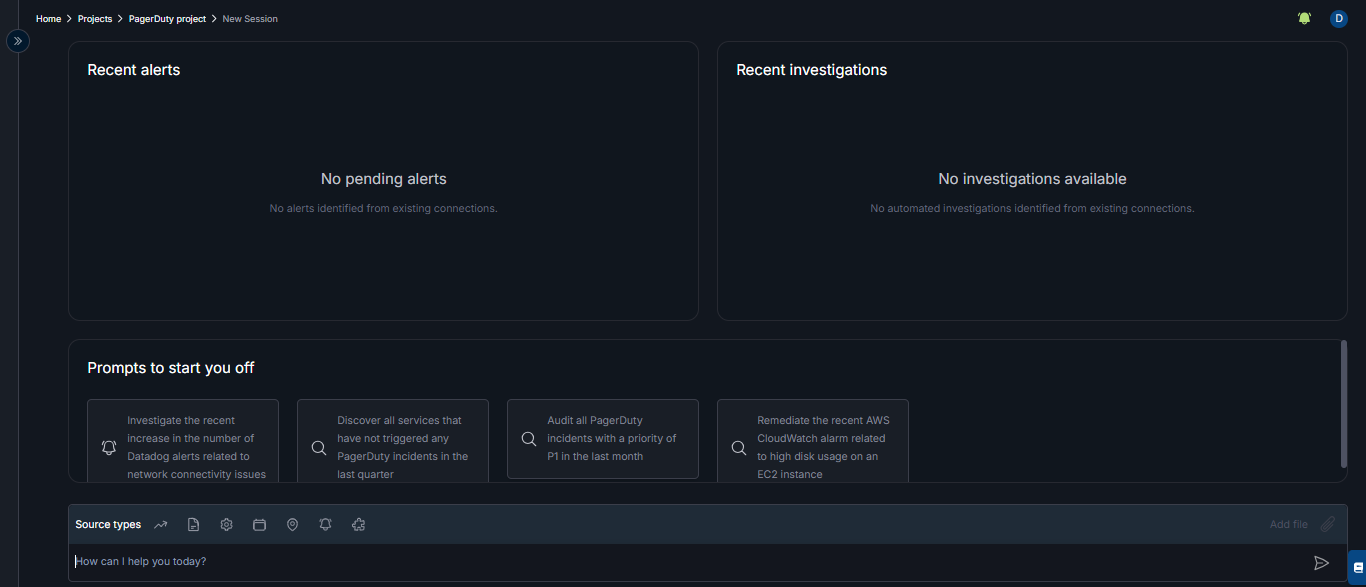
Fig.25 - Datadog new Session
-
Enter a prompt: Select from the list of prompts on the session page or enter a prompt manually to start a session.
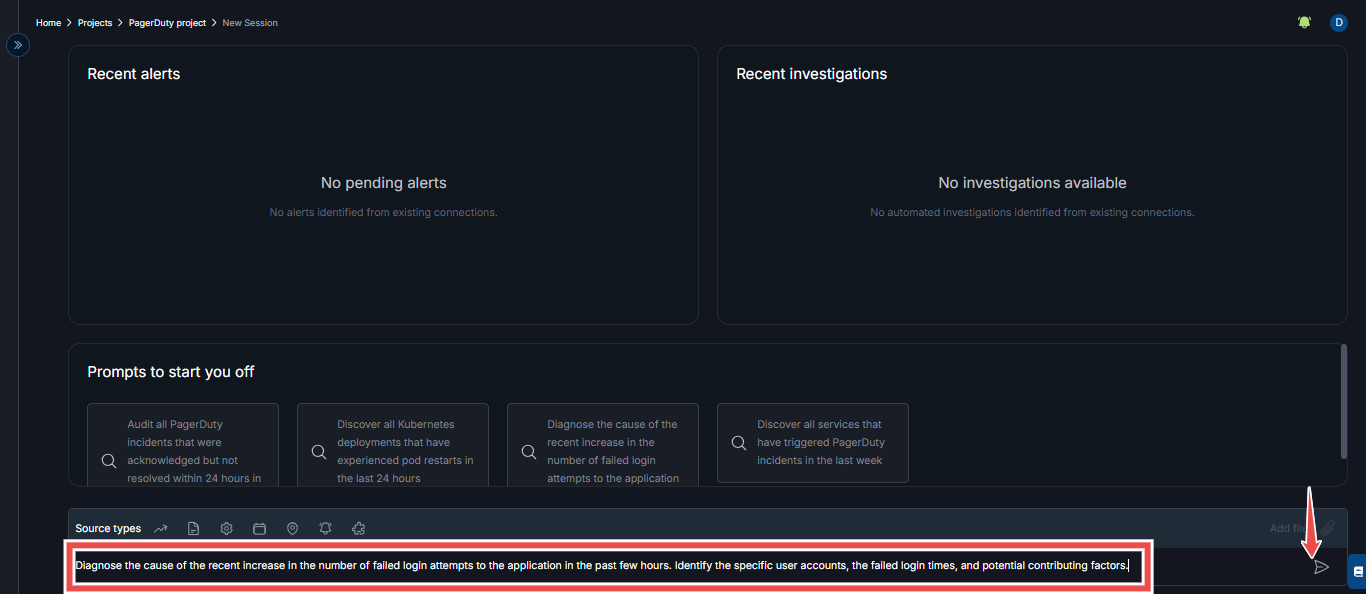
Fig.26 - Datadog Session prompt
-
Your automated session is begins: This page displays your session analytics. You can click the input box below to ask further questions.
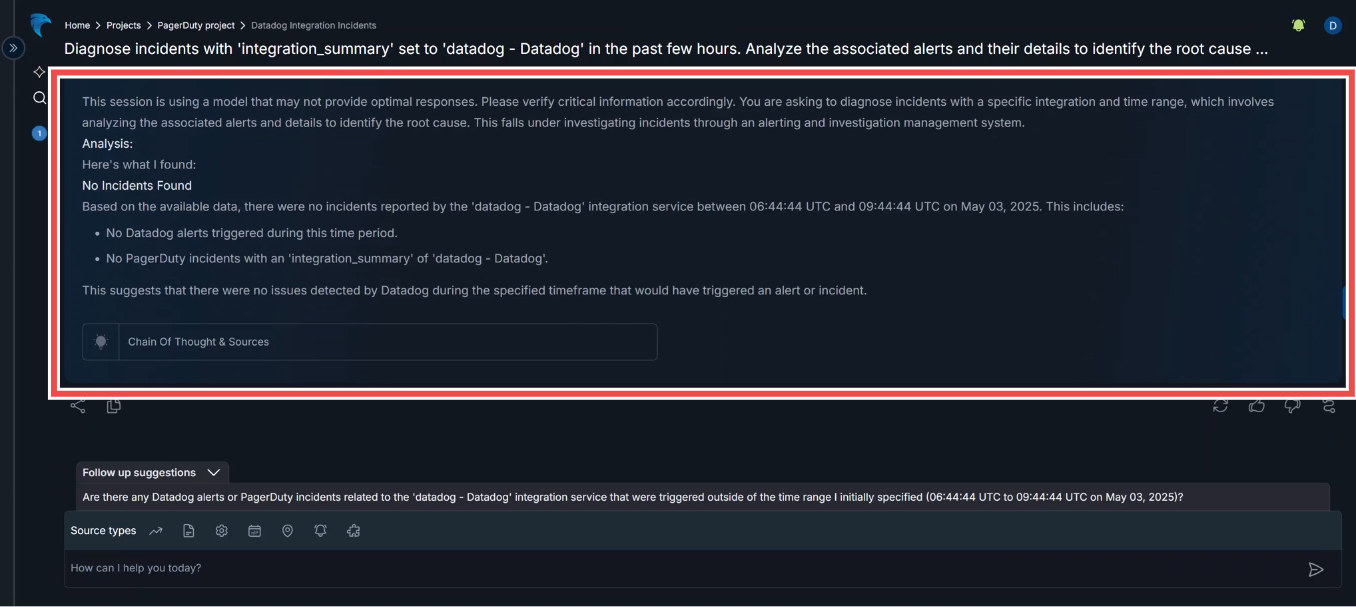
Fig.27 - Datadog Session questions