MongoDB Atlas
Connecting Hawkeye to your MongoDB Atlas environment allows us to collect telemetry data such as database metrics, logs, and performance data. This enables you to monitor and optimize your MongoDB Atlas clusters directly from Hawkeye.
The following steps will guide you in setting up this connection.
Step 1: Create a MongoDB Atlas API Key
Fig.1 - A walkthrough of how to create a MongoDB Atlas API key
To connect Hawkeye to MongoDB Atlas, you’ll need to create an API key with appropriate permissions to allow Hawkeye to retrieve necessary data.
-
Log in to MongoDB Atlas: Go to the MongoDB Atlas console and log in to your account.
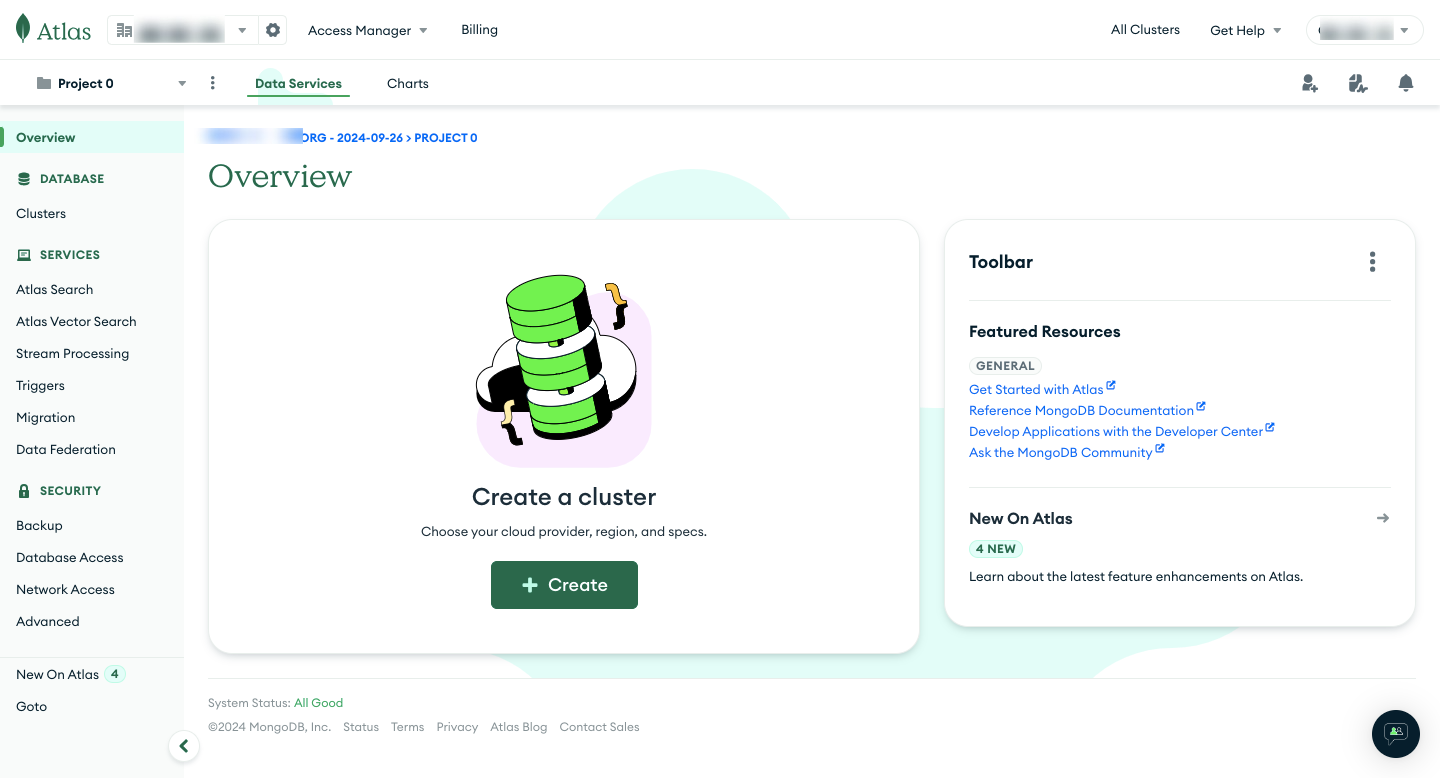
Fig.2 - Login to MongoDB Atlas
-
Navigate to Organization Access Manager: From the Atlas dashboard, select Access Manager > Project Access.
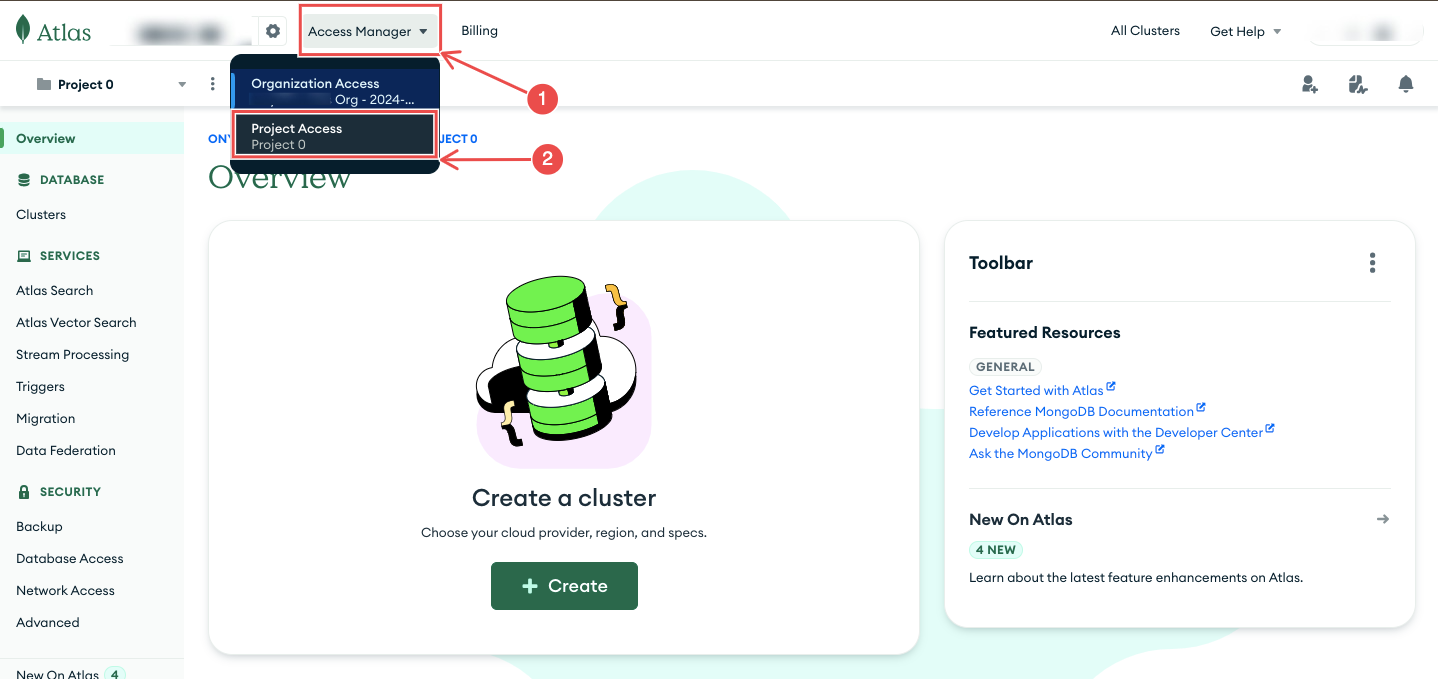
Fig.3 - Project access
-
Create a Project API Key: Click on API Keys tab and then select Create API Key.
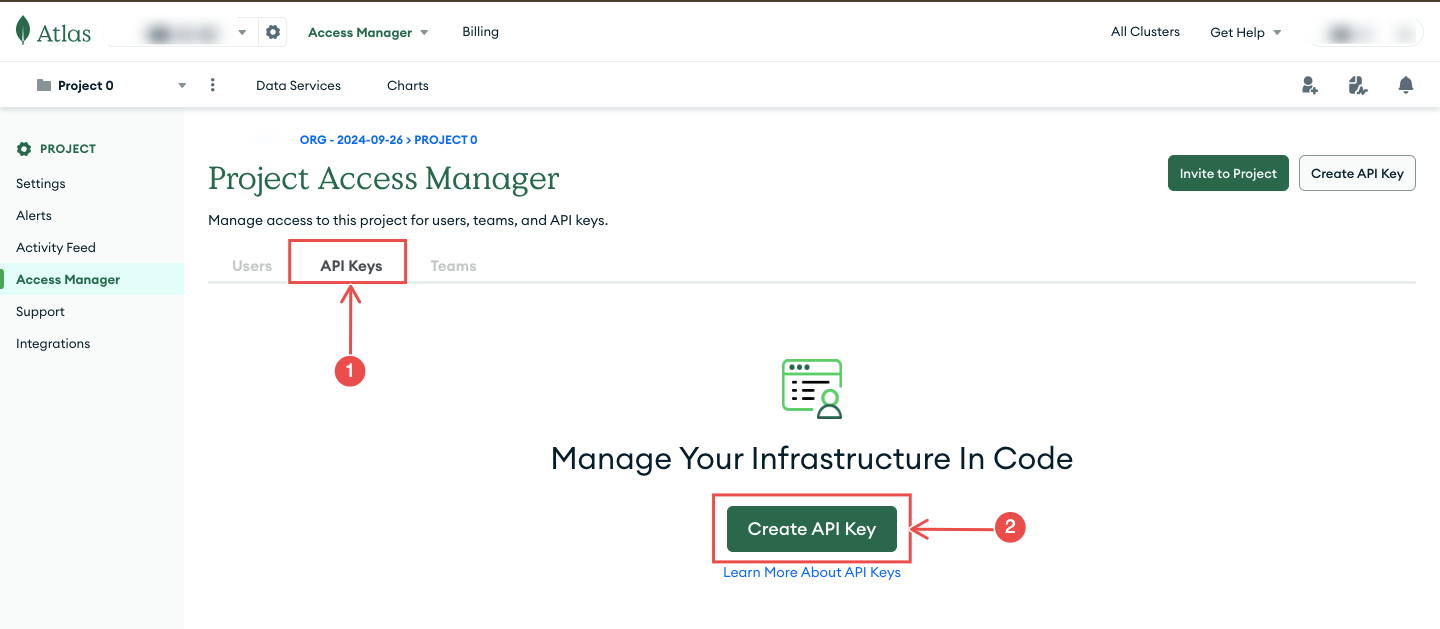
Fig.4 - Create project API key
-
Provide credentials:
- Provide a description for the API key.
- Assign appropriate roles to the API key. At minimum, grant Project Read Only to allow Hawkeye to retrieve telemetry data.
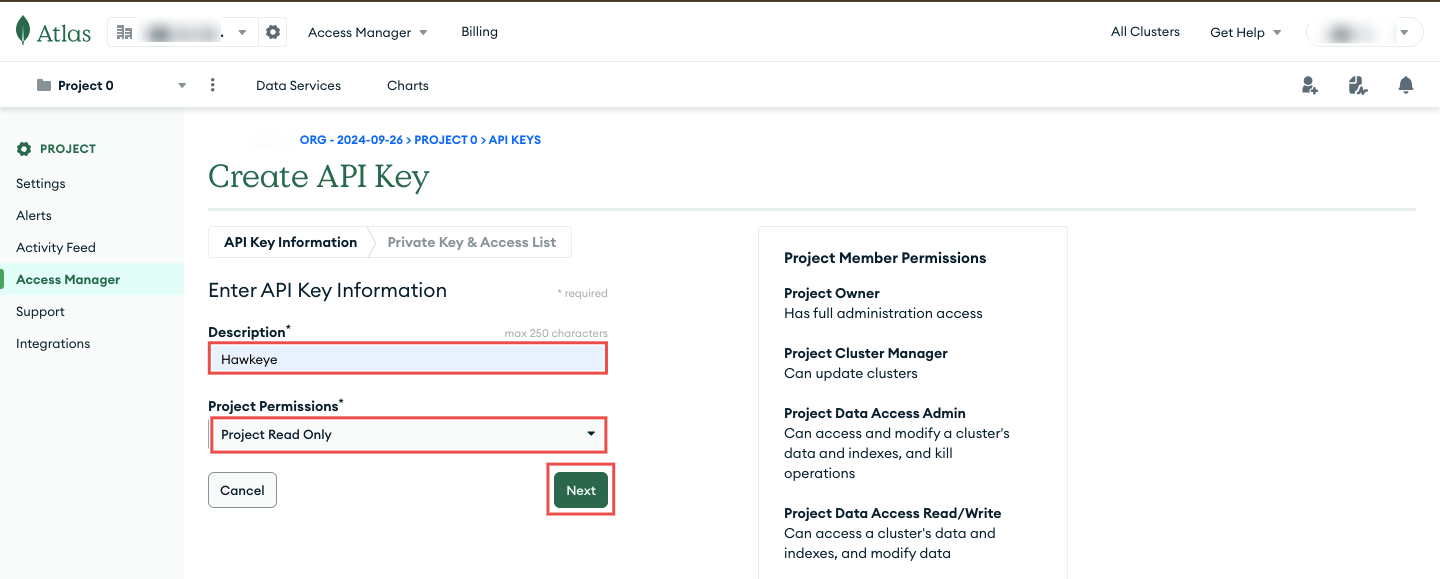
Fig.5 - Provide credentials
-
Copy the API Key: Once the API key is created, copy it. You will need this key for the Hawkeye connection setup.
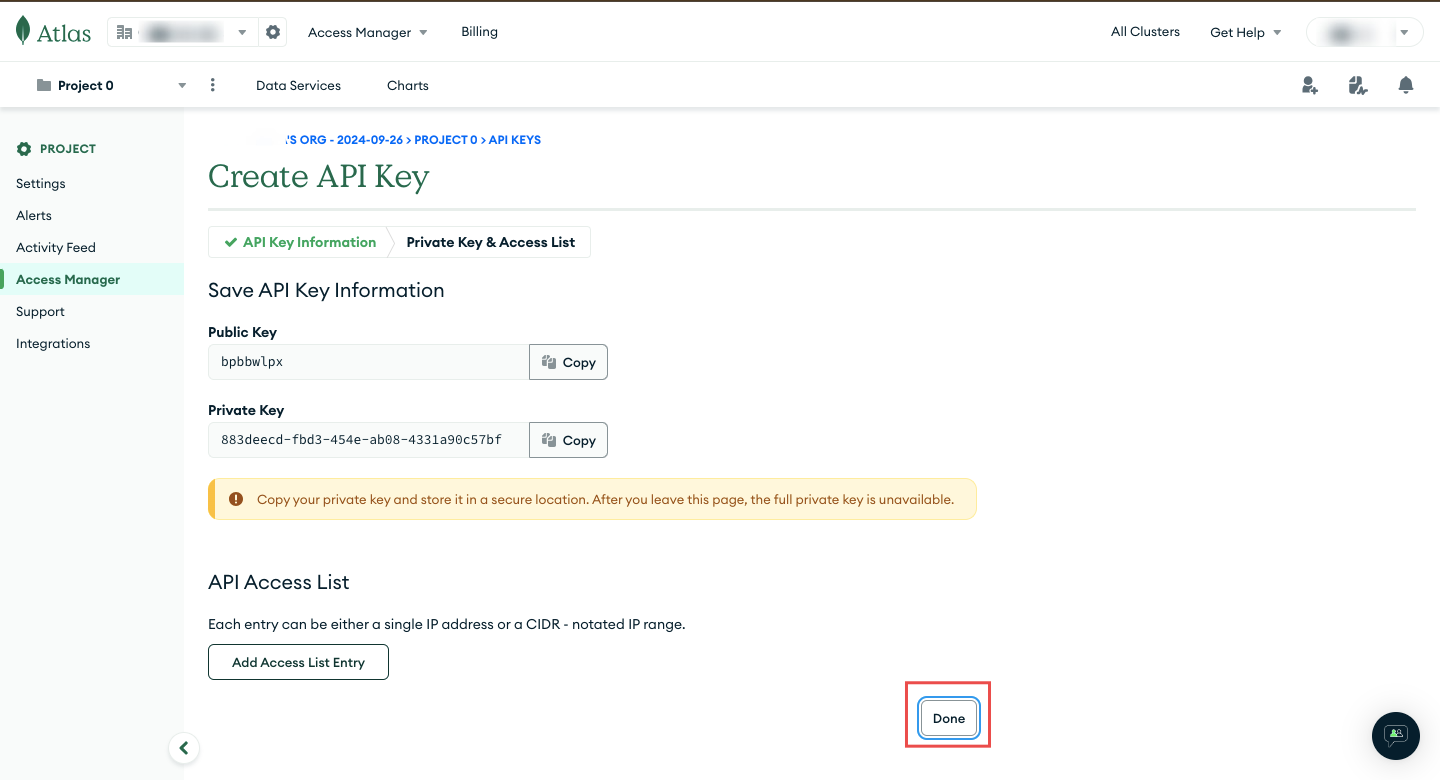
Fig.6 - Copy the API key
Step 2: Add MongoDB Atlas Connection to Hawkeye
With your API key ready, follow these steps to connect MongoDB Atlas to the Hawkeye dashboard.
-
Navigate to the connections tab: On the Hawkeye dashboard, go to the Connections section and click on the New Connection card.
-
Select MongoDB Atlas connection: From the list of available connections, choose MongoDB Atlas.
-
Enter credentials:
- Name: Enter a name for the connection (e.g., “MongoDB Atlas Integration”).
- Description: Add a description for what the connection is for.
- API Key: Paste the API key you generated in Step 1.
- Project ID: Enter your MongoDB Atlas Project ID. You can find this in the Atlas dashboard under Project Settings.
-
Save the connection: Verify all credentials are correct, then click the Save button.
-
Confirm connection: If the connection is successful, the MongoDB Atlas connection card will appear in your Hawkeye dashboard, showing that the integration is active.