Gitlab
Connecting Hawkeye to your Gitlab account allows us to collect telemetry data, such as service performance, environment metrics, and application health.
This data enables real-time monitoring and insights into the performance of your applications running on Gitlab.
To integrate Gitlab with Hawkeye, you’ll need an Access Token from your Gitlab account.
Step 1: Generate Authentication Token from your Gitlab account.
-
Login to your Gitlab account, navigate to your user profile at the top-left corner of your dashboard and from the drop-down menu, select Preferences.
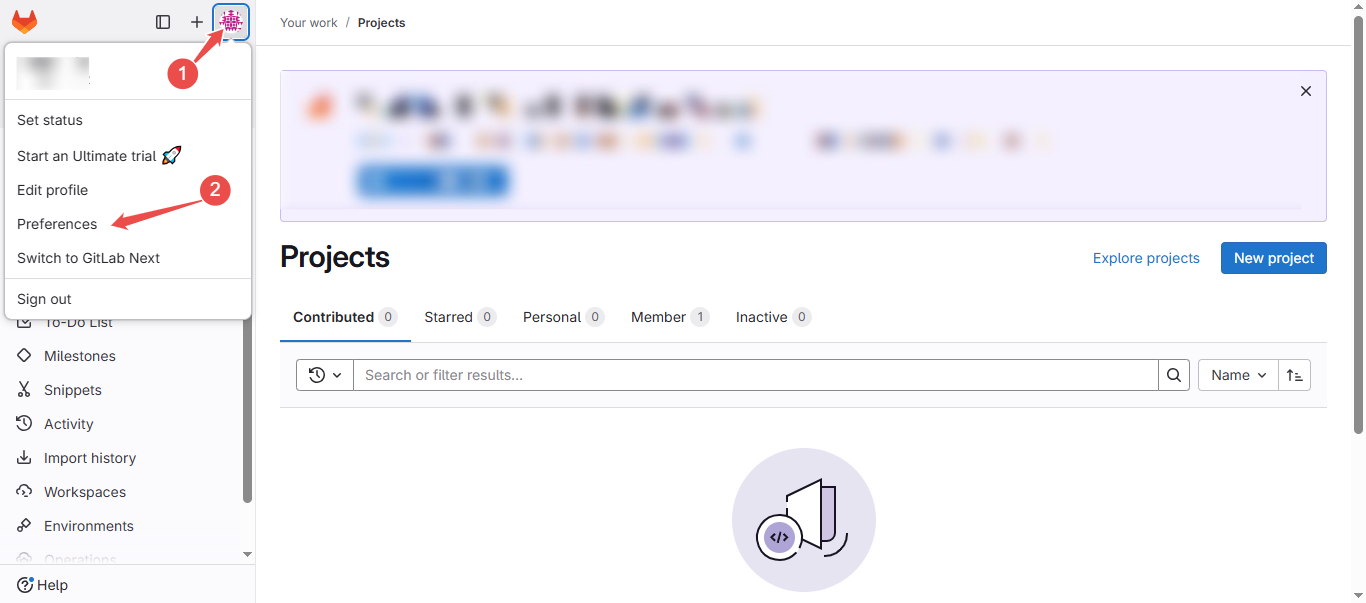
Fig.1 - Gitlab user profile and preferences
-
On the Side navigation, above Preferences, select Access Tokens.
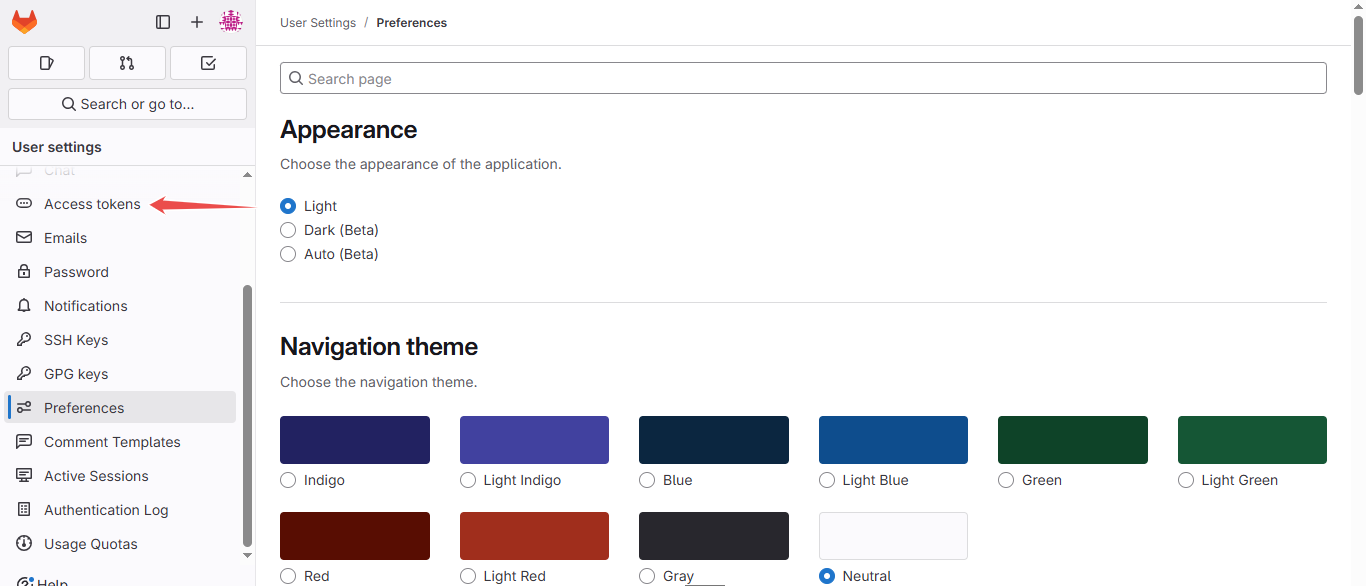
Fig.2 - Gitlab access tokens
-
At the top-right corner of the Access Token page, click Add new token.
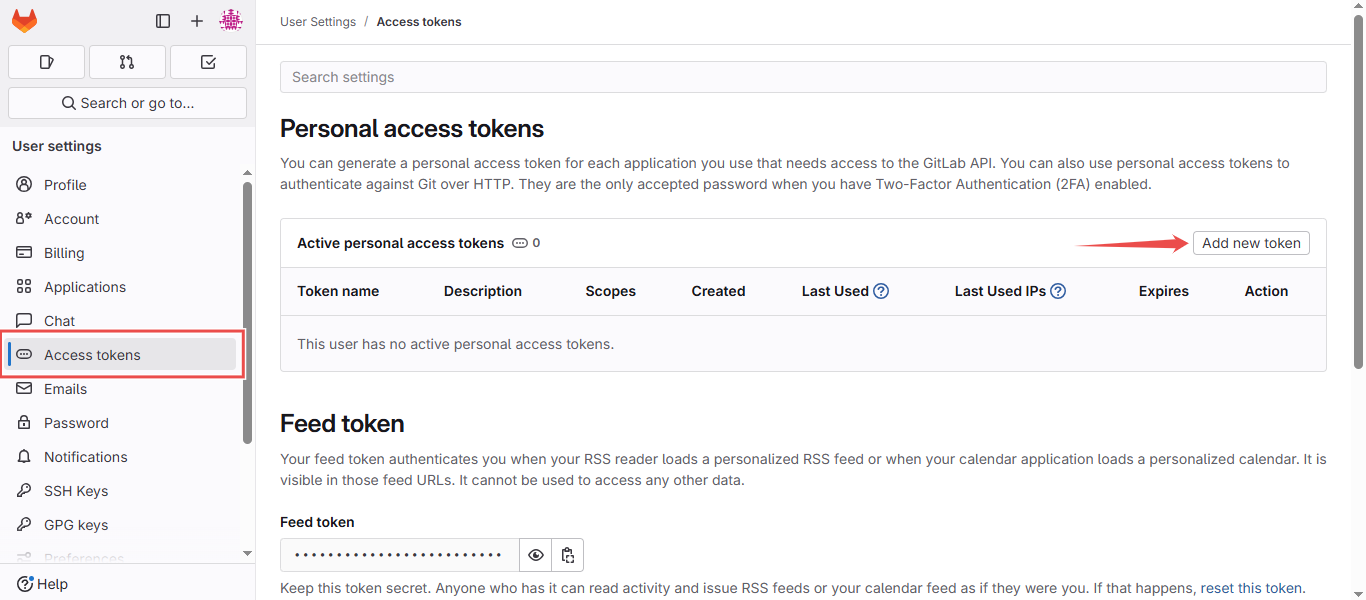
Fig.3 - Gitlab new token
-
The a Name and Description for your token in the inputs provided.

Fig.4 - Token name and description
-
Under Select scopes option, select read_api option.
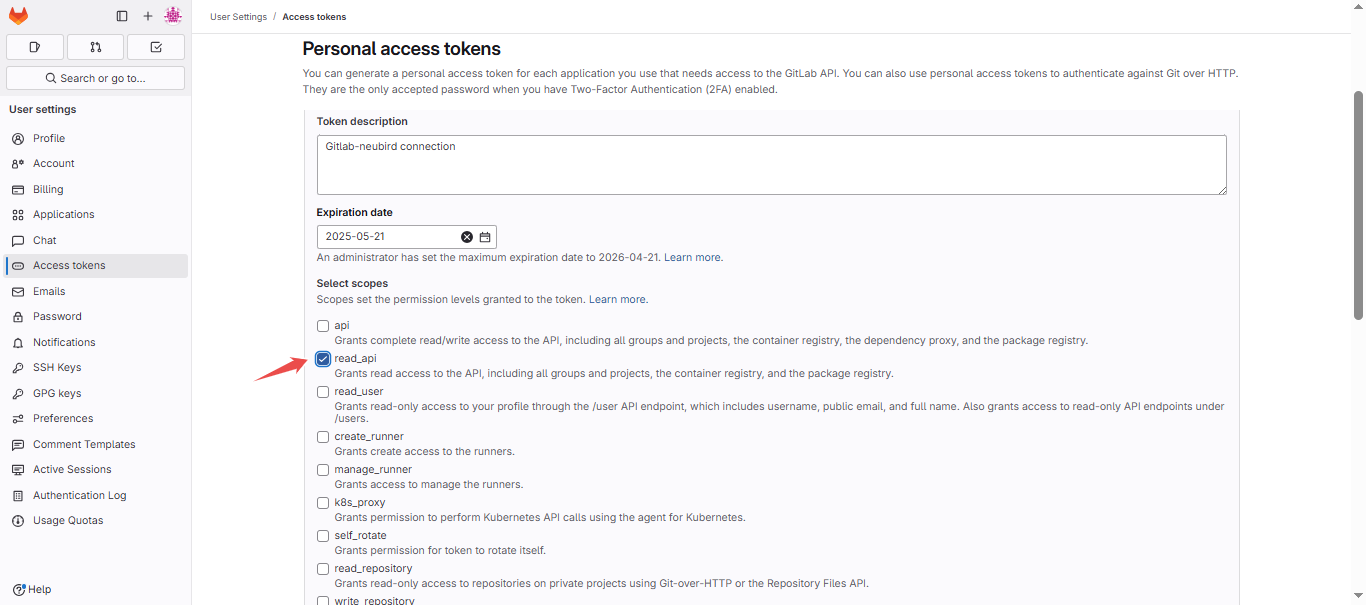
Fig.5 - Access token scope selection
-
Click Create personal access token button to continue
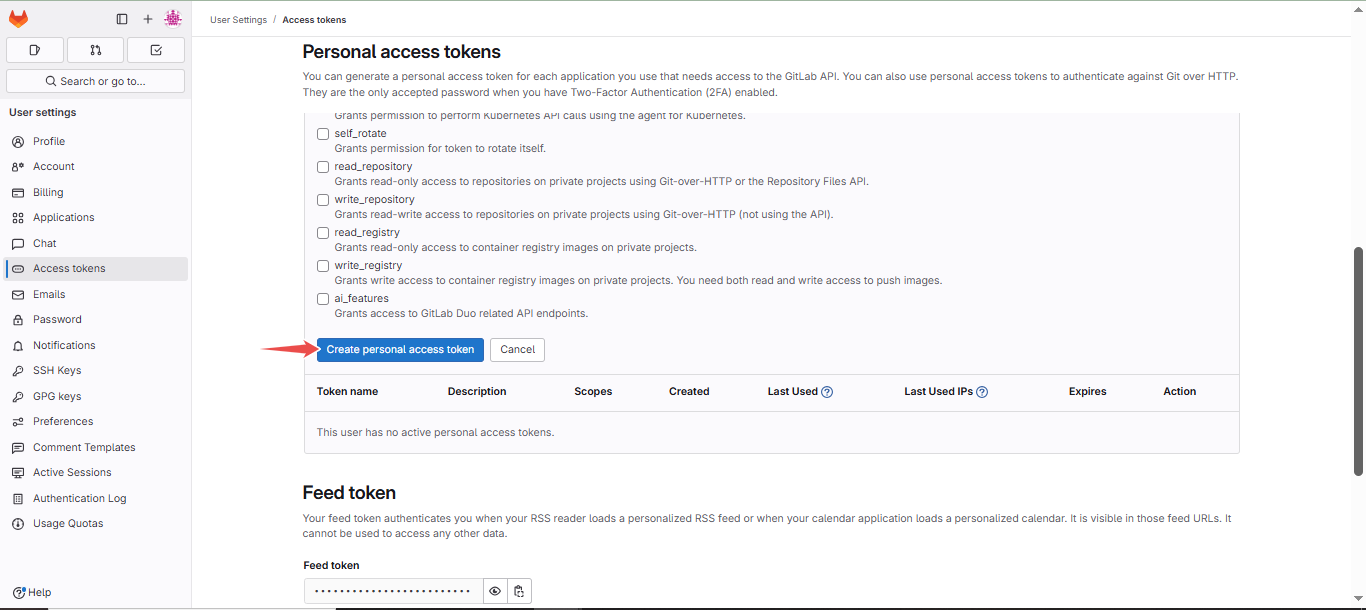
Fig.6 - Create personal access token
-
Safely copy your newly created Personal access token
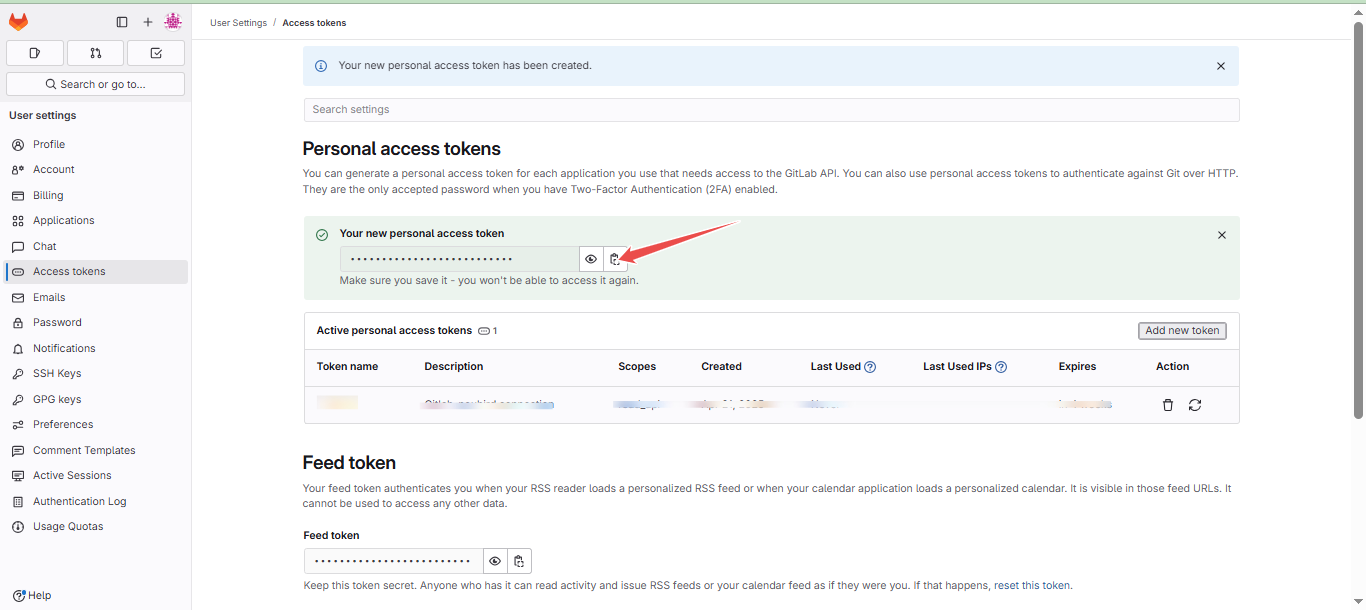
Fig.7 - Copy personal access token
Step 2: Add Gitlab Connection to Hawkeye
-
Navigate to the connections tab: On the Hawkeye dashboard, go to the Connections section and select New Connection.
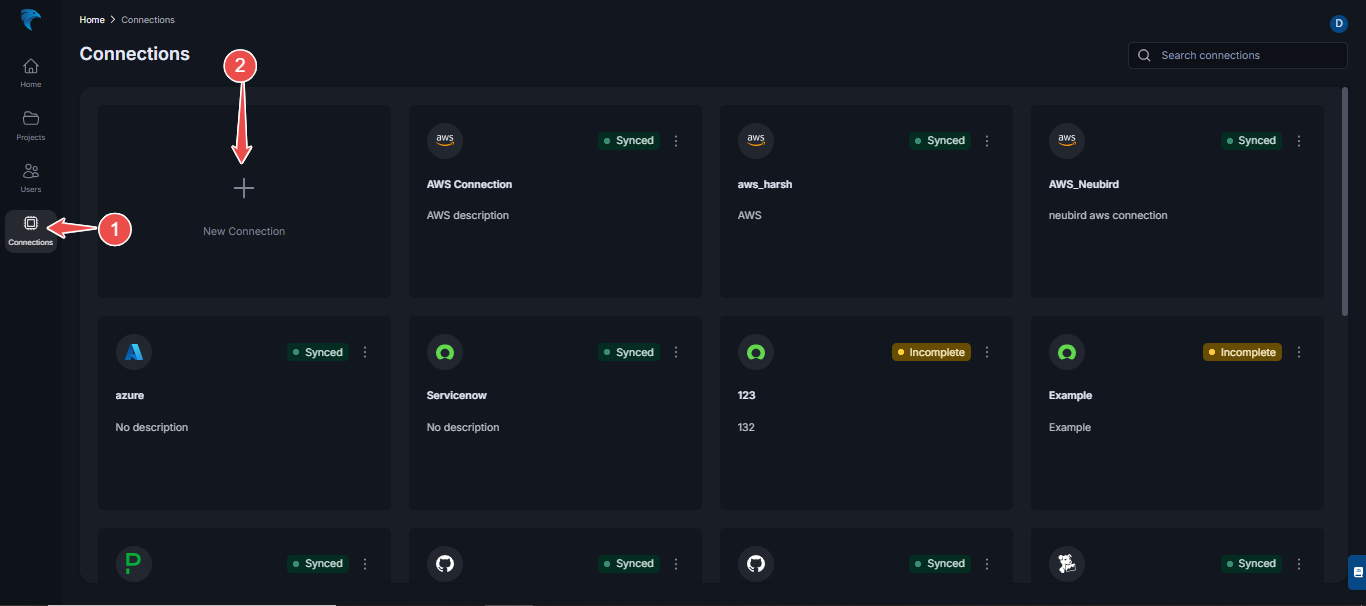
Fig.8 - Add Gitlab connection to Hawkeye
-
Select Gitlab: From the list of available connections, choose Gitlab (Gitlab connection is currently not supported on Hawkeye).

Fig.9 - Select Gitlab
-
Enter Credentials: Enter the required credentials (example: Access Token) on the Gitlab connection page.
-
Save and Confirm: Verify the information and click Save to create the connection. If successful, you will see the connection card showing your Gitlab setup.