ServiceNow
Integrating ServiceNow with Hawkeye enables you to gather critical telemetry from your ServiceNow environment, including incident management and service requests.
For a successfully integration, you’ll need an API access key and a customer ID. The following steps will help you set up this connection.
Step 1: Create an Inbound Authentication Profile
Fig.1 - A walkthrough of how to create an Inbound authentication profile
Before connecting ServiceNow to Hawkeye, you’ll need to generate an API key from your ServiceNow instance.
-
Navigate to the API Access Policies: In your ServiceNow dashboard, go to All > System Web Services > API Access Policies > Inbound Authentication Profile.
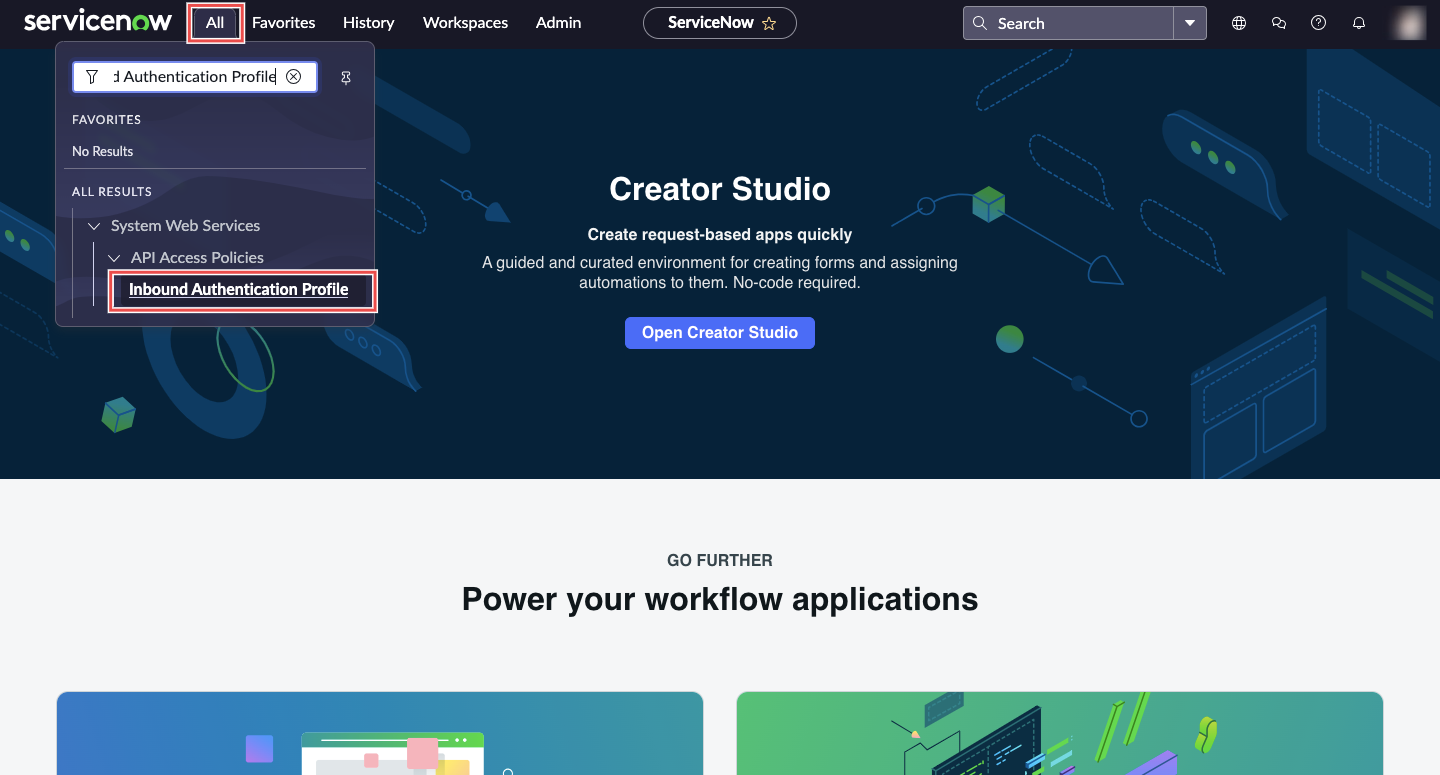
Fig.2 - Inbound authentication profile
-
Create a new API Key: Click New, and then select Create API Key authentication profiles.

Fig.3 - Click new
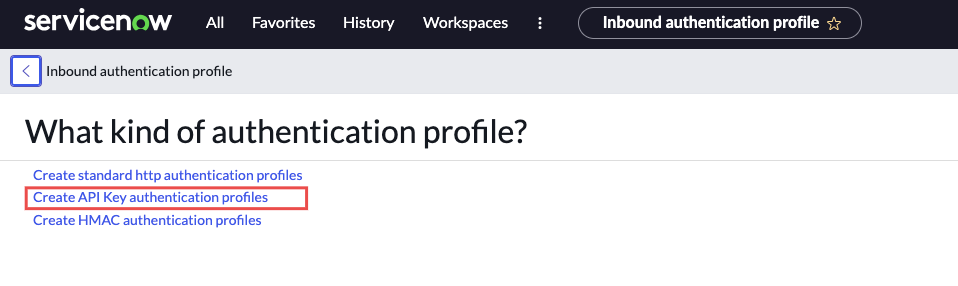
Fig.4 - Create API key authentication profile
-
Enter API details:
-
Enter a descriptive name for the key in the Name field.
-
In the Auth Parameter field, select Auth Header.
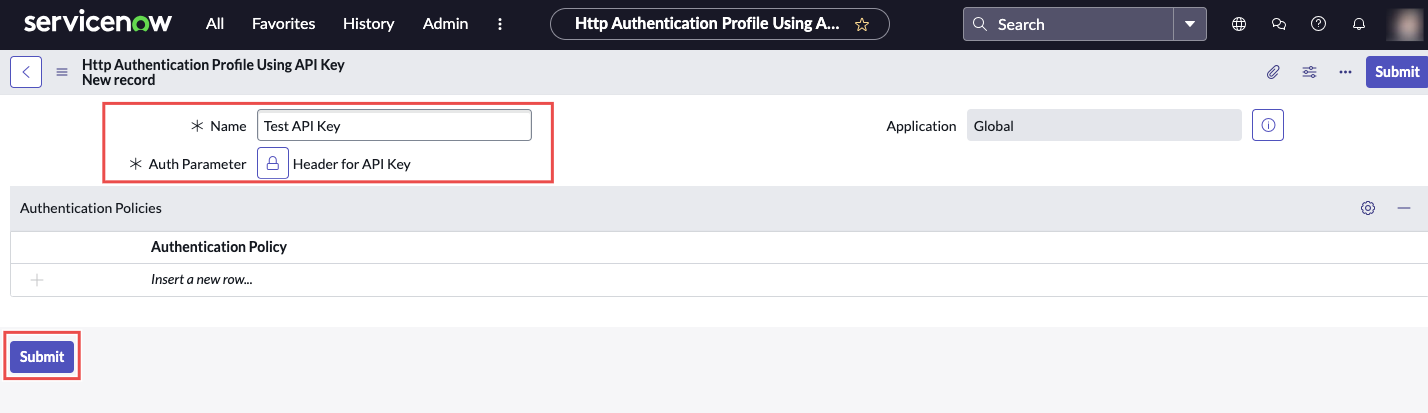
Fig.5 - Enter API details
After completing the above steps, click Submit to save your API key profile.
-
-
Generate the REST API Key: Go to All > System Web Services > API Access Policies > REST API Key, and click New.
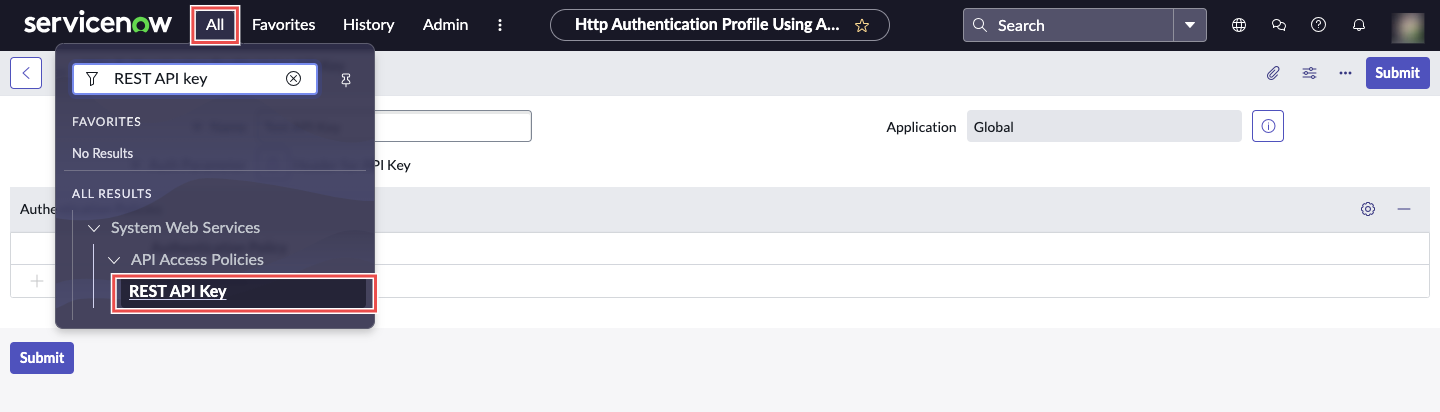
Fig.6 - Select Rest API key

Fig.7 - Click new
-
Enter REST API details: Provide a descriptive name and select a user or service account for the API key.
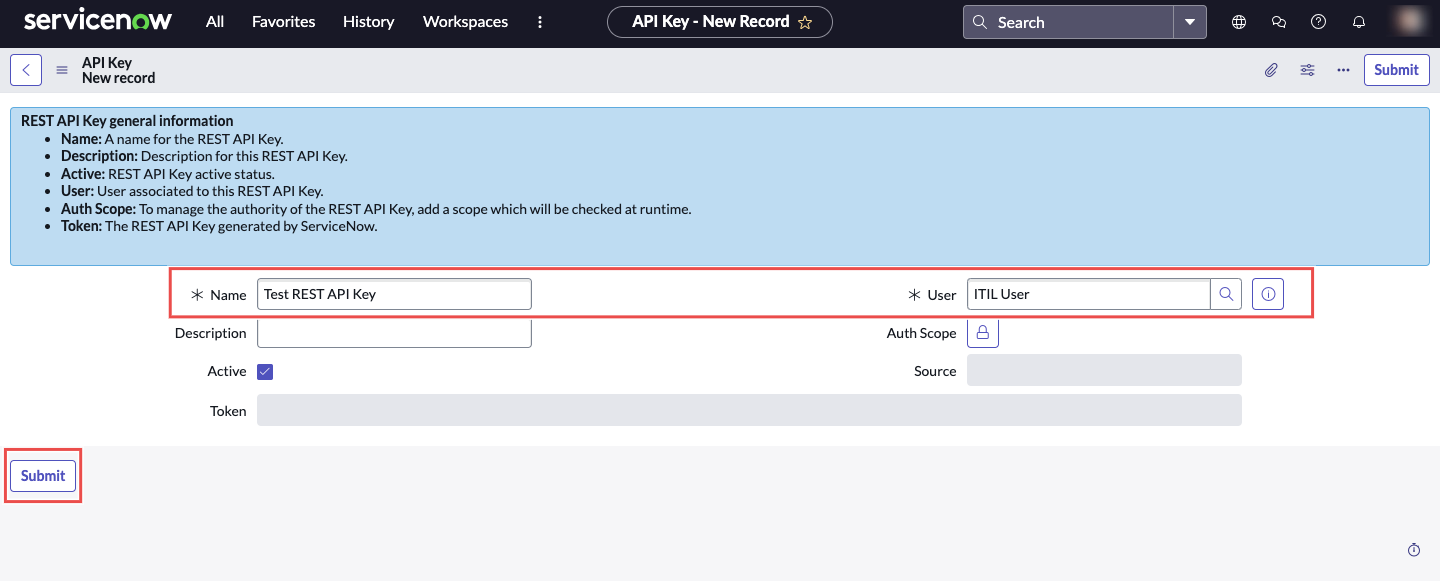
Fig.8 - Enter Rest API details
After completing the above steps, click Submit to save your REST API key.
-
Navigate to REST API Access Policies: Go to All > System Web Services > API Access Policies > REST API Access Policies.
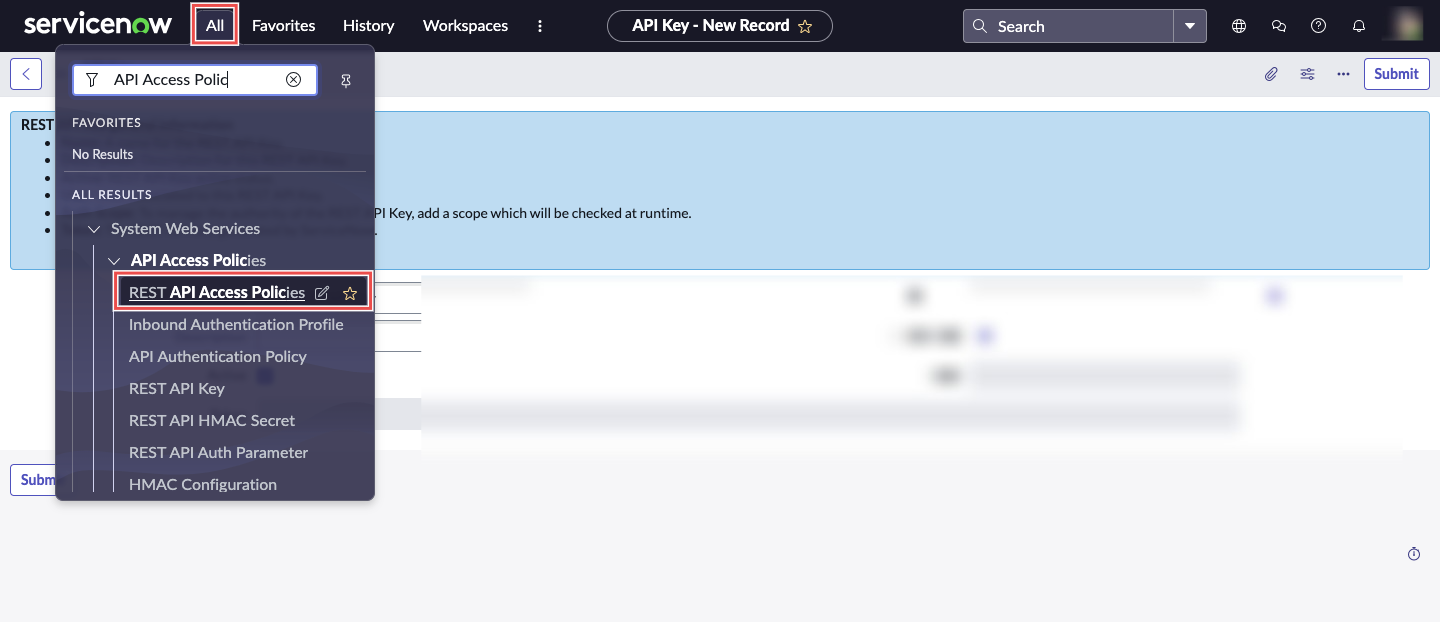
Fig.9 - Rest API Access policies
-
Create a new policy: Click New to create a new API Access Policy.
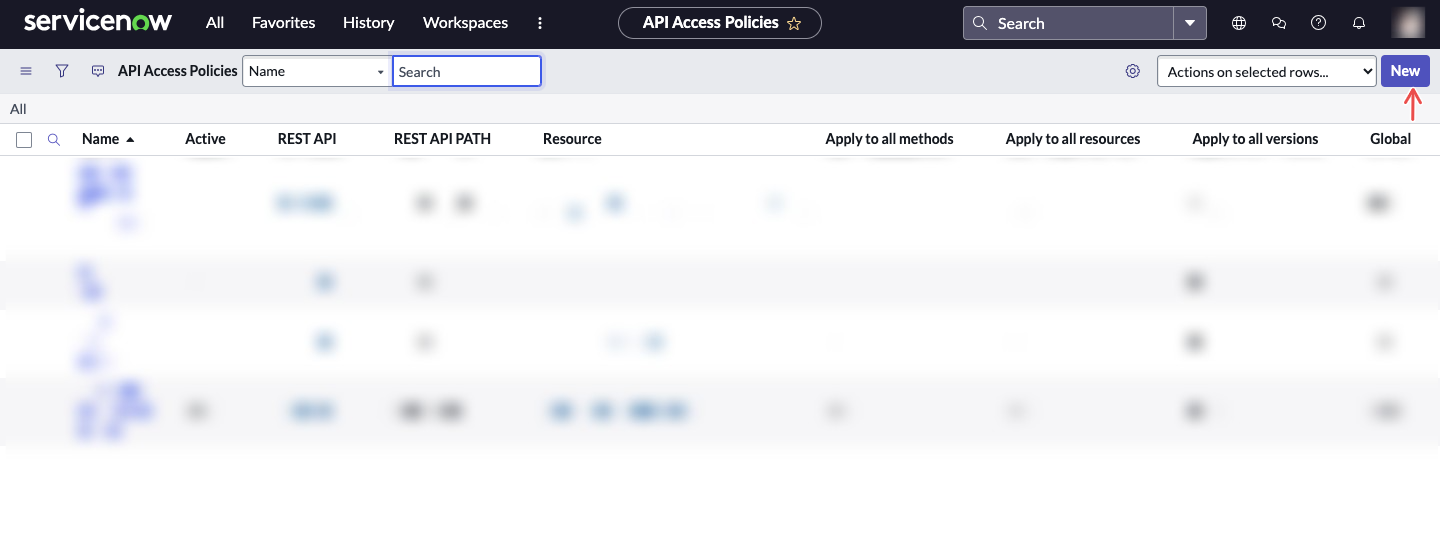
Fig.10 - Create new policy
-
Enter policy details:
-
Name: Enter a descriptive name for your policy.
-
REST API: Select the REST API you want to use. For now, we only support the Table API.
-
Configure policy restrictions: Use the checkboxes on the right side of the form to uncheck restrictions, allowing fields on the left side to appear.
-
Add API Authentication Profile: Scroll to the embedded list on the form and add your newly created API Authentication Profile created earlier.
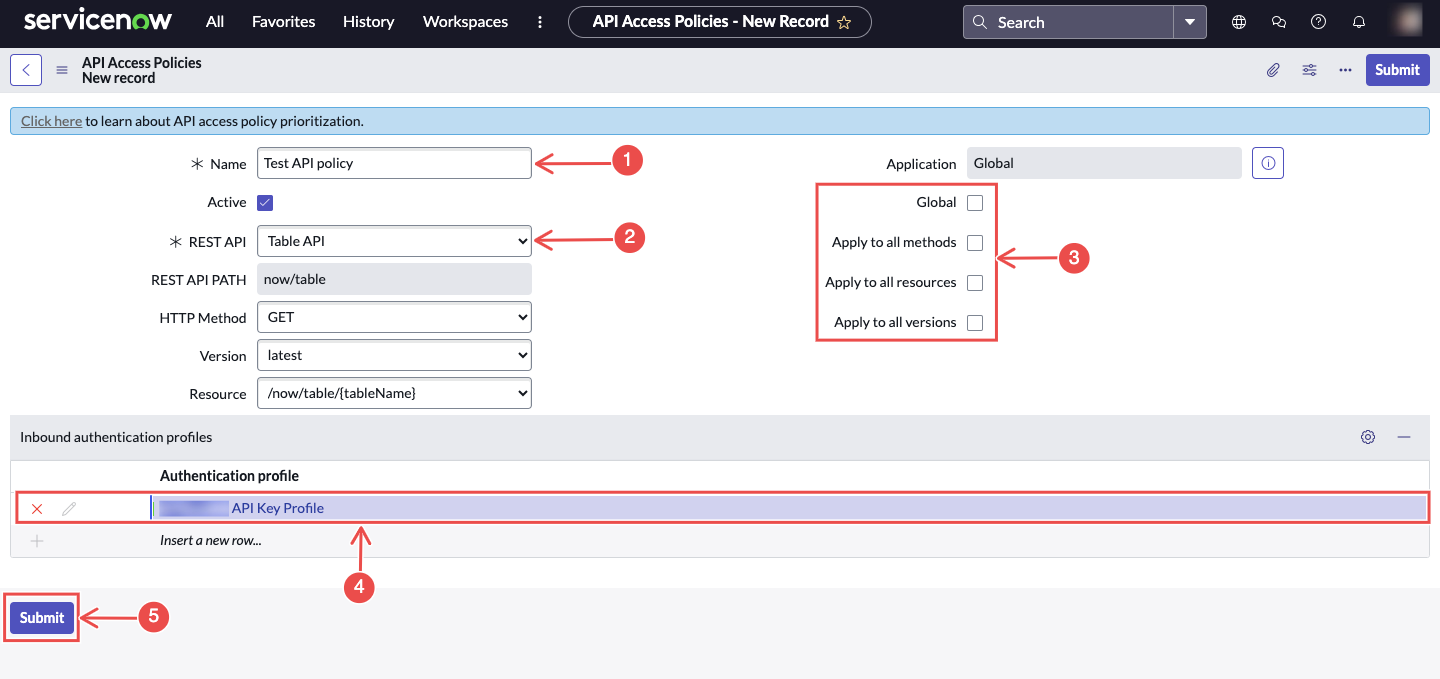
Fig.11 - Enter policy details
Click Submit to save the new API Access Policy. Once saved, a token will be generated. Use the lock icon to view and copy this token.
-
Step 2: Add ServiceNow Connection to Hawkeye
Fig.12 - A walkthrough of how to add ServiceNow connection to Hawkeye
Now that you have the API key and customer ID, it’s time to configure the connection on the Hawkeye dashboard.
-
Navigate to Connections: On the Hawkeye dashboard, go to the Connections tab and click New Connection.

Fig.13 - Create new connection dashboard
-
Select ServiceNow: From the list of available connections, select ServiceNow.
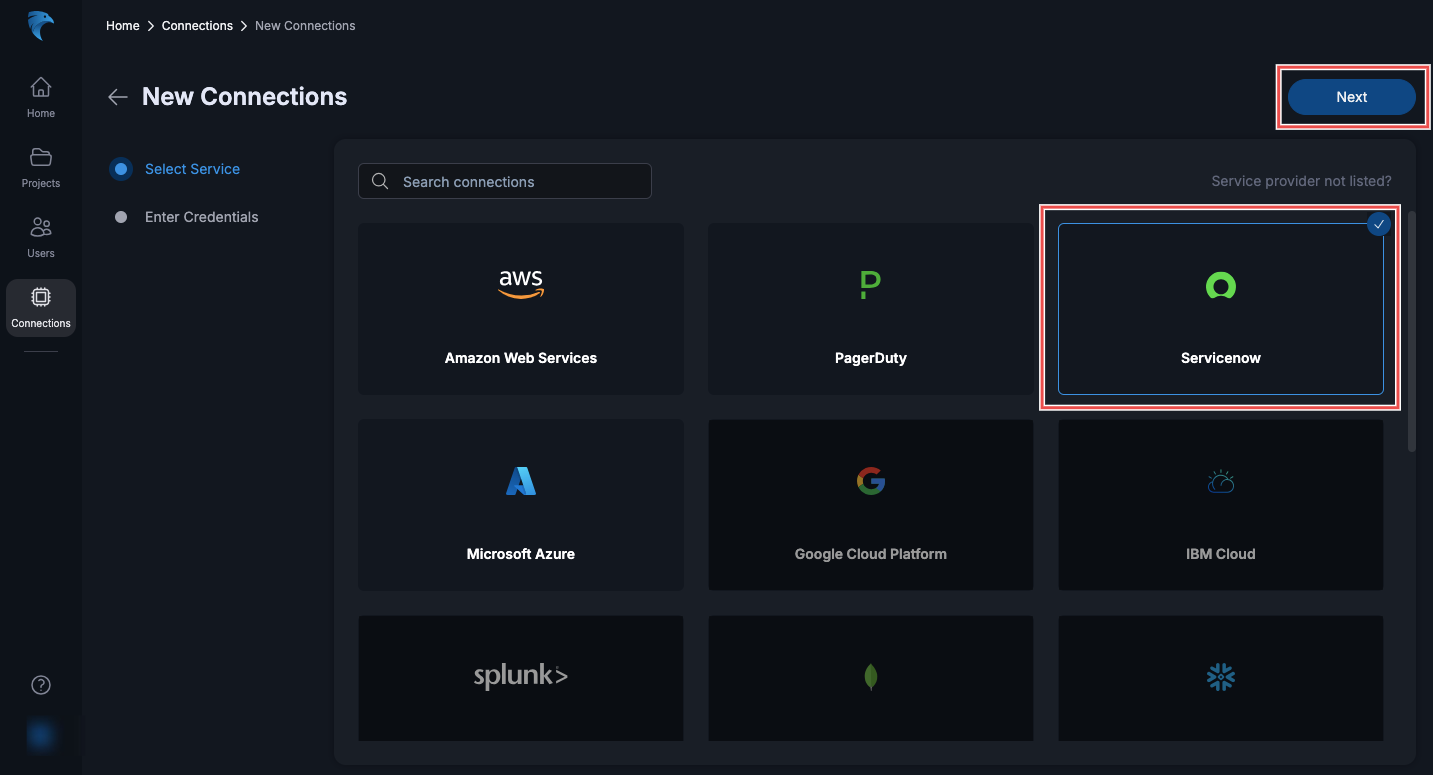
Fig.14 - Select ServiceNow
-
Enter Connection Details:
-
Name: Provide a name for the connection.
-
Description: Optionally, add a description to help identify this connection.
-
API Key: Paste the API key you generated in Step 1.
-
Customer ID: Provide your ServiceNow customer ID. It’s in this format:
https://yourinstance.service-now.com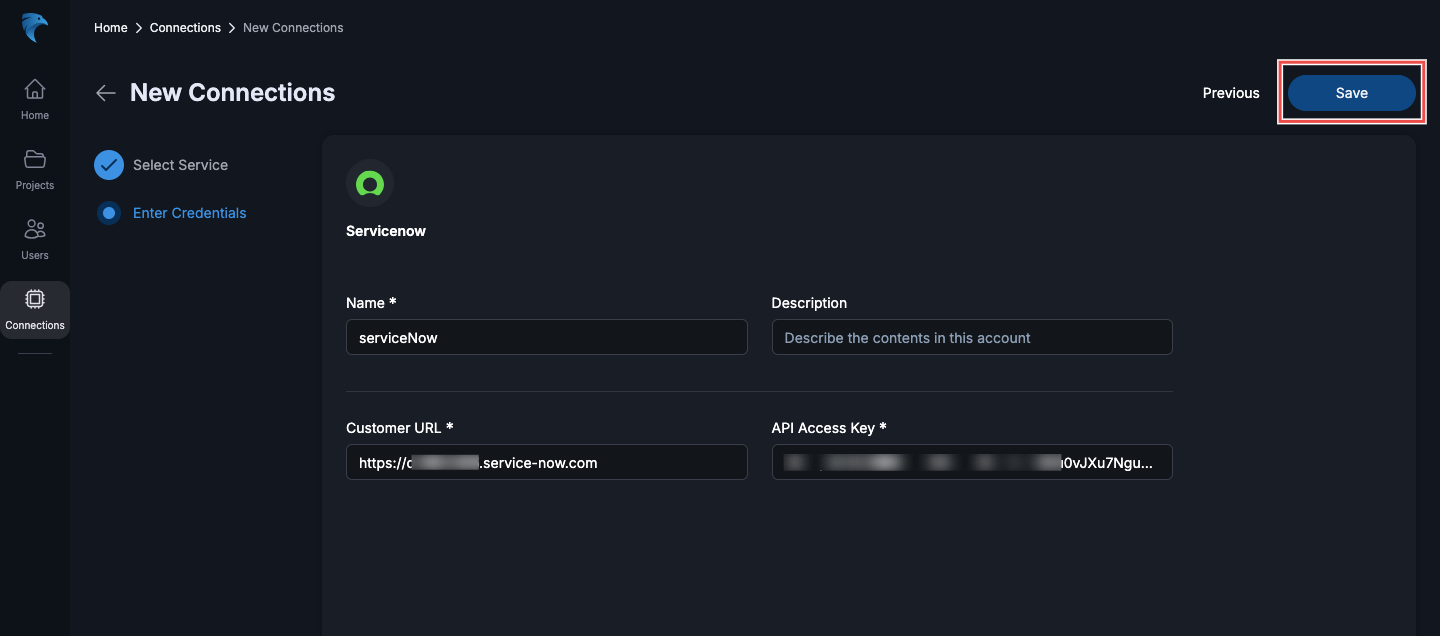
Fig.15 - Enter ServiceNow connection details
Ensure all the fields are filled out correctly, and click Save to create the connection.
-
-
Confirm Connection: Once the connection is successfully created, you should see a confirmation message like this:
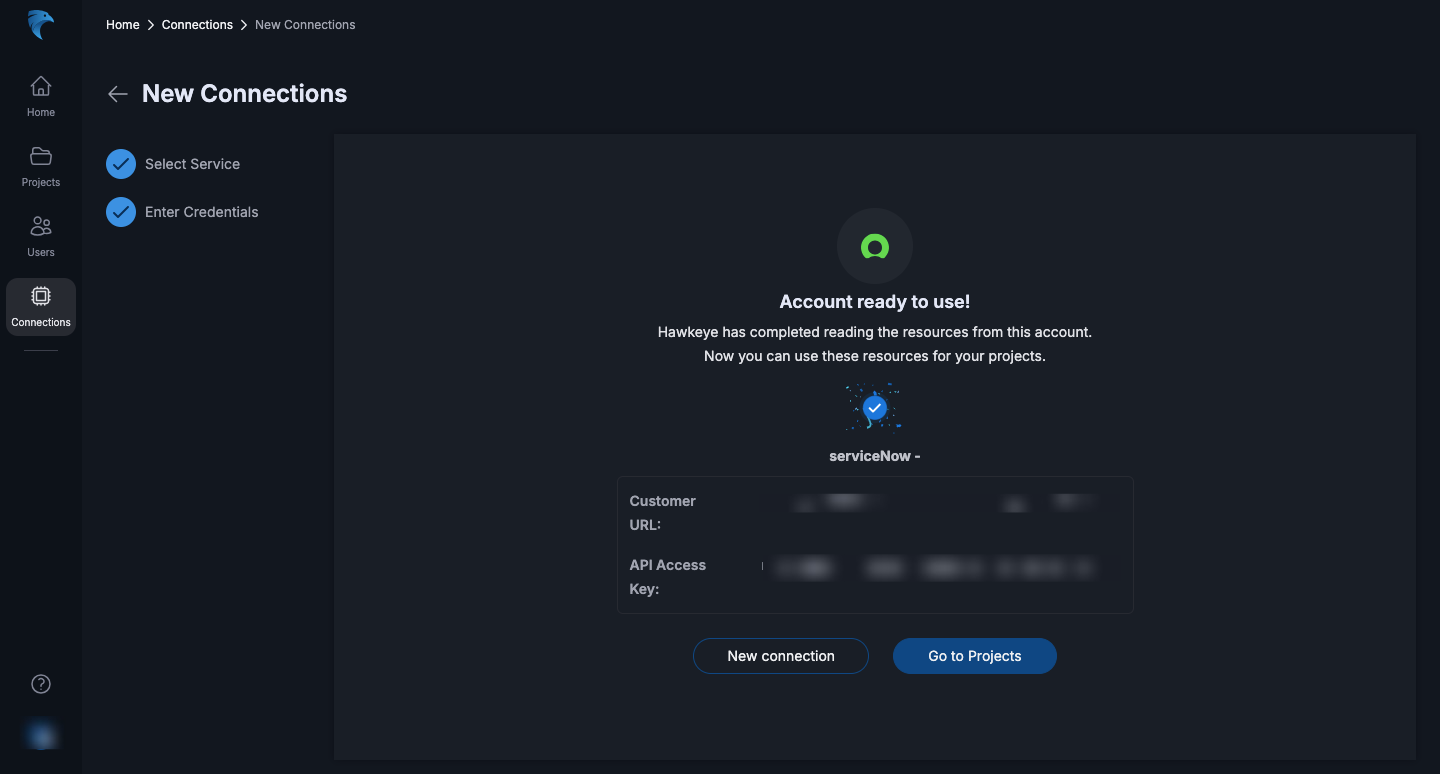
Fig.15 - Confirm ServiceNow connection