New Relic
Connecting Hawkeye to your New Relic account allows for the collection of application and infrastructure telemetry, including metrics, traces, and logs.
These data help with real-time monitoring and alerting through the Hawkeye dashboard.
You’ll need to authenticate using a New Relic API Key and Account ID.
Step 1: Setup New Relic Integration
Fig.1 - A walkthrough of how to setup New Relic integration
Follow these steps to retrieve the credentials required for the connection:
-
Navigate to New Relic API Keys: Sign in to your New Relic account and go to API Keys from the account settings.
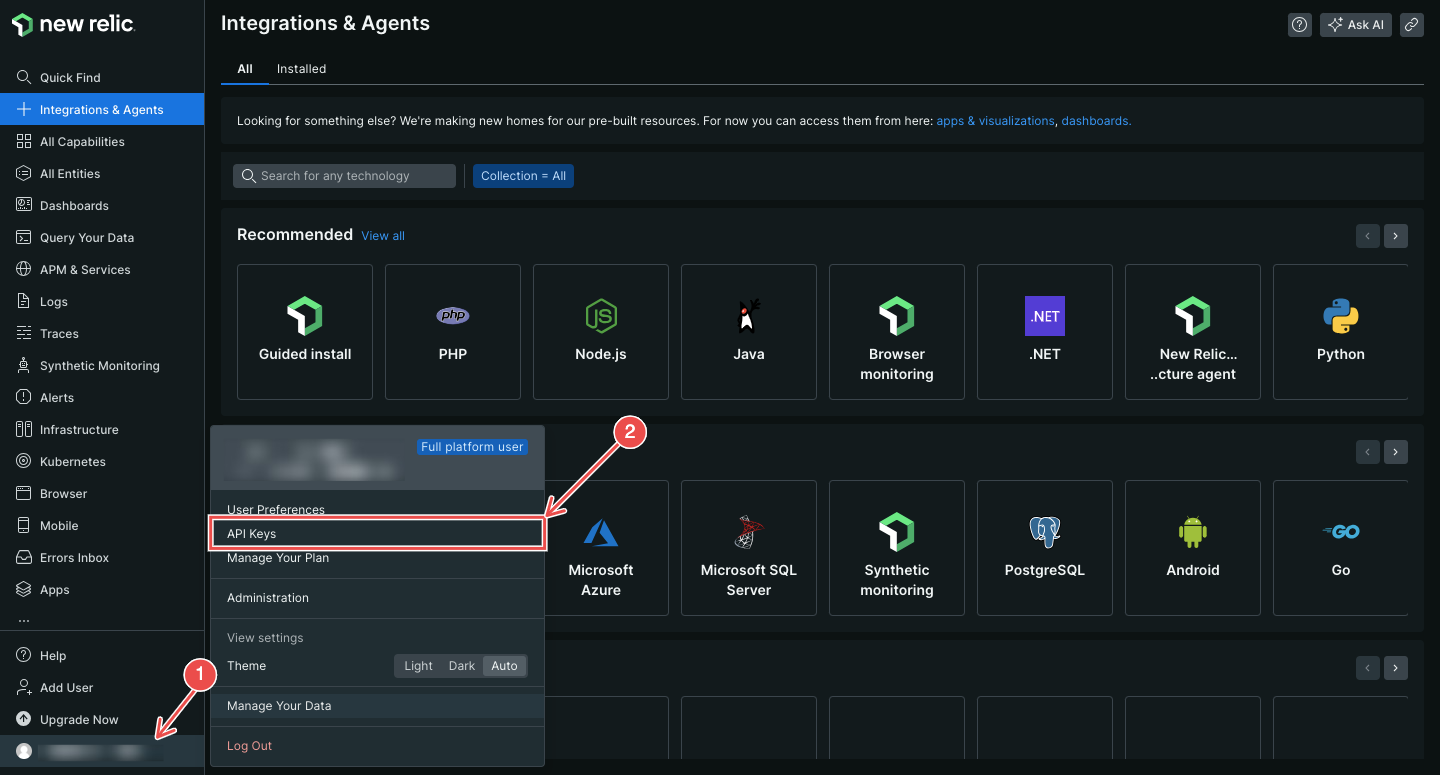
Fig.2 - New Relic API keys
-
Create API Key: In the API Keys section, click on Create a Key.
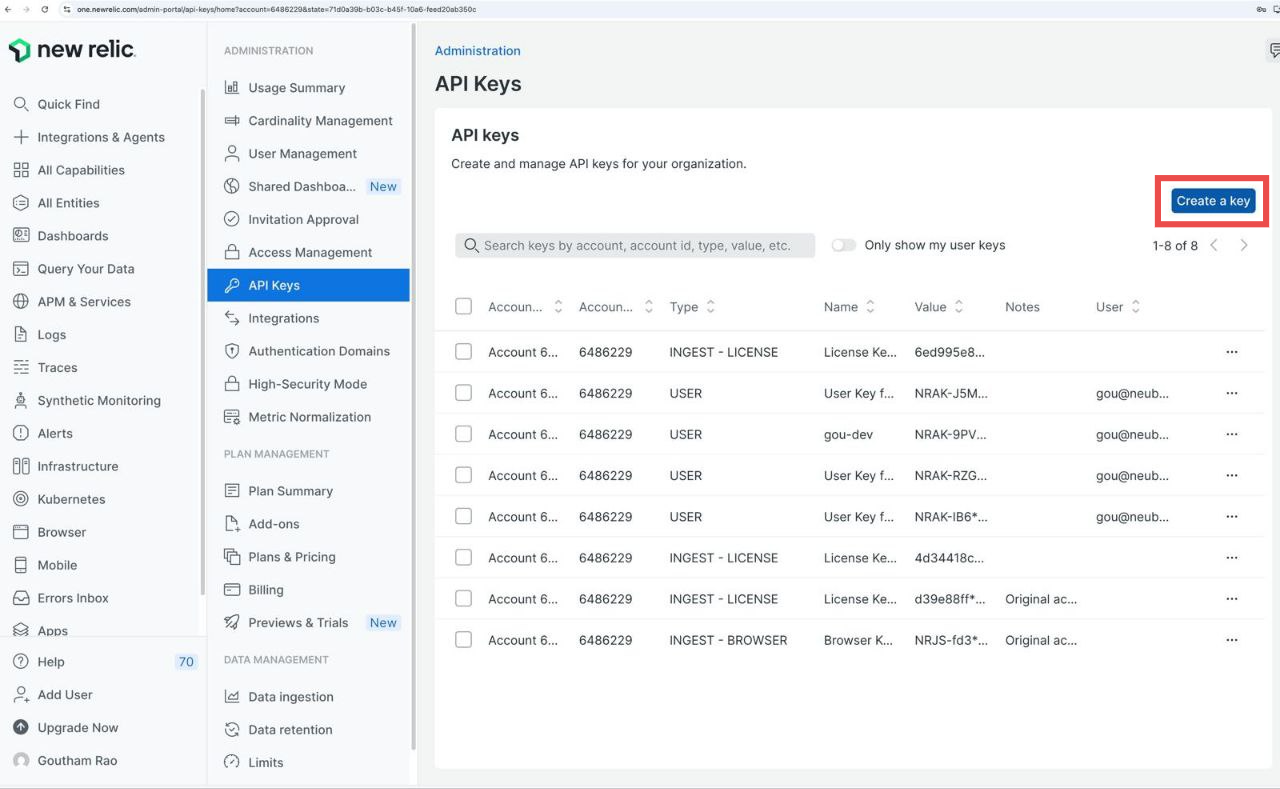
Fig.3 - Create a key
-
Name the API Key: Give your API key a name, and a description in the Notes input.
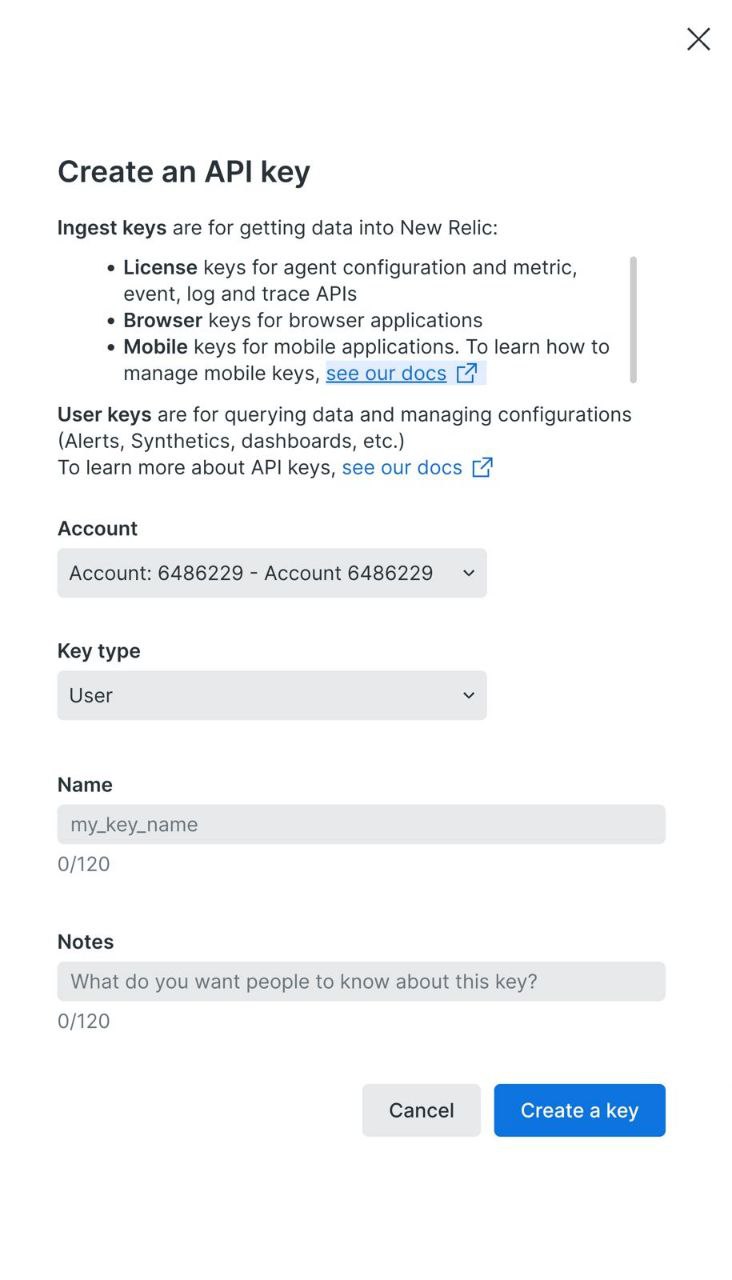
Fig.4 - Name API key
Click Create a Key to generate your API key.
-
Copy the API Key: Copy the API key displayed on the screen, as you’ll need it for the Hawkeye configuration.
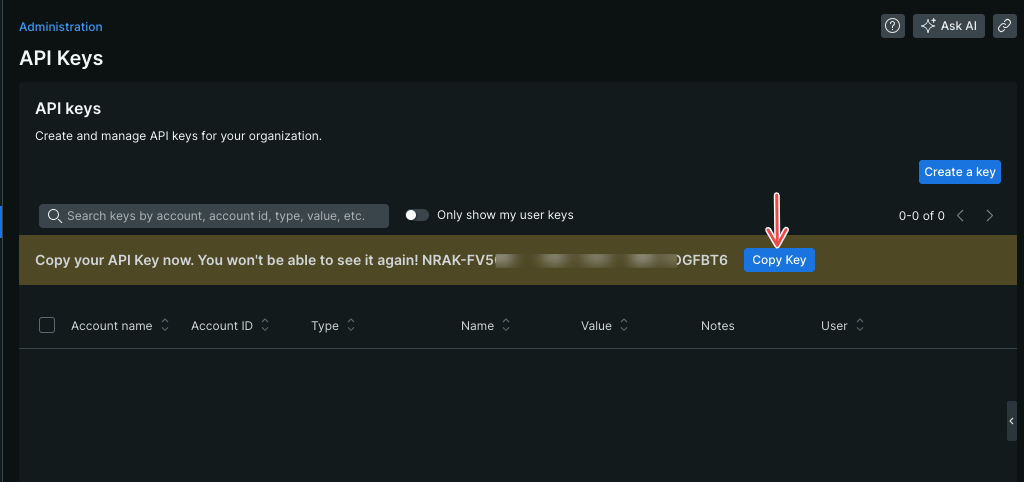
Fig.5 - Copy API key
-
Retrieve Account ID: In the Account Settings section, locate your New Relic Account ID. This will be required in the next step.
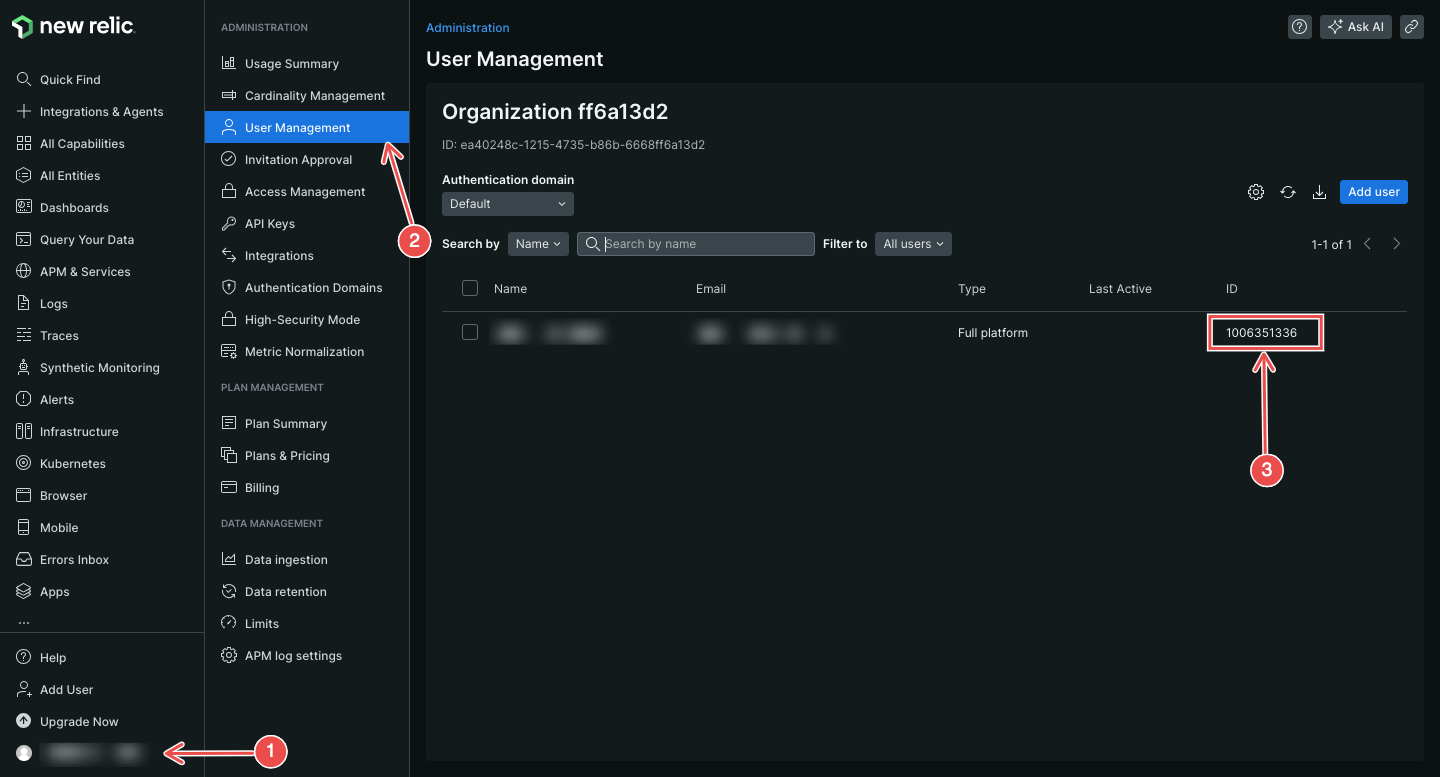
Fig.6 - Retrieve account ID
Step 2: Add New Relic Connection to Hawkeye
Now that you have your New Relic API Key and Account ID, proceed with the following steps in Hawkeye:
-
Navigate to the Connections Tab: In the Hawkeye dashboard, go to the Connections section and click on New Connection.
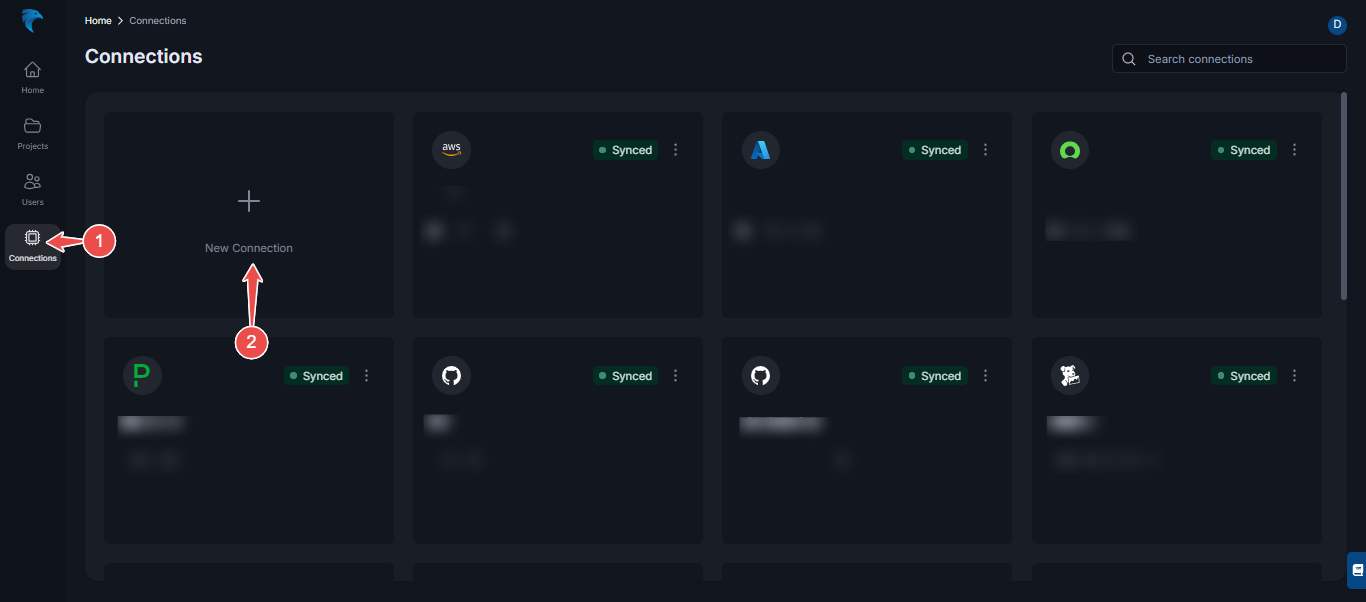
Fig.7 - Create New Relic connection dashboard
-
Select New Relic: From the list of available integrations, select New Relic.
-
Enter Credentials: Provide the following details:
-
Verify connection: After the connection is successfully established, go to the Connections section in Hawkeye. You should see the New Relic connection card displayed on your dashboard.