GCP
Connecting Hawkeye to your Google Cloud Platform (GCP) environment allows us to collect telemetry data such as resource configurations, audit logs, and metrics from various services on your GCP account.
The scope of data accessible to Hawkeye depends on the permissions granted to the service account used for the connection.
Step 1: Create a Service Account in GCP
Fig.1 - A walkthrough of how to create a service account in GCP
Start by creating a service account that Hawkeye will use to access your GCP resources.
-
Access IAM & Admin: Navigate to the IAM & Admin section in the GCP Console.
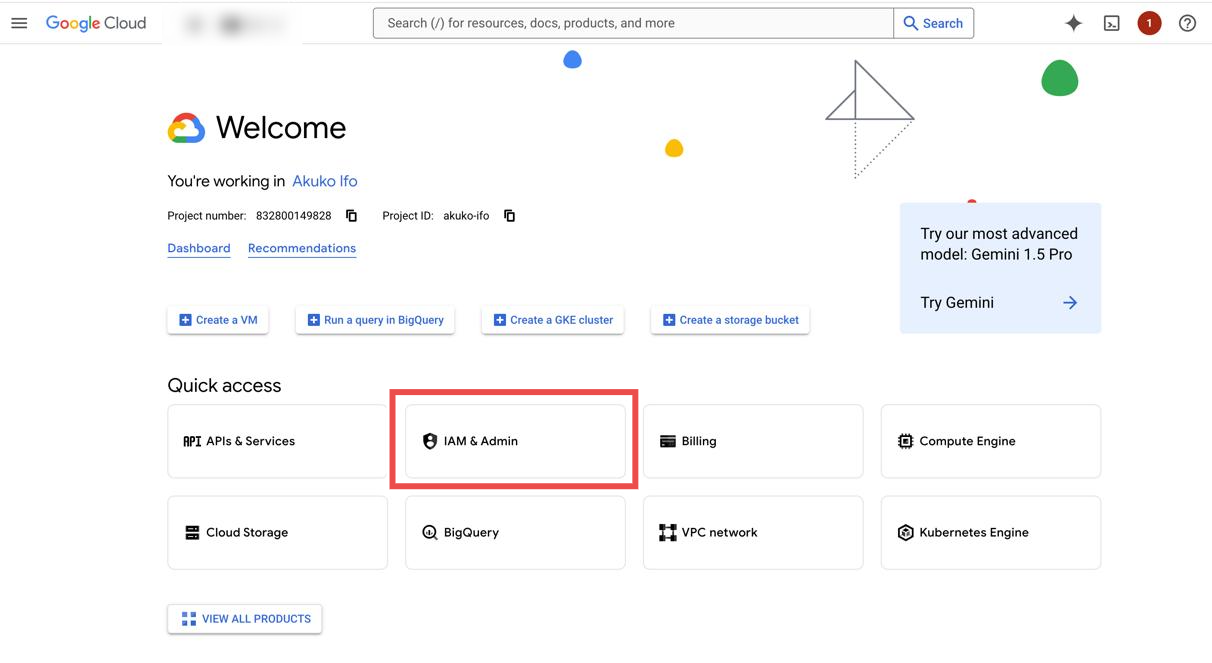
Fig.2 - Access IAM & Admin
-
Create a new service account: In the IAM & Admin dashboard, select Service Accounts > Create Service Account.
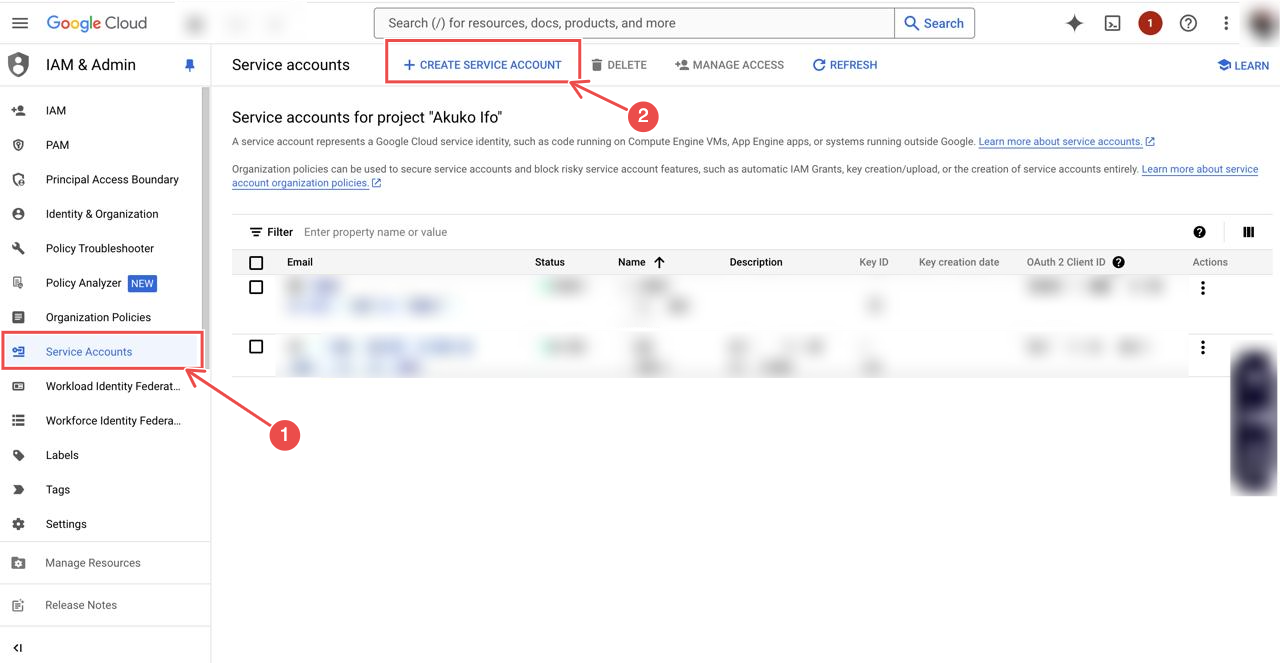
Fig.3 - Create new service account
-
Configure the service account: Enter a Name for the service account and optionally a description. Click Create and Continue.
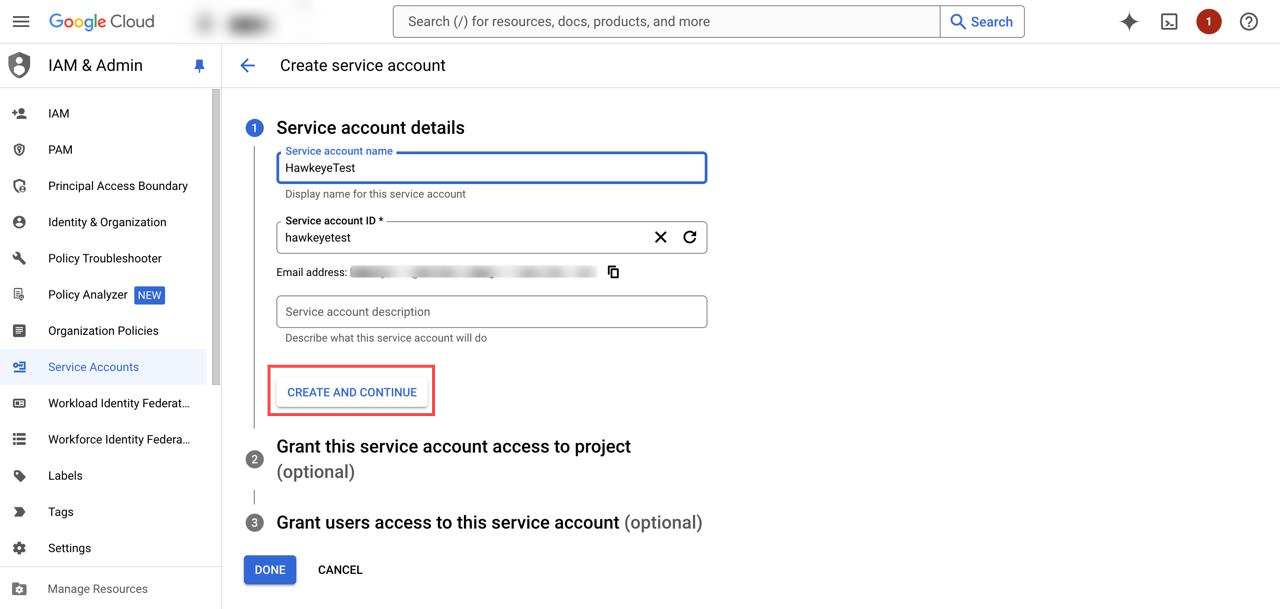
Fig.4 - Configure service account
-
Assign roles to the service account: Assign the following roles to the service account:
- Viewer: Needed for config, logs, and metrics dat.
- Logs Viewer: To access logs.
- Kubernetes Engine Cluster Viewer: Needed for kubernetes access to get config for cluster
- BigQuery Data Viewer: Needed if they integrate with BigQuery
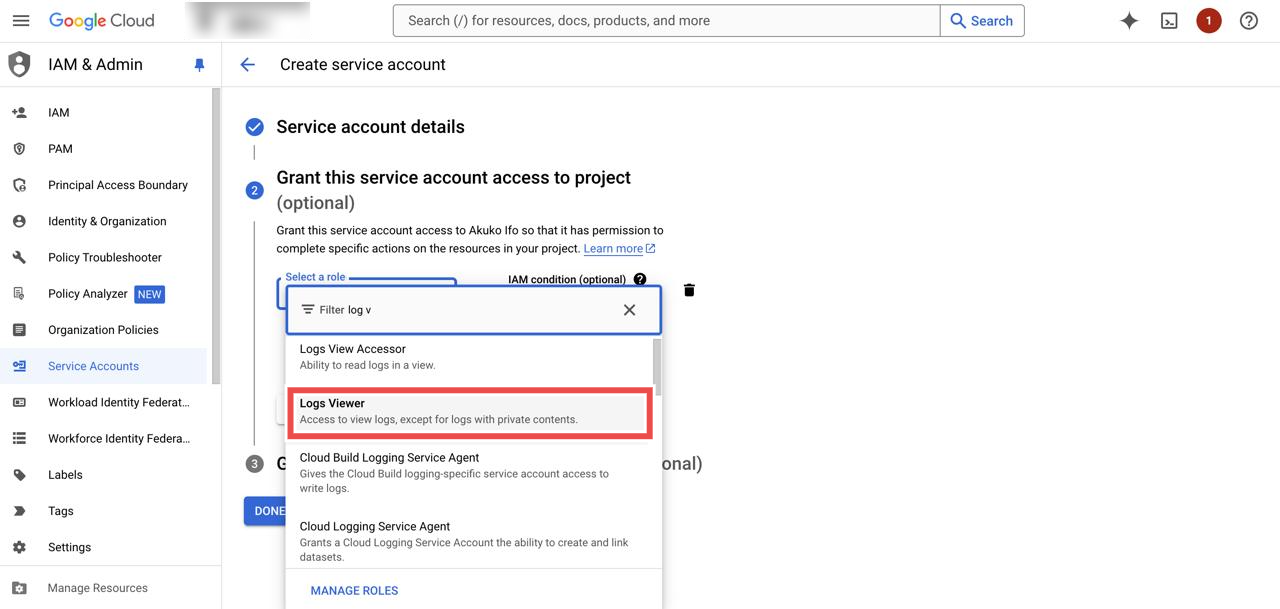
Fig.5 - Assign roles
-
Create a key for the service account: After assigning roles, choose to create a new key for the service account in JSON format. This key will be downloaded to your machine and used to authenticate the service account in Hawkeye.
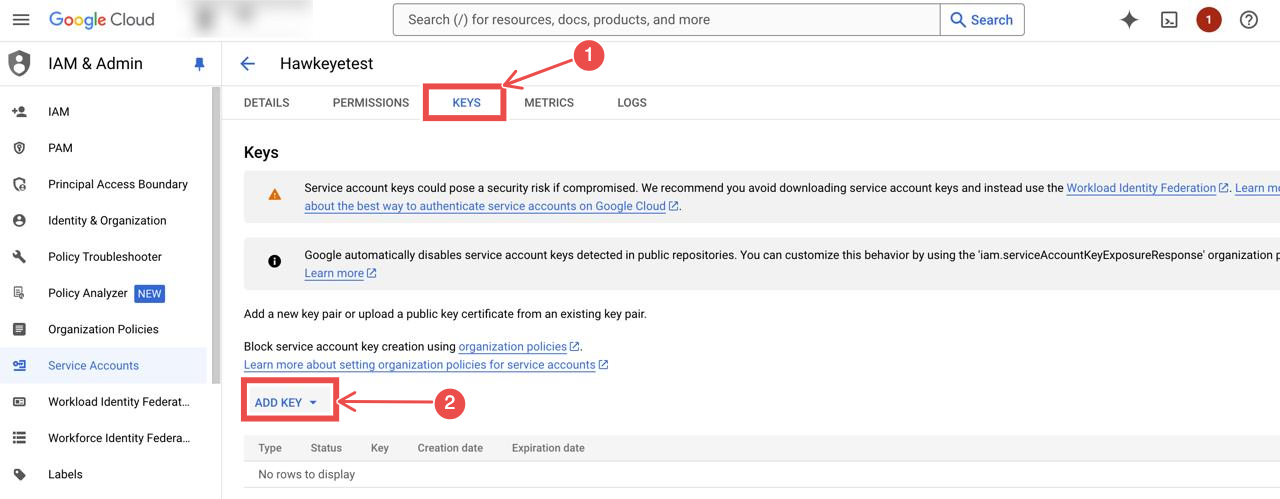
Fig.6 - Create a key for service account
-
Store the service account key: Safeguard this key, as it will be required when connecting your GCP account to Hawkeye.
Step 2: Configure Workload Identity Federation
Workload Identity Federation allows external identities to access GCP resources without needing a service account key. It’s equivalent to AWS’s external ID for cross-account roles.
-
Create an Identity Pool: In the GCP console, navigate to IAM & Admin > Workload Identity Federation, and create an Identity Pool.
-
Configure an Identity Provider: Add an identity provider to establish trust between the external environment and GCP.
-
Link to Service Account: Attach the Workload Identity Federation to the service account you created, allowing external entities to authenticate and access GCP resources.
Step 3: Add GCP Connection to Hawkeye
With your service account ready, navigate to the Hawkeye dashboard and set up the connection.
-
Navigate to the connections tab: On the Hawkeye dashboard, go to the Connections section and select New Connection.
-
Select GCP connection: From the list of available connections, select Google Cloud Platform.
-
Enter credentials: Provide the following details:
- Name: The name of the connection.
- Description: A brief description of the connection.
- Service Account Key: Upload the JSON key file you generated in Step 1.
- Project ID: The GCP project ID where the service account resides.
- Region: Specify the GCP region where your resources are located.
-
Verify and Save: Verify that all the credentials are correct, then click Save to complete the connection setup.
-
Confirm connection: If the connection is successful, you’ll see a confirmation message, and the connection will be visible in your list of connections.