Incident.io
Integrating Incident.io with Hawkeye enables seamless incident management, on-call routing, and alert orchestration between your monitoring systems and your incident response workflow. Once connected, alerts triggered in Hawkeye (or upstream systems) can automatically create, update, or resolve incidents in Incident.io, providing visibility, context, and automated escalation paths.
This integration ensures that:
- Incidents are created with the appropriate metadata (service, severity, tags) directly from Hawkeye alerts
- Status and updates (acknowledgements, resolutions) are synced bi-directionally
- On-call schedules from Incident.io are respected when routing alerts
- You maintain a single source of truth for incident lifecycle management
Below is a high-level overview of how to connect Incident.io to Hawkeye, followed by a step-by-step guide.
Configure an Incident.io API key for Hawkeye
Follow these steps to create a dedicated API key in Incident.io and connect it to Hawkeye.
-
Open Settings
- Sign in to Incident.io.
- Click your organization name and choose Settings.
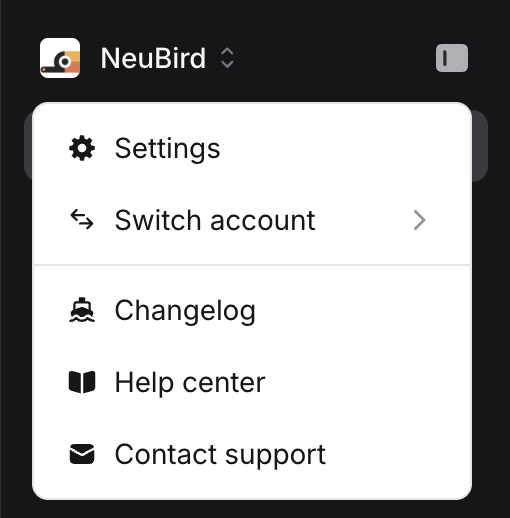
Fig.1 - Incident.io Settings Page
- Open API Keys
- In the Settings sidebar, under Extend, select API Keys.
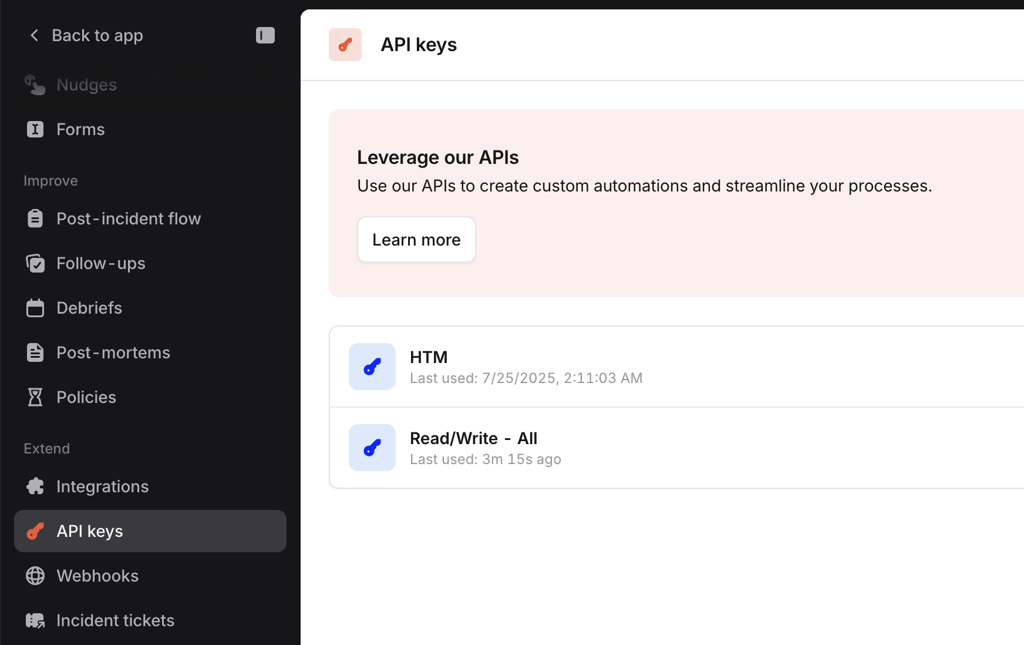
- In the Settings sidebar, under Extend, select API Keys.
Fig.2 - Incident.io API key Page
- Create a new API key
- Click Add new.
- Give the key a clear name, for example
Hawkeye - 2025-10-05. - Choose the minimal permissions Hawkeye needs. At minimum select:
- Incidents: Read all incidents (required)
- Incidents: Create incidents
- Incidents: Update incidents
- On-call / Schedules: Read (recommended if Hawkeye should respect on-call routing)
- If Incident.io uses different scope labels, pick the equivalent scopes that allow creating, updating, and reading incidents and on-call schedules.
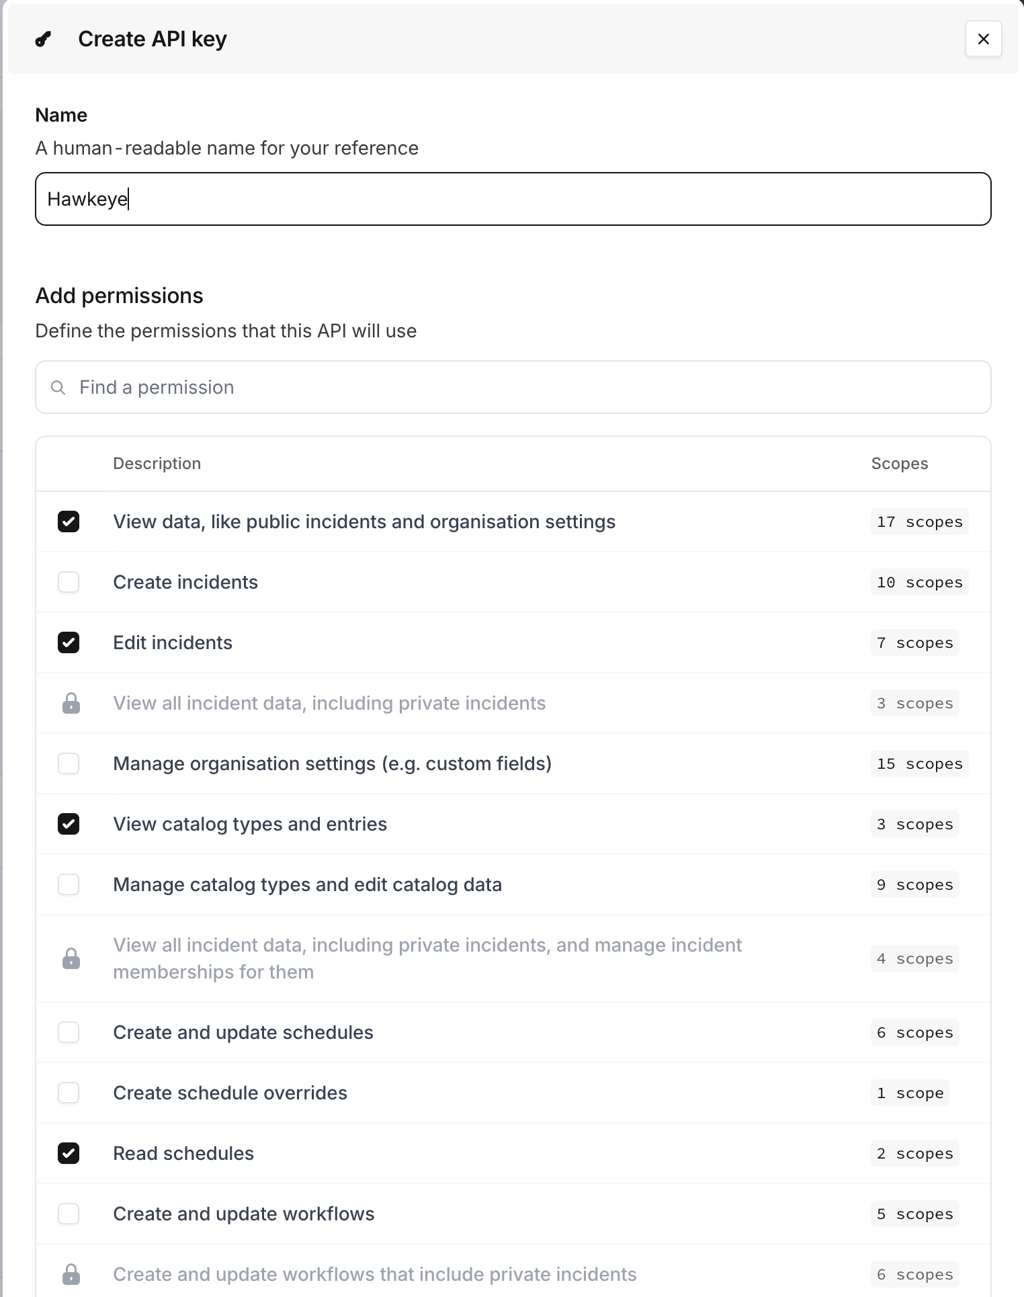
Fig.3 - Incident.io Create API key Page
- Save and copy the API key
- Save the key and copy the generated token immediately. Treat the token like a secret.
Step 2: Add Incident.io Connection to Hawkeye
Now that you have your API Token and Instance URL, follow these steps to connect Incident to Hawkeye.
-
Open connections tab in Hawkeye: In the Hawkeye dashboard, go to Connections and select New Connection.

Fig.4 - Create new Incident.io Connection dashboard page
-
Select Incident: From the available integrations, select Incident.
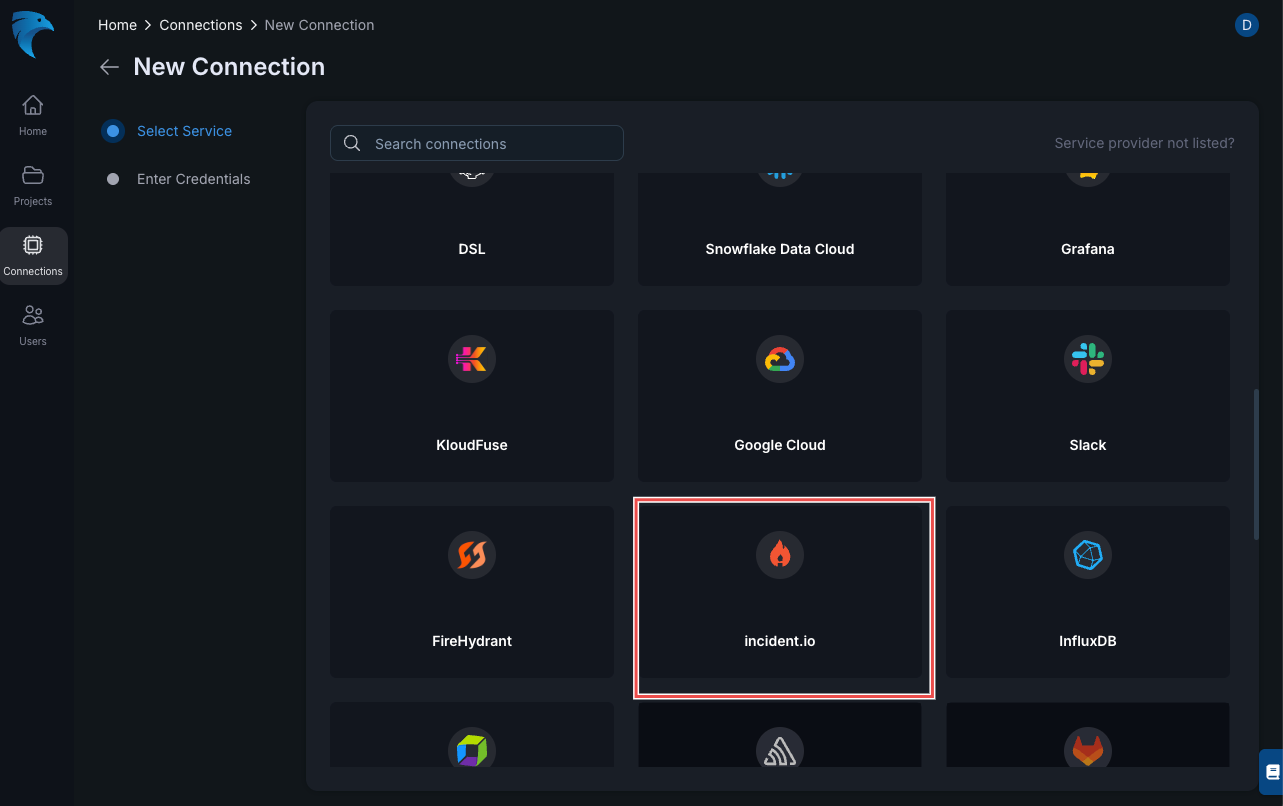
Fig.5 - Incident.io selection page
-
Enter credentials:
- Name: Give your Incident connection a descriptive name. (Required)
- Description: Optionally, add a description.
- API Token: Paste the API Token generated from the Incident API page.(Required)
Click Save to finalize the setup.
-
Verify connection: After saving, the connection should be visible on the Connections tab. A successful setup will show the Incident connection card on your dashboard.
This creates a secure, auditable connection between Hawkeye and Incident.io so alerts flow smoothly into your incident workflow.