SignalFX
Connecting Hawkeye to your SignalFx (now part of the Splunk Observability Cloud) environment enables the collection of your application and infrastructure telemetry, including metrics, traces, and logs.
These data streams feed into the Hawkeye dashboard to power real-time monitoring, alerting, and troubleshooting across your systems.
You will need to authenticate using your Organization Access Token (sometimes called an “org token” or “ingest token”)
along with the realm (e.g., us0, us1, eu0) that corresponds to your SignalFx/Observability Cloud instance.
Fig.1 - SignalFX Demo guide
Step 1: Create an Access Token in SignalFx
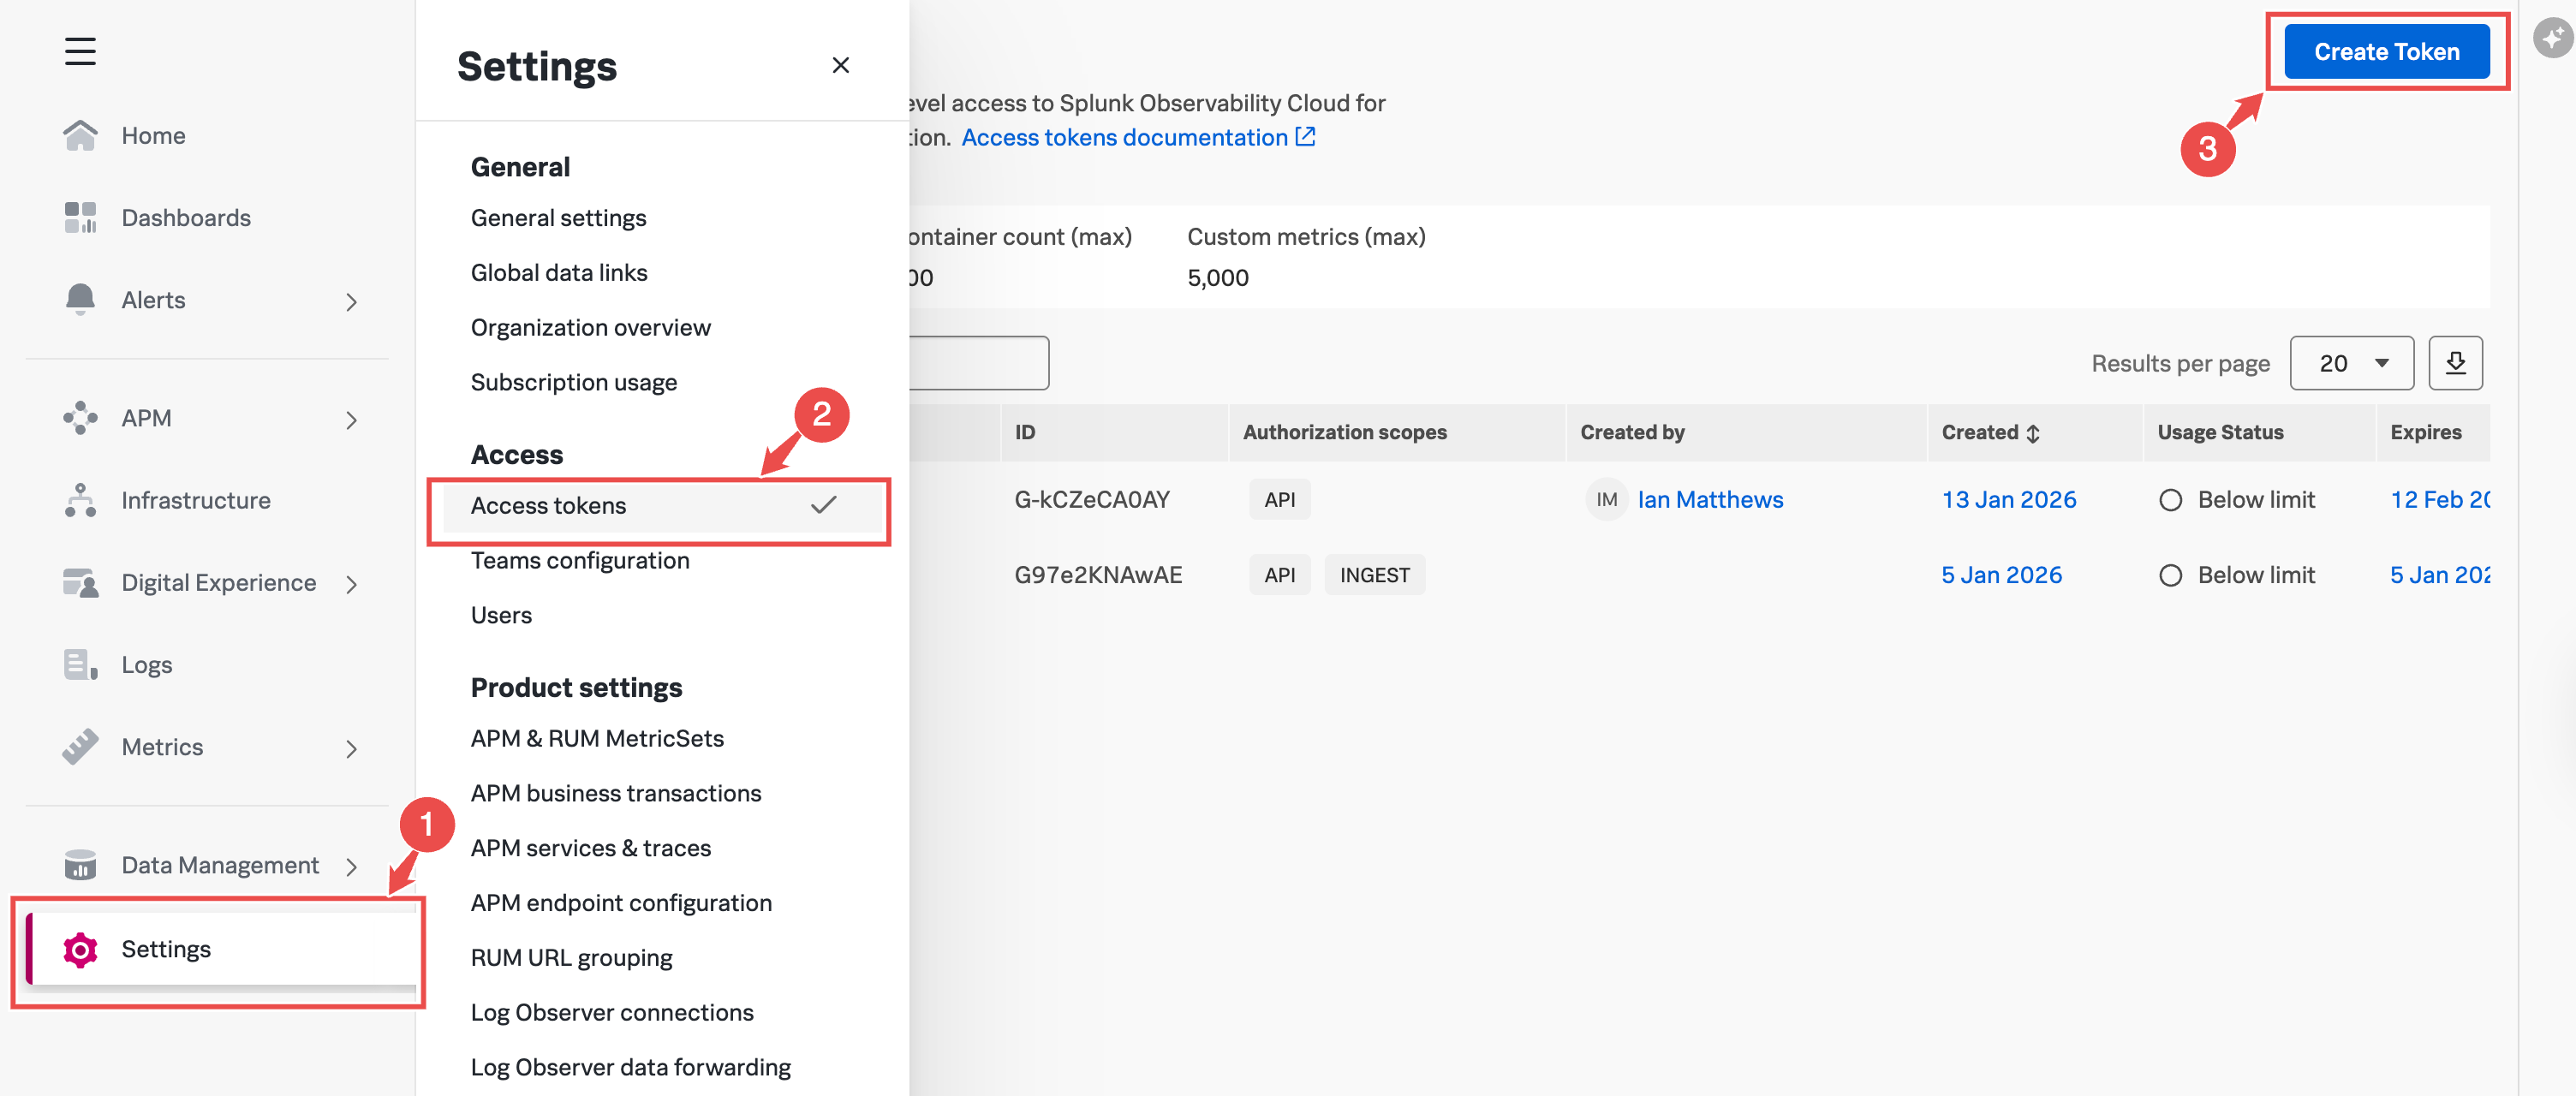
Fig.2 - SignalFX API token page
-
Open Settings On the left-hand sidebar, click Settings (highlighted as step 1 in the image).
-
Go to Access Tokens Under the Access section in the Settings menu, select Access tokens (highlighted as step 2).
-
Create a New Token Click the Create Token button at the top-right corner of the screen (highlighted as step 3).
-
Follow the Prompts After clicking Create Token, follow the on-screen instructions to set the token name, select authorization scopes, and configure expiration.
-
Save Your Token Once created, make sure to copy and securely store the token as it may not be displayed again.
Step 2: Get SignalFx API Endpoint
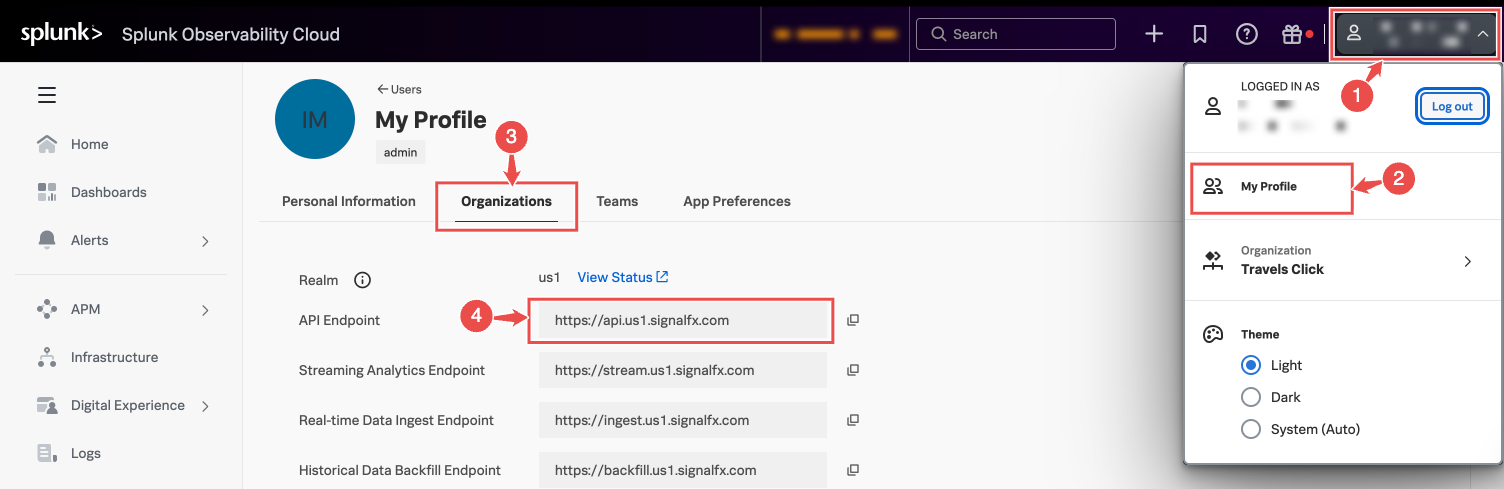
Fig.3 - SignalFX API token page
-
In the top-right corner of the Splunk Observability Cloud interface, click on your profile icon (user avatar). This is highlighted as step 1 in the image.
-
From the dropdown menu, click My Profile. This is highlighted as step 2 in the image.
-
In the My Profile page, select the Organizations tab. This is shown as step 3 in the image.
-
Under Organizations, locate the API Endpoint field. This shows the SignalFX endpoint URL for your organization.
- Example:
https://api.us1.signalfx.com - You can copy the URL by clicking the copy icon next to it. This is shown as step 4 in the image.
- Example:
Step 3: Add SignalFx Connection to Hawkeye
Now that you have your API Token and Instance URL, follow these steps to connect Atlassian to Hawkeye.
-
Open connections tab in Hawkeye: In the Hawkeye dashboard, go to Connections and select New Connection.

Fig.4 - SignalFx new connection dashboard page
-
Select SignalFx: From the available integrations, select Atlassian.
- Click Next to proceed.
-
Enter credentials:
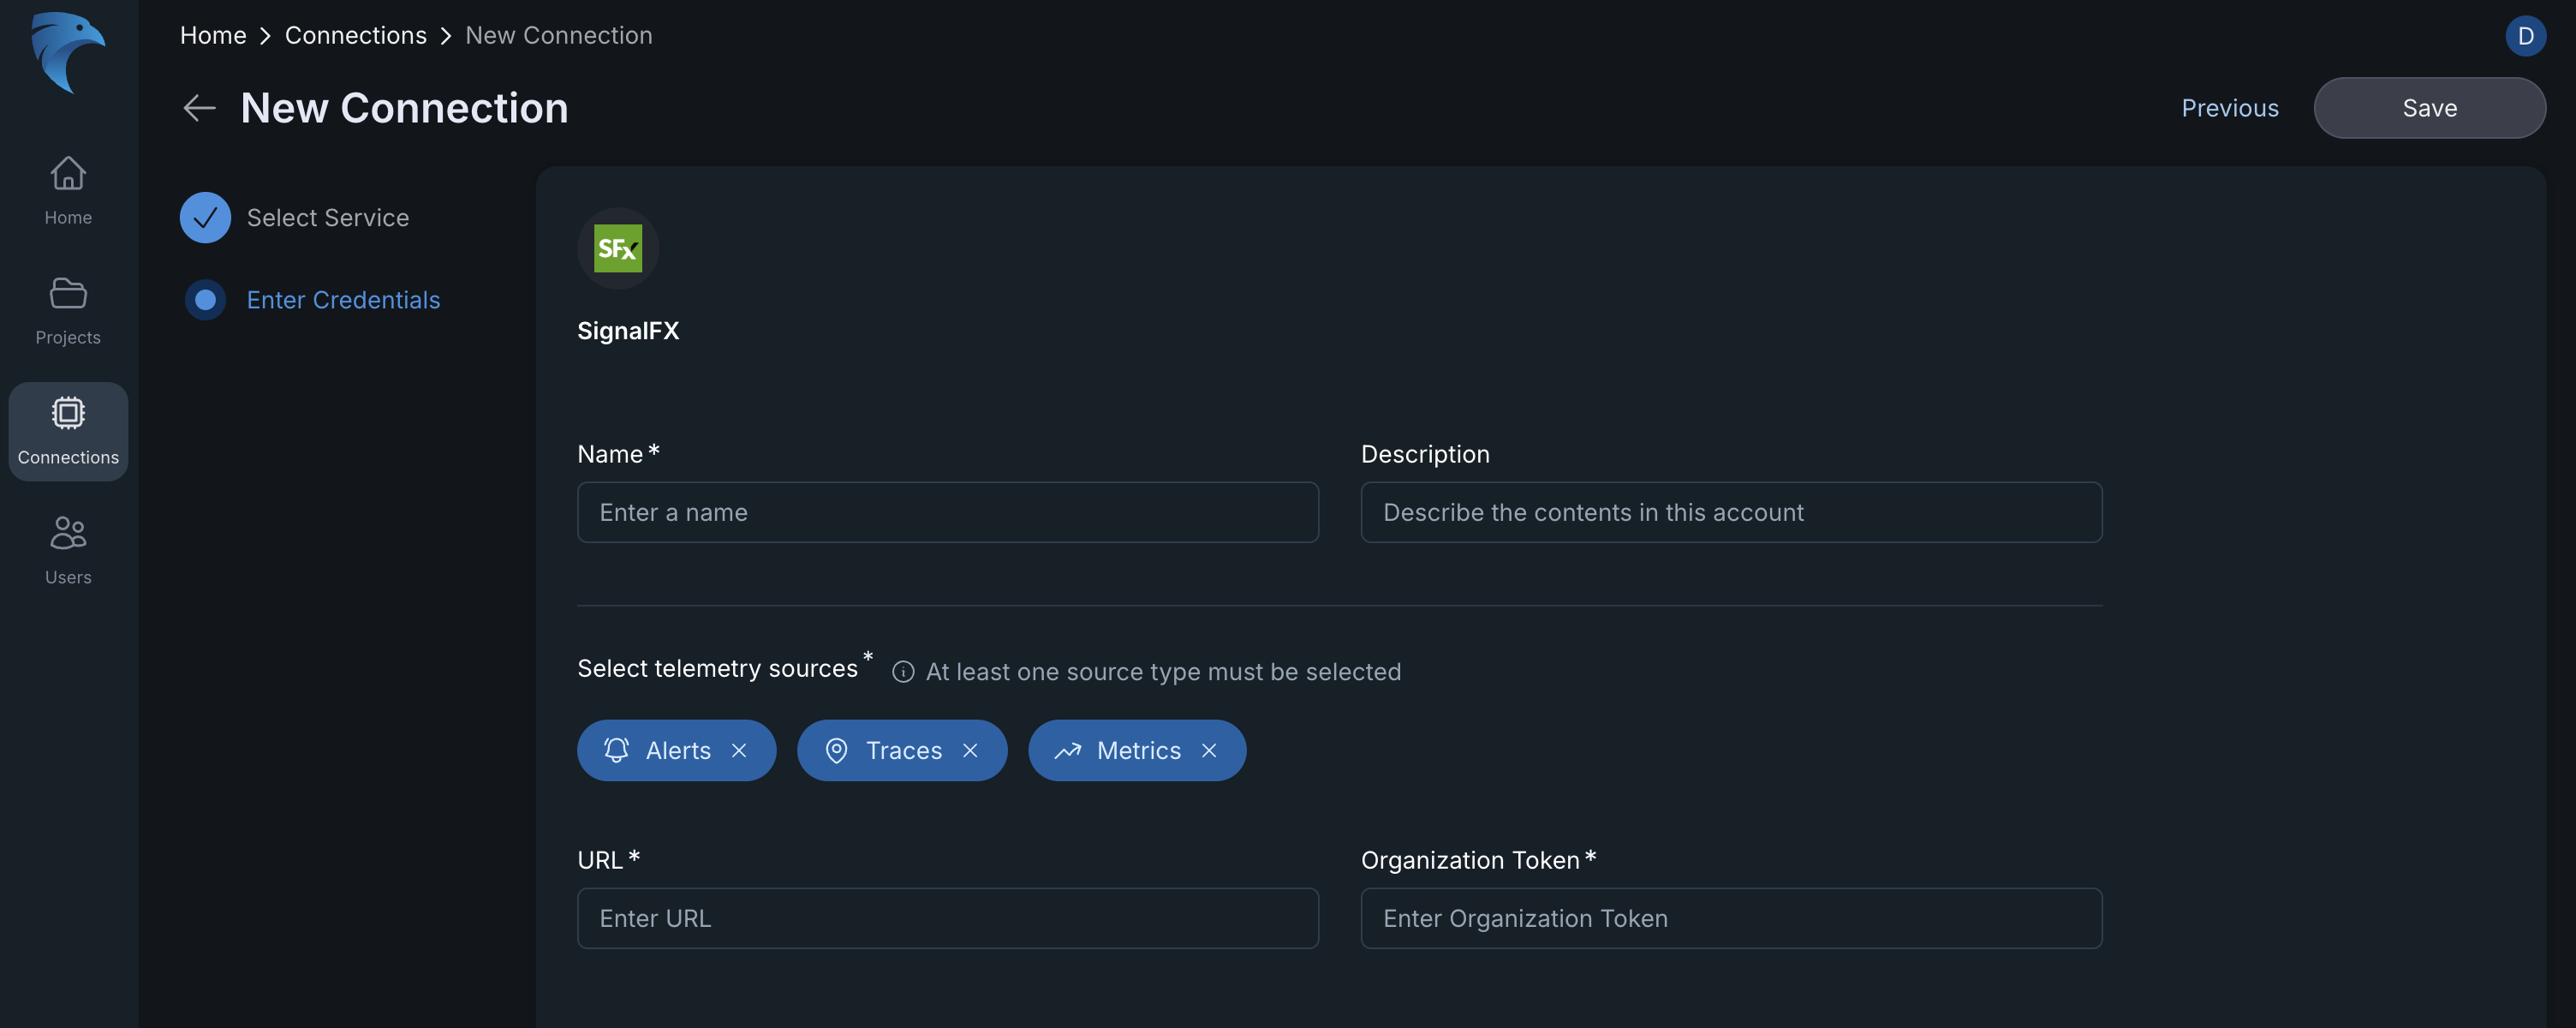
Fig.5 - SignalFx new connection dashboard page
- Name: Give your Atlassian connection a descriptive name (e.g., “Atlassian Project Tracker”).
- Description: Optionally, add a description.
- Organization Token: Paste the API Token generated from the SignalFx API page.
- URL: Enter the Endpoint URL of your SignalFx.
Click Save to finalize the setup.
-
Verify connection: After saving, the connection should be visible on the Connections tab. A successful setup will show the Atlassian connection card on your dashboard.