Rootly
Rootly is an incident management platform that gives you the ability to manage all your on-call alerts and schedules. It allows you to quickly connect into your monitoring tools which is also known as integration and alert source.
Integrating a Rootly connection on your Hawkeye dashboard helps ensure that issues, alerts, and events are shared automatically, reducing downtime during incidents.
To set up a Rootly connection, you must create an API key, which you’ll need as a credential. The following steps will guide you in creating one.
Step 1: Create an API Key
Fig.1 - A walkthrough of how to create an API key for Rootly connection
-
Navigate to Configuration: On the left sidebar menu of your dashboard, click on the Configuration. Select “API Keys” from the configuration options. Then click “Generate New API Key” to start creating your key.
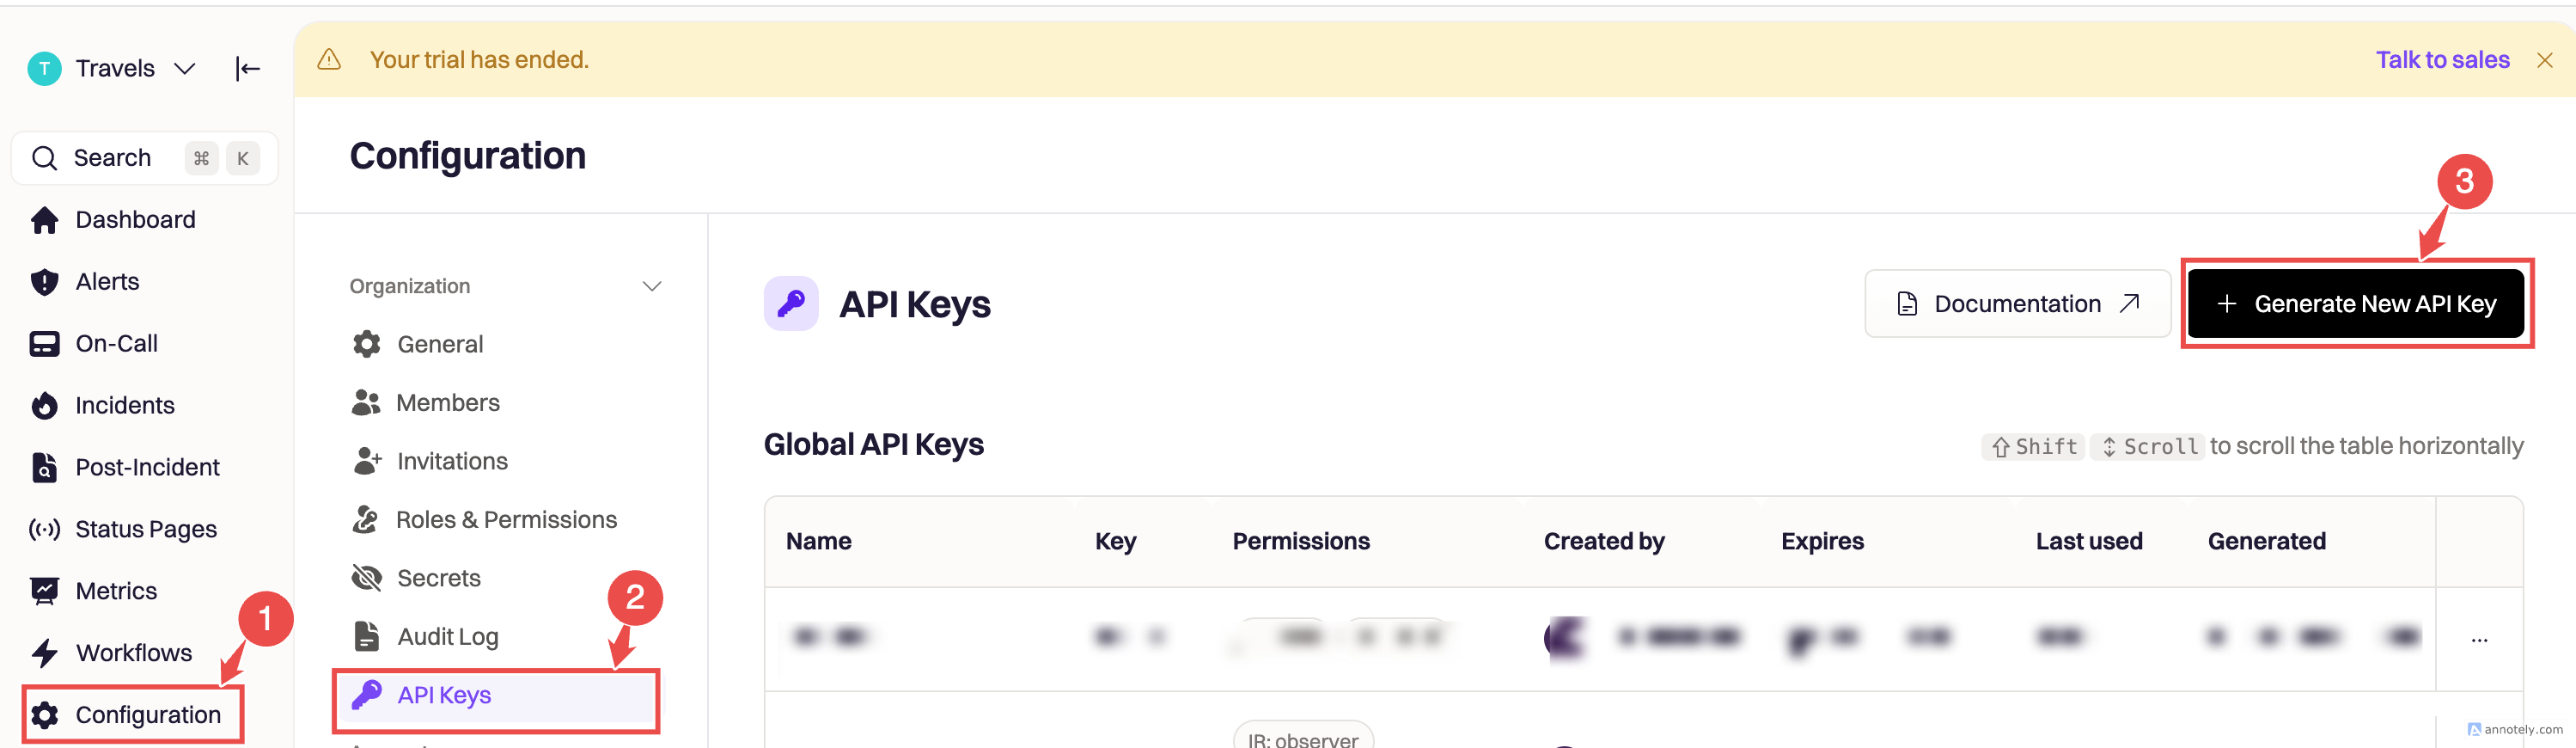
Fig.2 - Rootly Dashboard
-
Select an API key type: Click on any of the API Key types displayed on the screen, example “Global API key” to determine who will have full account access.
-
Set up API key: You’ll be prompted to input some basic information such as;
- Incient Response Role: Click on the dropdown to select an incident response role. (Required)
- On-Call Role: Click “No role” dropdown button to view available permission options. (Required)
- Name: Choose a relevant name for your API Key. (Required)
- Description: Provide a short description about the API Key, as well as what the Key will do.
- Expiration: Choose an expiry date for you Key.
After inputting the required details, click on the Create button at the bottom right corner of the screen.
-
Finalizing the API key setup: The next valid step is to click on the copy icon by the side, to copy your newly created API key to a secured location. Then, click on “I have the API key now” to complete the process. A confirmation message indicating that the API key was successfully created will be displayed. The API key will now be ready to be connected to Hawkeye.

Fig.3 - Copy and save API Key
Step 2: Add Rootly connection to Hawkeye
Now that you have your API Token ready, follow these steps to connect Rootly to Hawkeye:
-
Open connections tab in Hawkeye: In the Hawkeye dashboard, go to Connections and select New Connection.

Fig.4 - Create new Rootly Connection dashboard page
-
Select Rootly: From the available connections, select Rootly and proceed to the next step.
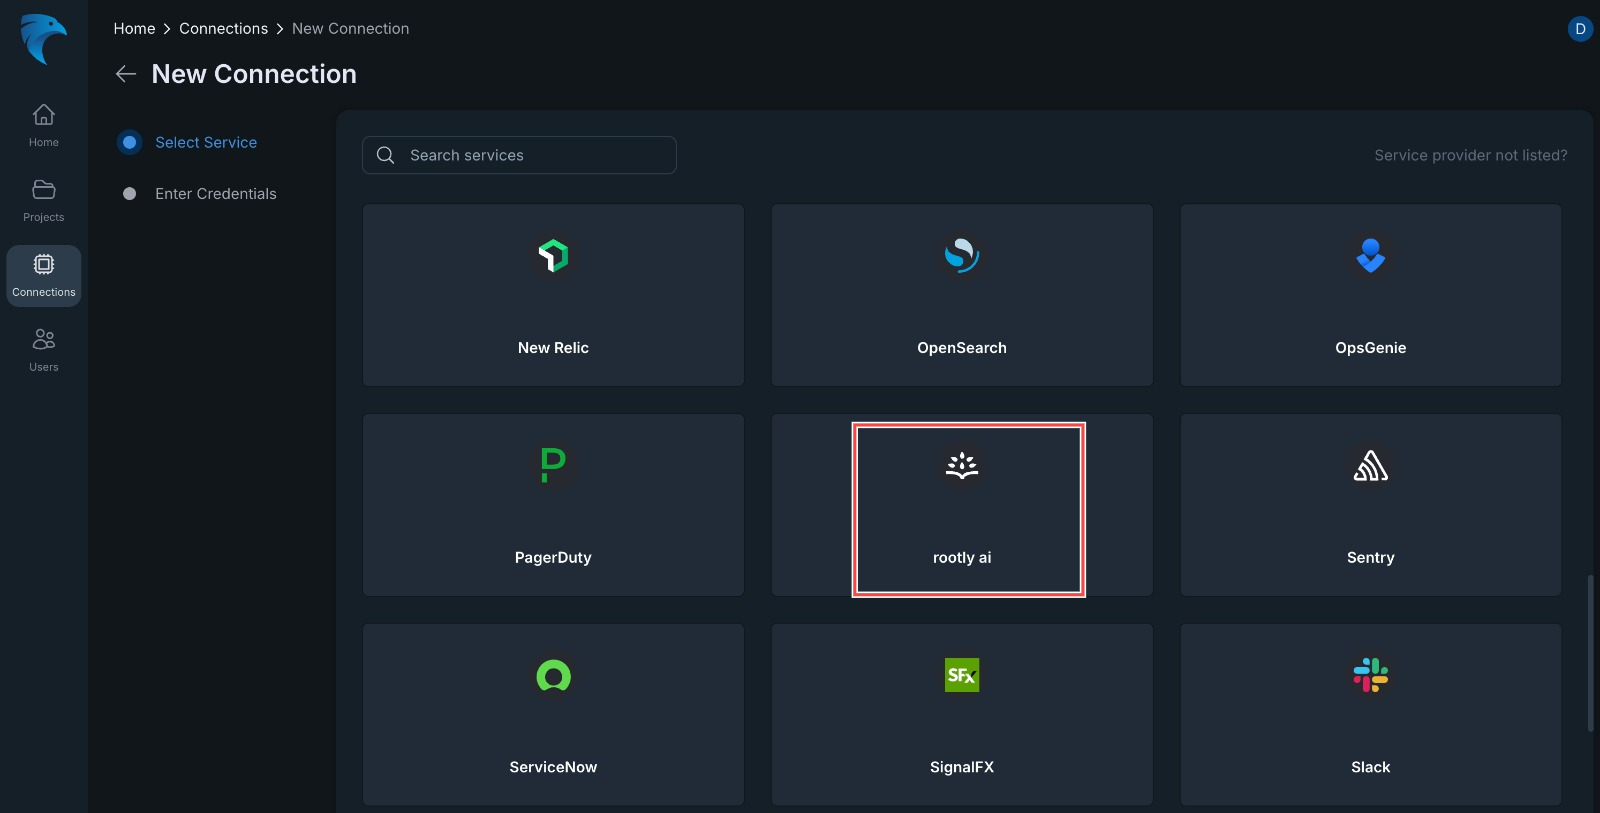
Fig.5 - Rootly.ai selection page
-
Enter credentials:
- Name: Give your Rootly connection a name to identify it (e.g. “RootlyUser”). (Required)
- Description: Add a description to the name. This gives an overview of the connection, and it is optional.
- API Key: Paste the API Token generated from the Rootly API page.(Required)
At the top right corner of your screen, click Save to finalize the setup.
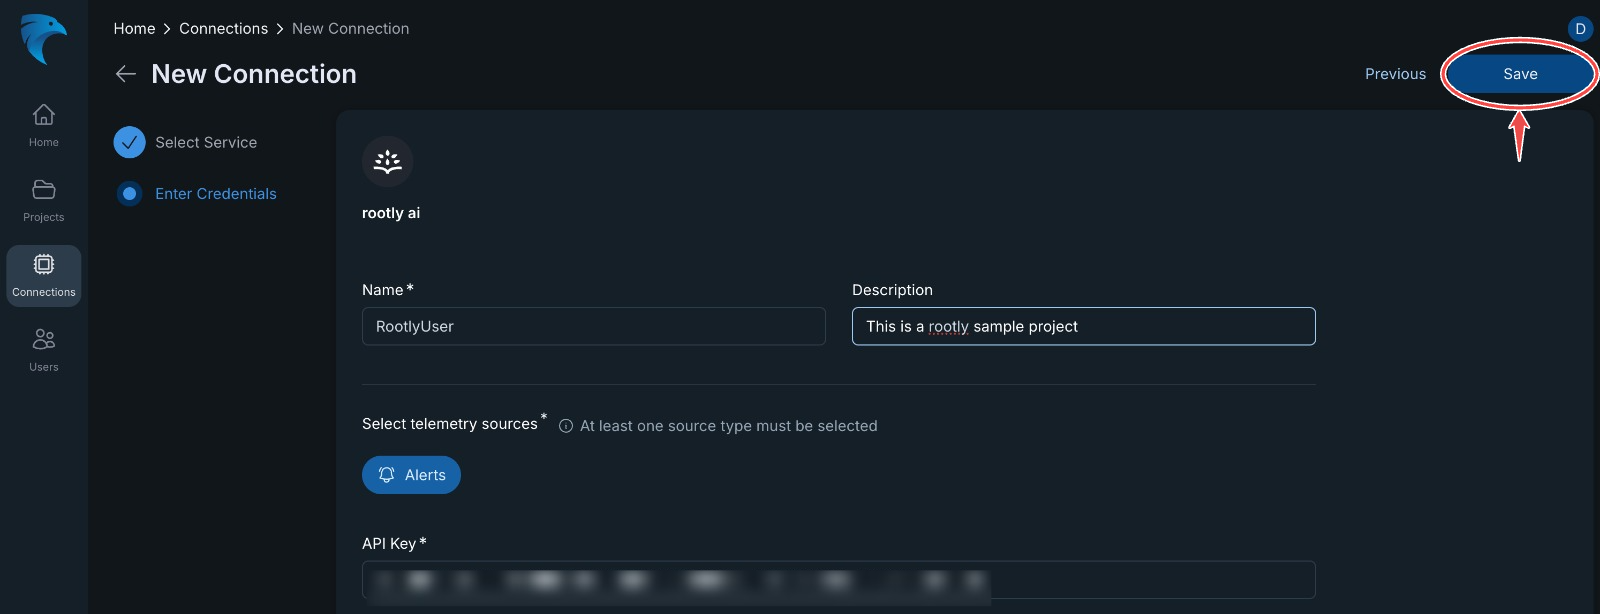
Fig.6 - Enter Rootly credentials
-
Verify connection: After a successful setup, the Rootly connection card you just created will be displayed on the Connections dashboard.